 Plan View ( Modeling > press v )
Tool summary :
Also see :
YouTube video: Plan View takes you to a plan view at the elevation you enter. If you want to save a permanent copy of the view, you can Save View As . (Recorded in SDS2 Detailing , v2020i)
VIDEO 
Plan View and Save View As are used to create new plan views named "SECOND FLOOR" and "ROOF." Open View is used to open these views. (Recorded in SDS2 Detailing , v7.2.)
- How can I look at the model? (topic)
- Current view location (changed by Plan View )
- Save View As (to save changes made using Plan View )
- Undo View Change (to undo Plan View )
- Revert (undoes Plan View unless you first Save )
- Work plane highlighting (of surfaces at plan view's elevation)
- Detail Erection Views (creates a drawing of a plan view)
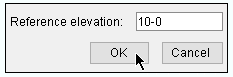
- Reference Elevation (lets you change the elevation of a Plan View )
- Depth checking (controls visibility in and out of the reference elevation)
- Z global axis (elevation is defined with respect to)
page 1 | contents | view > | view | erection views
Step-by-step instructions :
Plan View relocates your current view in Modeling to a plan view at the particular elevation that you specify.
|
1 . Invoke Plan View . The view that you are currently in is irrelevant. Plan View gives you the same results no matter what view you are in. |
|
2 . Enter the elevation (in the primary dimension " Units " or other units ) that you want the plan view to be at. Press " OK " to continue. " Cancel " ends the operation. |
|
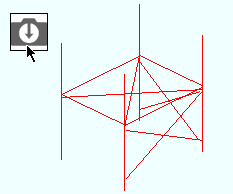
3 . Your current view relocates to the elevation you entered. Since a plan view has no lateral limits, it shows all steel that is at that elevation. A plan view looks down, toward lower elevations. |
Note 1: To invoke Plan View ...
Method 1 : Click the Plan View icon, which is pictured above. The icon can be taken from the group named ' View ' and placed on a toolbar (classic) or the ribbon (lightning).
Method 2 : If " Modeling layout style " is ' Classic ', you can use the menu system to choose View > Plan View .
Method 3, 4 or 5 : Plan View can also be configured to be invoked using a keyboard shortcut , the context menu , or a mode . For the lightning interface, this configuration is done using Customize Interface . The default keyboard shortcut for Plan View is v .
Note 2: At this point you have not actually created a new view; you have simply relocated your current view. Use Save View As to actually create a new view that you can Open ( Ctrl + o ) whenever you want. or use Undo View Change or Revert to undo the changes that Plan View made to your current view.
Note 3: Surfaces of materials in a solid form that are exactly at the elevation of a plan view's reference elevation are displayed more brightly. See work plane highlighting .
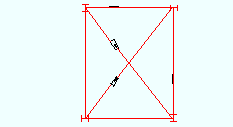
Note 4: The lateral limits of a plan view are determined by the materials (or members in stick form) that can be seen within the " Depth checking " limits of the reference elevation of the view. If only one member is within the depth checking limits of the elevation of the plan view, the plan view shows only that member. If ten members are at the elevation of the plan view, all ten members are shown in the view.
Note 5: The depth-check limits of the plan view will be checked on (
), with values of ' 3-0 ' in and '3-0 ' out, regardless of the depth-check settings you started with. For metric " Units " (mm), the default depth-check values are ' 1000 ' in and ' 1000 ' out.

depth check limits