 Snap to Adjacent Surface ( Modeling )
Tool summary :
- See the step-by-step instructions .
Also see :
- Current view location (changed by Snap to Adjacent Surface )
- Work plane highlighting (a result of Snap to Adjacent Surface )
- Snap to adjacent/farside ( User & Site Options > Modeling > set " In " " Out " depth checking)
- Undo View Change (undoes Snap to Adjacent Surface )
- Snap to Surface (similar to Snap to Adjacent Surface )
- Snap to Farside Surface (similar to Snap to Adjacent Surface )
page 1 | contents | navigate > surface > | navigate -- surface mode | 3D evus | top
Step-by-step instructions :
The following instructions assume that you are using a 3-button mouse and that you use mouse bindings similar to those shown in these illustrations. Also, this same operation invoked in Surface Mode combines steps 1 and 2.

|
1 . Invoke Snap to Adjacent Surface . |
|
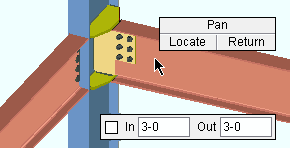
2 . Place your mouse pointer ( |
|
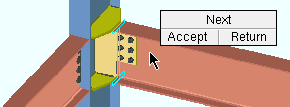
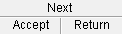
3 . The status line prompts, "Snap to this Adjacent Surface?" Left-click ( Accept ) if the surface outlined with a blinking, cyan border is the surface you want. |
|
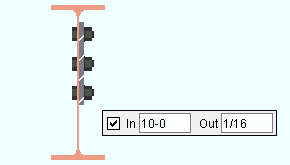
4 . You are now on a surface that is adjacent to the surface you located in step 2. Depth checking is adjusted per User and Site Options > Modeling > " Snap to adjacent/farside ." |
Note 1: To invoke Snap to Adjacent Surface ...
Method 1 : Click the Snap to Adjacent Surface icon. The icon can be taken from the group named ' Navigation -- Surface Mode ' and placed on a toolbar (classic) or the ribbon (lightning).
Method 2 : If " Modeling layout style " is ' Classic ', you can use the menu system to choose Navigate > Snap to Adjacent Surface .
Method 3, 4 or 5 : Snap to Adjacent Surface can also be configured to be invoked using a keyboard shortcut , the context menu , or a mode . For the lightning interface, this configuration is done using Customize Interface .
Method 6 : You can Snap to Adjacent Surface from Surface Mode . First place the mouse pointer (
) on the material surface you want to snap to an adjacent surface of, then right-click ( Adjcnt ). In the above instructions, skip step 2 and go to step 3.
Note 2: Right-click ( Return ) in steps 2 or 3 ends the Snap to Adjacent Surface operation.

bindings , step 2 Note 3: Middle-click ( Next ) in step 3 is for selecting one surface from among multiple adjacent surfaces. If you middle-click ( Next ) for all the adjacent surfaces that Snap to Adjacent Side shows you, the operation ends.
bindings, step 3 Note 4: The adjacent surface that you accept becomes the work plane of your view and is therefore displayed in a lighter color (see work plane highlighting ).
Note 5: Once you are on the work plane of a surface, you can perform operations such as Add Material or Add Holes to that surface.
Note 6: At this point you have not actually created a new view; you have simply relocated your current view. Use Save View As to actually create a new view. OR use Undo View Change or Revert to undo the changes to your current view made with Snap to Adjacent Surface .
page 1 | contents | navigate > surface > | navigate -- surface mode | 3D evus | top