Handrail Enhancements in SDS2 2022
Watch a video tutorial here.
SDS2 2022 introduces several enhancements to the handrail member.
These include additional options for galvanizing vent holes, fine-tuned control of picket spacing, and the ability to add corner posts and L-shaped base plates. In addition to modeling, improvements have been made to the corresponding detailing templates.
Vent holes for galvanizing
Internal vent holes
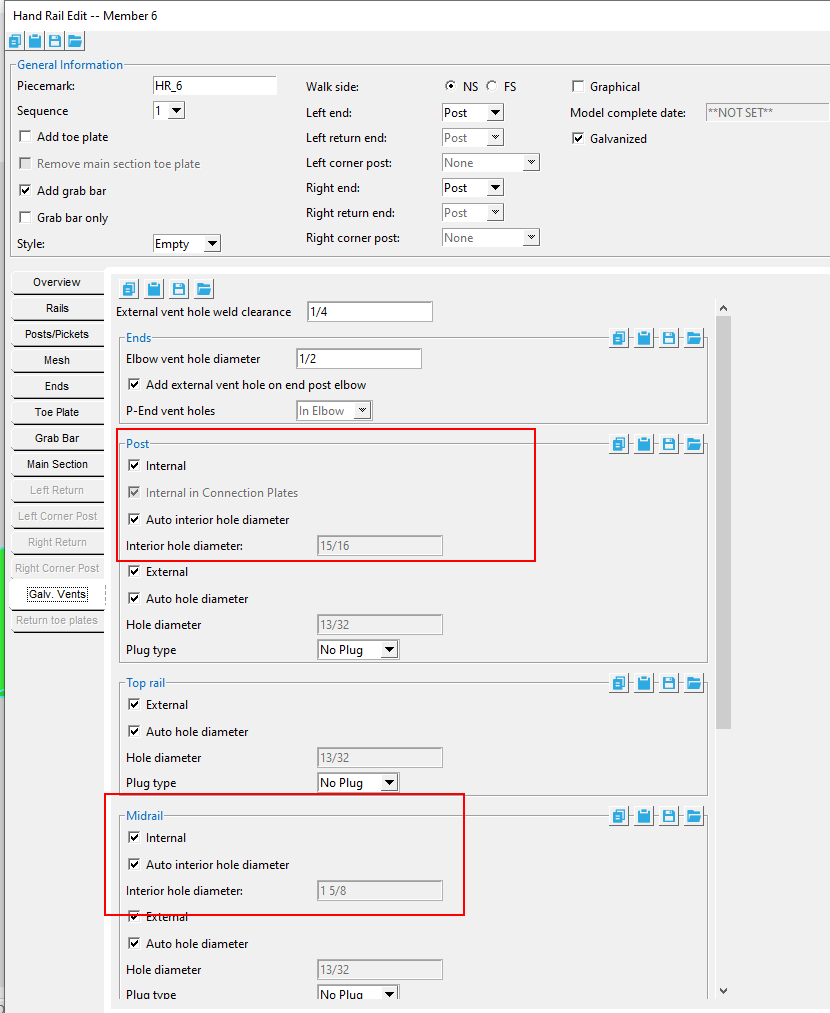
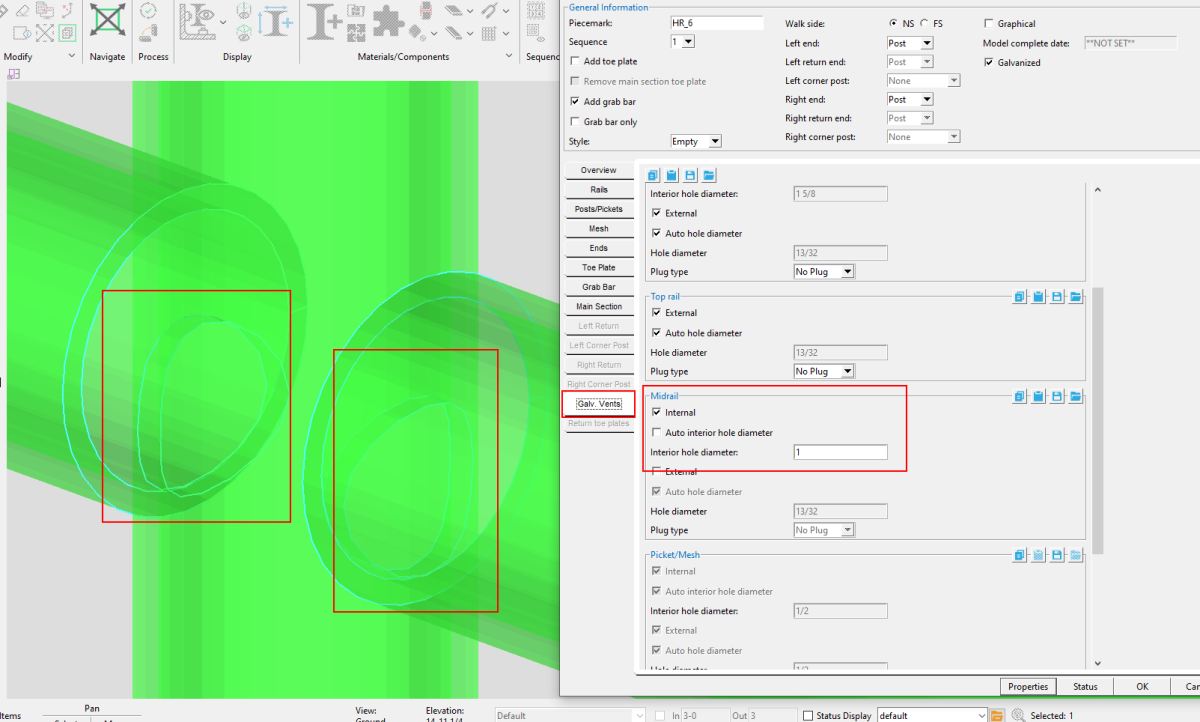
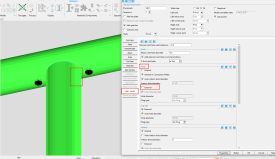
Your handrail edit options now include options to control internal vent hole diameters for posts, midrail, pickets, and grab bar. You can find these in the Hand Rail Edit >window under the Galv. Vents tab.
We have also added a scroll bar to areas of the handrail edit window to make it easier to see and navigate all the options.
Tip: If you do not fit your post to top rail or midrail to post, the system will create the internal hole at the top rail and post where the midrail ends.
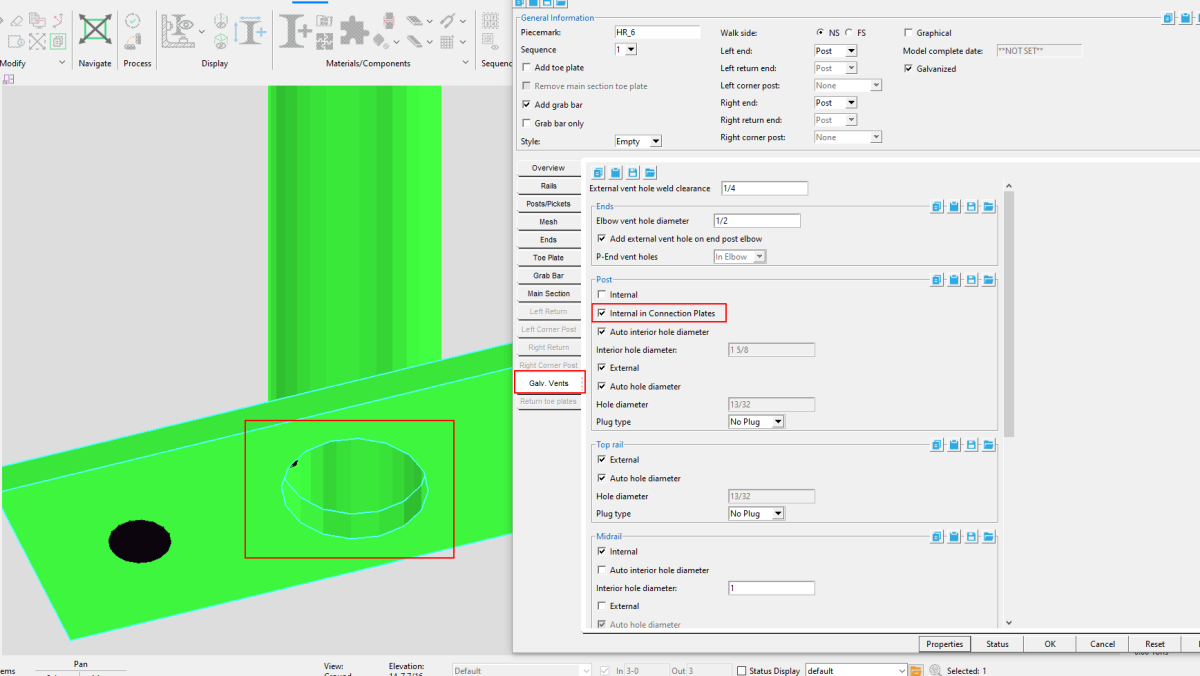
If you check the ‘Internal’ option under “ Posts,” the model will also add an internal hole in the base plate or continuous plate. If ‘Internal’ is deselected, you will be able to select ‘Internal in Connection Plates.” This will allow you to add an internal hole on the plates but not the corresponding top rail or posts at midrails.
External vent holes for galvanizing
Elbows: In addition to internal vent hole options, you will now see an option under “Ends” to ‘ Add external vent hole on end post elbow’ at the post location. For ‘P-End vent holes,’ you can select to have no vent hole, add one in the elbow, or add one in the rail.
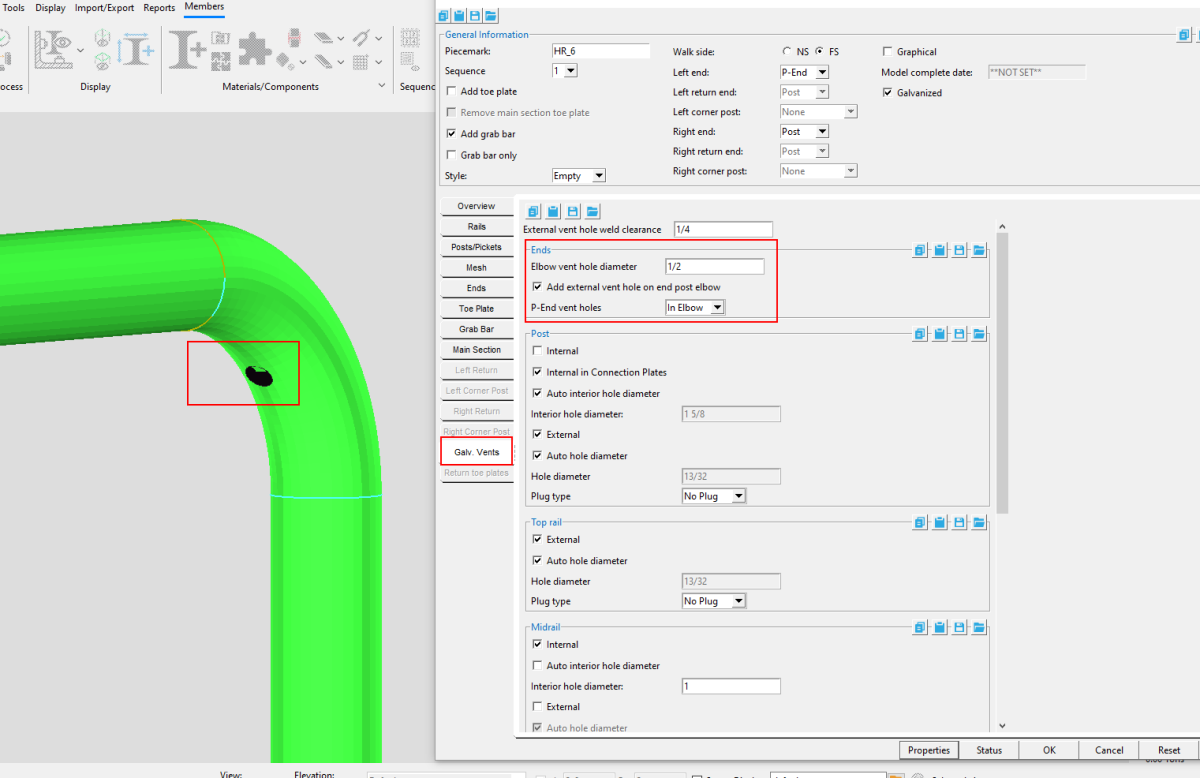
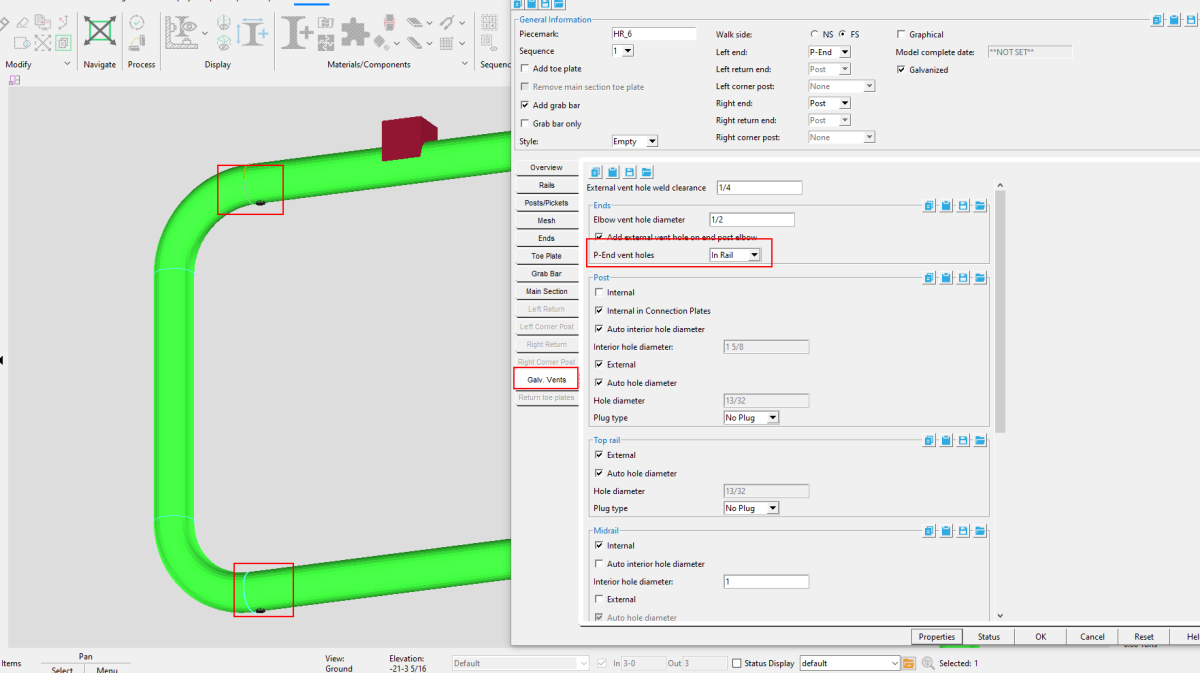
Top rail and posts: There are now options to select or deselect ‘External’ vent holes under both “Posts” >and “Top rail.” This means you now have the option to add external holes to posts while still adding them to top rails.

Vent holes on detailing templates
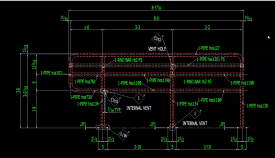
In conjunction with the modeling options for vent holes, improvements have been made to the detailing templates, with internal vents and vent holes labeled.
Picket Spacing
Equal spacing for pickets
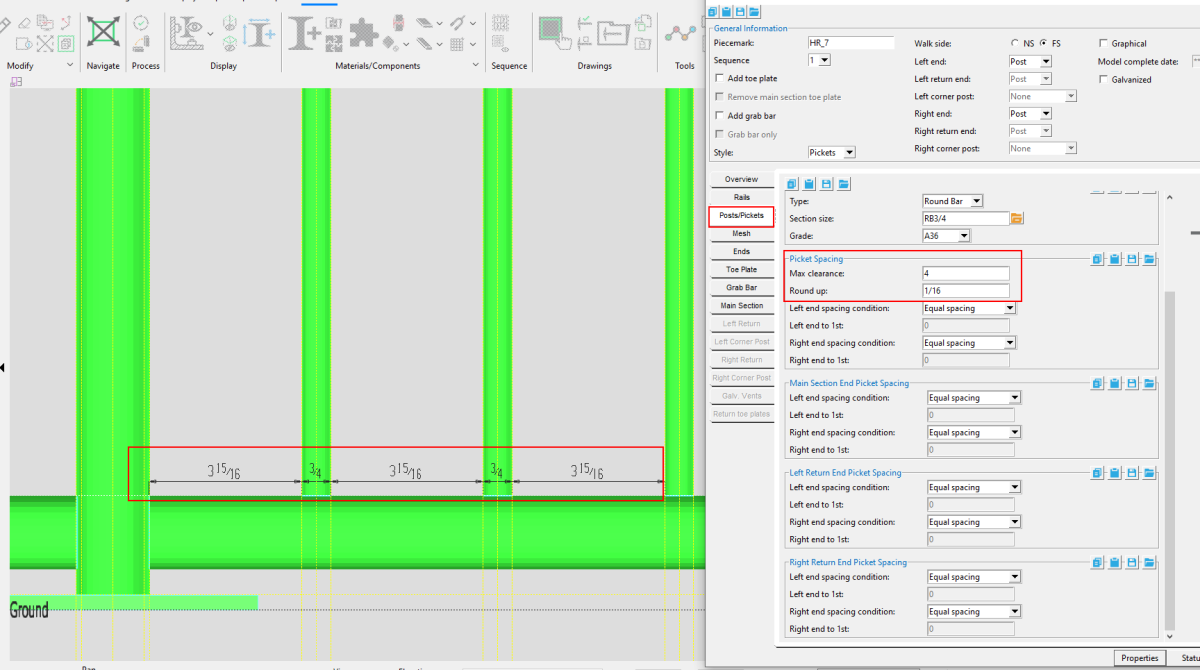
SDS2 2022 has enhanced the controls for picket spacing, with more automation to make the spacing equal and architecturally pleasing, as well as more user controls.
Options for ‘Max clearance’ will now allow you to set a maximum clearance between post and picket faces. For example, you can set a ‘Max clearance’ of 4 according to OSHA standards to ensure a 4-inch sphere cannot fit between the pickets.
>The ‘Round up’ option can be set to round up the total dimensions between the posts.
Detailing templates – Picket spacing
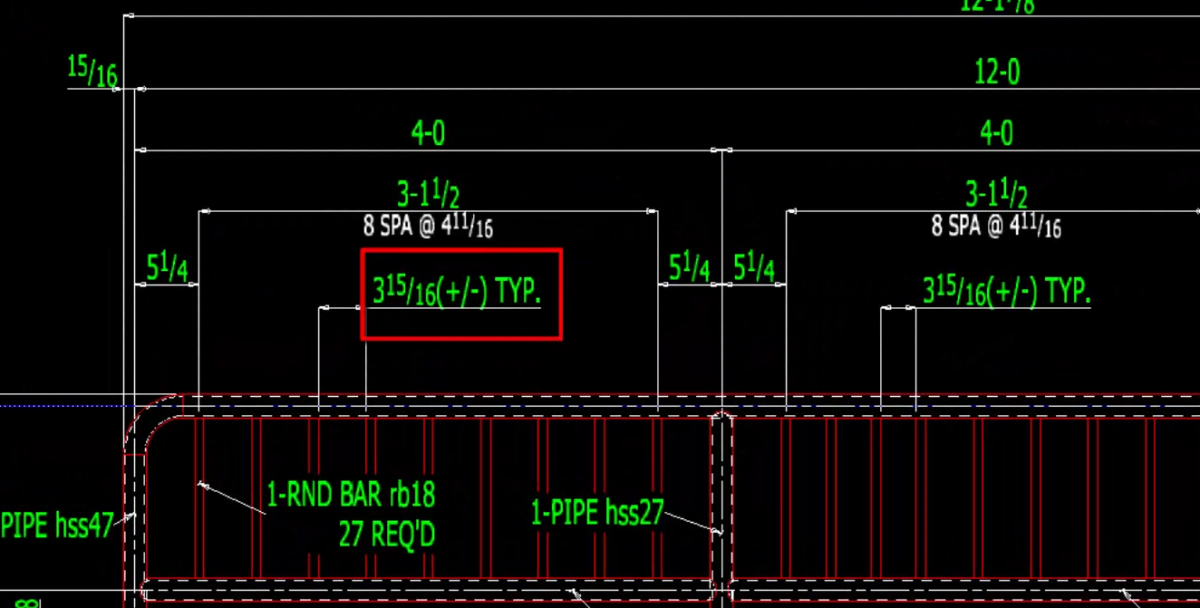
The Detailing Templates now show the spacing between pickets. These are face-to-face clearance dimensions to the exact 1/16”. If the spacing is not exactly a 1/16”, it will show a (+/-) added to the dimension.
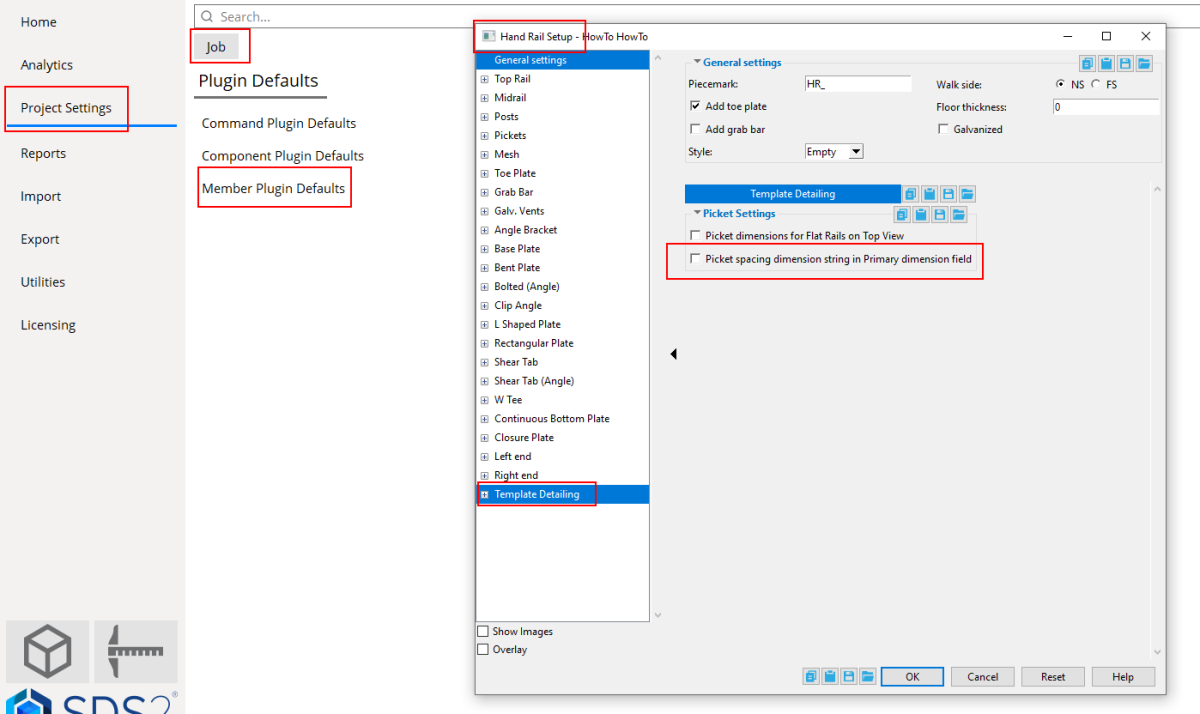
Spacing data has been added to the secondary dimension. An option to include spacing data in the primary dimension field can be found from the Home screen in Project Settings> Job> Plugin Defaults> Member Plugin Defaults> Hand Rail.
Face-to-face dimension with (+/-) measurement
There has also been spacing data added to the secondary dimension. There is also an option to set the spacing dimension in the Primary dimension. This option is in Project Settings> Job> Plugin Defaults> Member Plugin Defaults> Hand Rail.
Setback from point
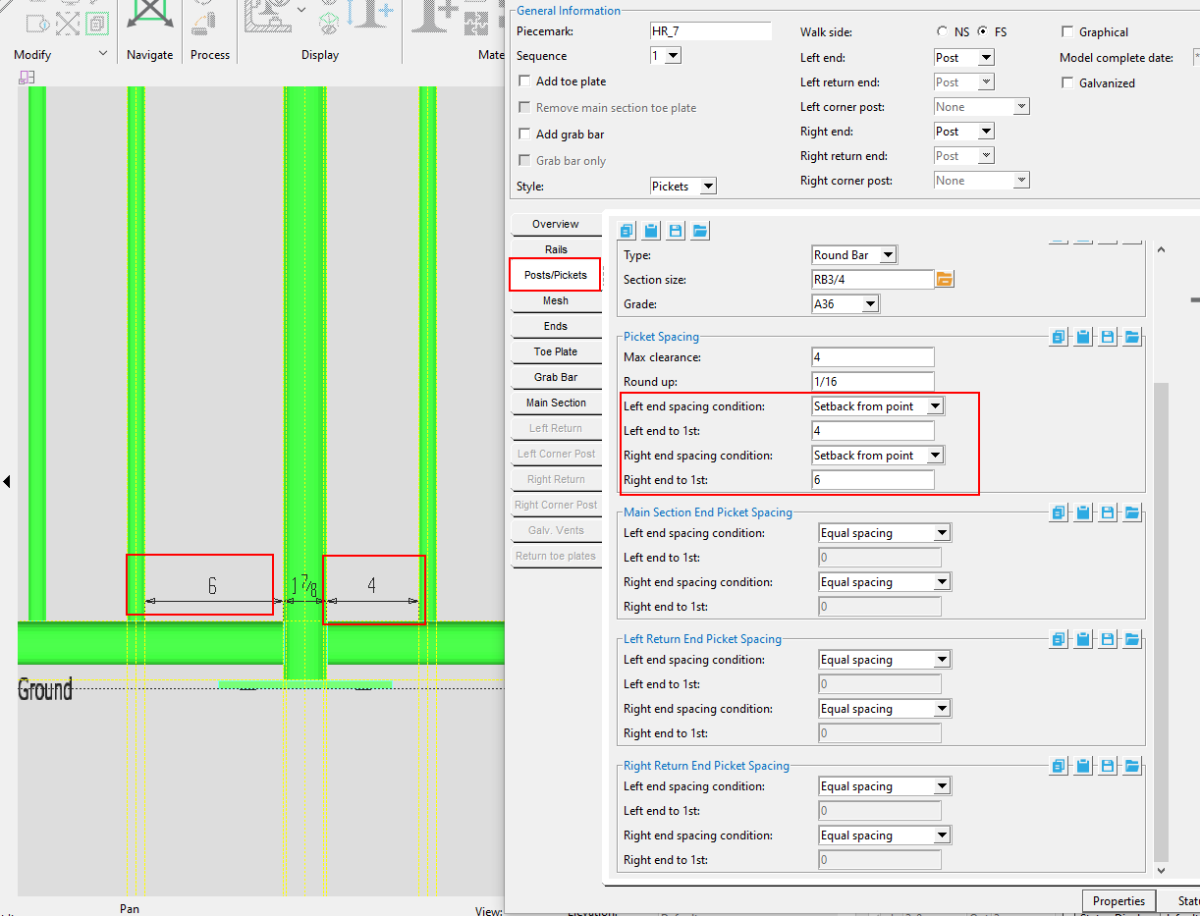
In addition to ‘ Equal spacing’ options for pickets, you can also adjust the spacing from intermediate posts to first pickets.
Left and right end spacing conditions can now be set to ‘Setback from point,’ for pickets, main section ends, and left and right section ends.
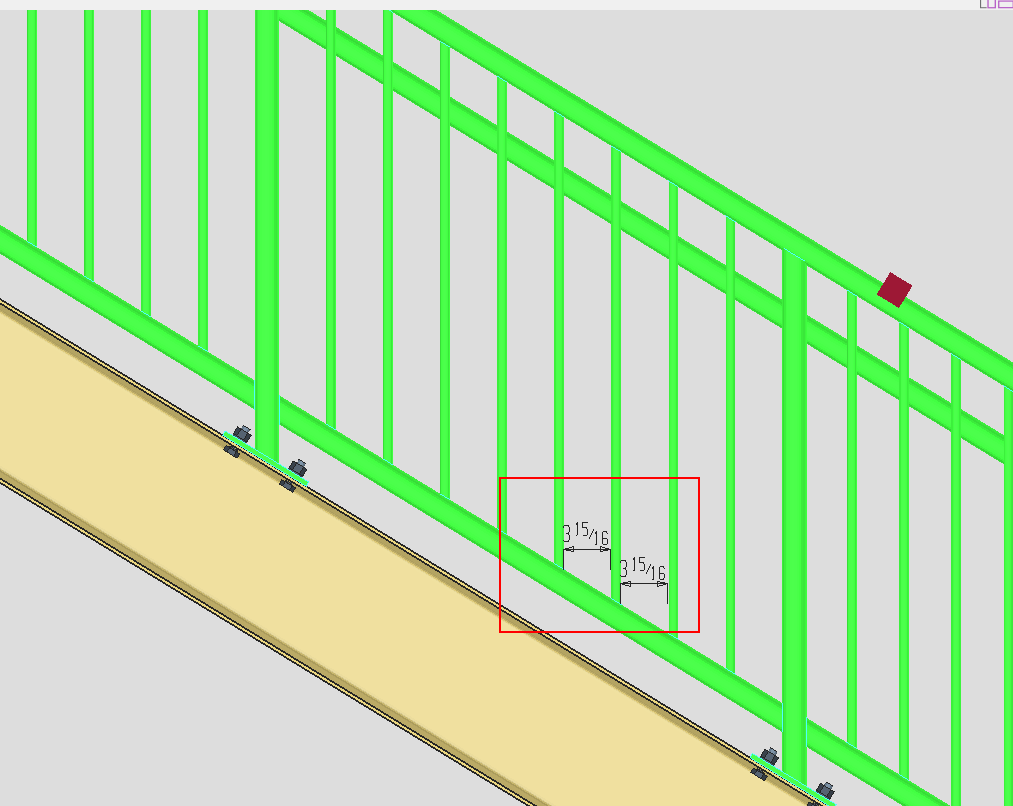
Spacing on slopes
Picket spacing on handrails with a slope will now be calculated on the horizontal, rather than on the slope of the handrail.
Detailing views
When you detail a stair rail with templates, the picket spacing will appear on the Main View if there is not a Top View. If you add a Top View, the picket spacing will automatically be placed on the Top View.
 Main View
 Top View
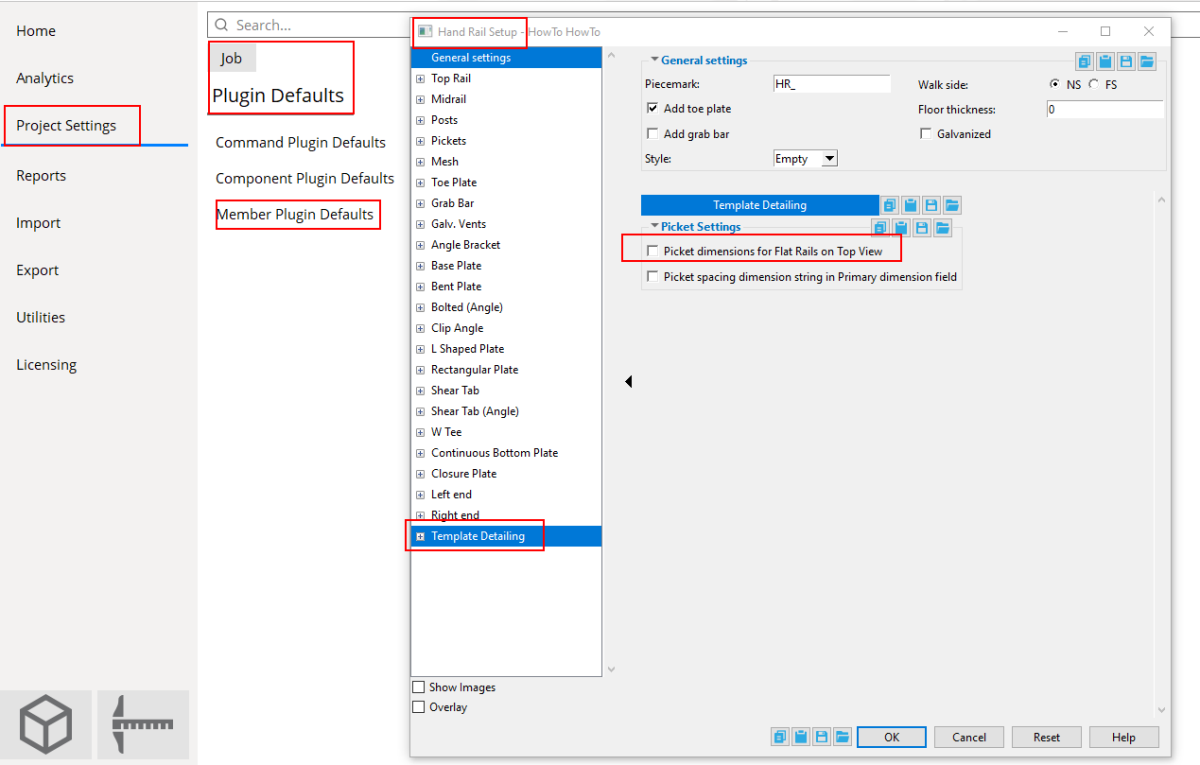
For Flat Rails with a Top View, there is an option inProject Settings> Job> Plugin Defaults> Member Plugin Defaults> Hand Rail > Template Detailing to select or deselect ‘Picket dimensions for Flat Rails on Top View.’
Corner Posts
SDS2 now supports adding corner posts with the handrail tool. In the “General Information” area of the Hand Rail edit window, you will see options for ‘ Left corner post’ and ‘ Right corner post.’
You can select from the dropdown menu whether you want the corner post to line up with ‘Main section’ or the ‘ Return,’ which affects the orientation of the connection. For example, if ‘Left corner post’ is set to ‘Return,’ the base plate will run in the same direction as the left return section.
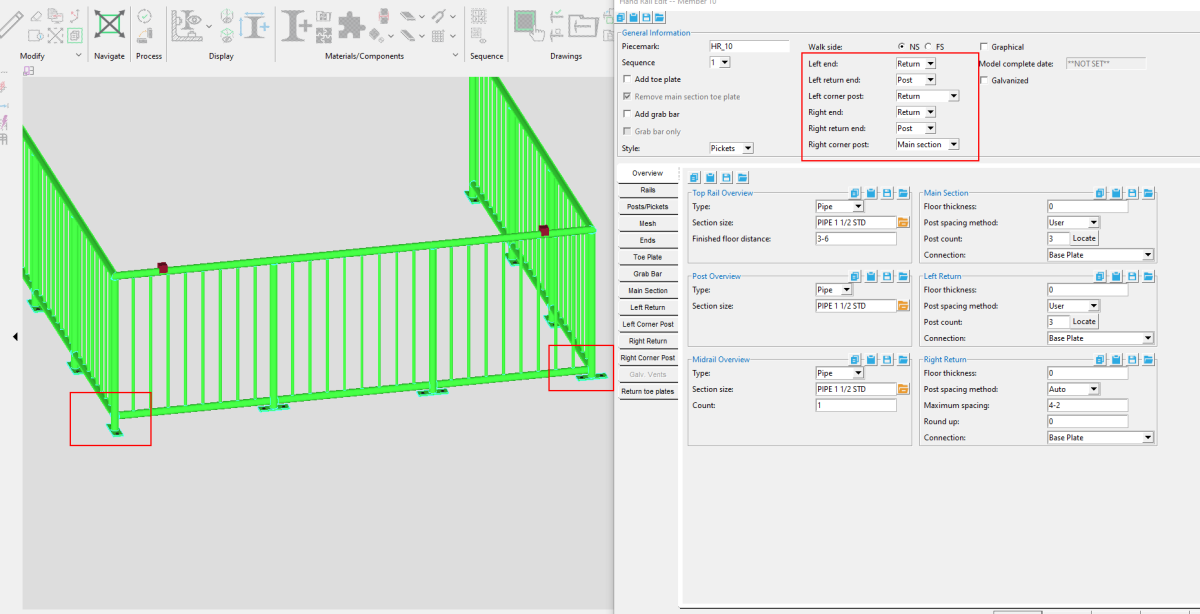
You will also see new tabs in theHand Rail edit window for Left Corner Post and Right Corner post. There you can control a number of settings, including the‘Connection type.’ L-shaped plates are now available to select for corner posts.
