 Add Roof Frame
Tool summary :
- Two work points are required to lay out a roof frame. The points can be located in empty space or to permit automatic connections to a member.
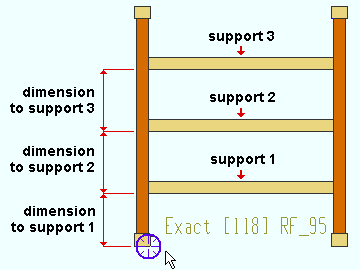
- The two work points position primary support 1 .
- The 1st work point establishes the roof frame's left end. Its elevation is recorded as the " Left end elevation ."
- The 2nd work point establishes the roof frame's " WP-WP length: actual ." Its elevation is recorded as the " Right end elevation ."
- The videos on this page show work points to the top flanges of beams or to joists. However, the work points do not have to be on a member. It is permissible to add a roof frame out in space which does not connect to a member.
- If you want a roof frame to connect to a member, be sure to add a work point that is close enough to the member's work line to ensure that the member's " Supporting member number " is detected.
- To determine the desired elevation for a work point, you should take into consideration the supporting member's elevation and the " Connection type ." For example, for a ' Saddle clip ' connection to a beam's top flange, you will want the work point at the beam's top flange elevation -- INCM is a good point locator to accomplish this. On the other hand, for a ' Strip vertical leg ' connection, you will want the elevation of the work point above the beam's top flange to prevent material clashes. In this video ( click here ), Offset Controls are used to locate each of the two work points 1/4 inch above the top flanges of the two beams.
- The roof frame program does not prevent you from locating work points in such a way that results in a material clash with a member. Adjusting various settings on the Roof Frame Edit window can also result in material clashes. Be sure to check the model closely.
To invoke Add Roof Frame :
Methods 2, 3 & 4 : A Roof Frame icon can be added to your toolbar (classic) or ribbon (lightning). The icon, keyboard shortcut or context menu command can be found in the group named ' Model -- Member '. For lightning, Customize Interface is used to configure ribbons, keyboards, the context menu and modes.
Method 2 : Press F2 > check the box for "  Miscellaneous steel " > double-click " Roof Frame ."
Method 3 : If " Modeling layout style " is ' Classic ', you can choose Model > Member > Prompt for Member Type > check the box for " Miscellaneous steel " > double-click " Roof Frame ."
An example and videos :
|
Custom members such as the roof frame shown here look and behave much like regular SDS2 members, but are actually generated using Python scripts.
|
| VIDEO
|

|
Work points are located for three different roof frames. The first has its " Secondary quantity " set to ' 0 '. Ohers have a " Secondary quantity ' of ' 2 '. (Recorded in SDS2 Detailing , v2016.)
|
|
| VIDEO
|
|
Consider the " Connection type " you want to apply before locating a work frame's work points. This video demonstrates work point layout for a roof frame with ' Strip vert leg ' connections. (Recorded in SDS2 Detailing , v2016.)
|
|
Also see :
page 1 | contents | F2 > miscellaneous steel > roof frame | roof frame window | top
 )
)