 Break Member Apart ( Modeling )
Tool summary :
Also see :
|
- Modeling (SDS2 program wherein Break Member Apart is a tool)
- Recombine Members (undoes Break Member Apart )
- Break Apart (more automatic way to break members apart)
- Shop assembled (to break apart stairs)
page 1 | contents | model > member > | recombine members (inverse)
Step-by-step instructions :
Submaterials from members: Break Member Apart can be used in Modeling to break one or more pieces of material apart from a member, so that the broken-apart pieces of material are given a member piecemark and detailed separately as one miscellaneous member.
Submaterials from group members: If you remove submaterial from a member that is a part of a group member , the submaterial is made a member (a miscellaneous member) and remains a part of the original group member.
The following instructions assume that you are using a 3-button mouse and that you use mouse bindings similar to those shown in these illustrations.
Before using this tool:
Make sure that the member associated with the to-be-broken-off materials is displayed in one of the three solid forms .
Step 1 (preselection) is optional. If you are going to do step 1, you may want to set the selection filter to ' Material '. If you don't do step 1, in-tool selection is required -- see note 2 .
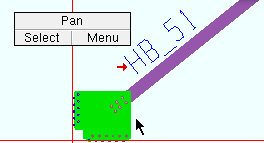
1 ( optional ): In Select Items mode, Select or Select + one or more materials to break off the member. In this example, a gusset plate and two clip angles are selected. 
2 . Invoke Break Member Apart . If you didn't do step 1, see note 2 before going to step 3. 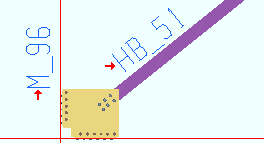
3 . The materials selected in step 1 (or step 2 -- see note 2 ) are broken off the member, and a member piecemark is assigned to them. In this example, the shop bolts fastening the gusset to the brace are changed to field bolts .
Note 1: To invoke Break Member Apart in Modeling ...
Note 2: If you didn't do step 1 ( preselection ), then after step 2 you are prompted to select the material(s) you want ( in-tool selection ). This prompting also occurs if a member or bolt or something other than one or more materials was selected in step 1. Press the Enter key or right-click ( Menu ) and choose " OK " on the context menu to signal you are done selecting materials and are ready to go to step 3.

bindings for in-tool selection
Note 3: Performing a manual Break Apart operation does not check the box for " Break Apart " on the member edit window. You need to Recombine Members .
Editing a member after Break Apart : For a beam , column , vertical brace or horizontal brace , which are members that connection design can generate connections on, connection design locks on the member edit window will continue to be editable, and subsequent invocations of Process and Create Solids will update all components of the original member, including the broken apart components. Even if you change the member's " Section size ," a subsequent Process and Create Solids will update all components of the original member.
Editing a miscellaneous member created by Break Apart : Suppose you have a miscellaneous member that is connection material which was broken apart from a beam, column or brace. If you graphically alter the connection material -- for example, by performing a cutting operation or changing its holes or editing the material itself -- the member it was broken apart from is marked as having a graphical connection . When a member's connection is graphical, connection design will not alter the connection.
page 1 | contents | model > member > | recombine members (inverse) | top