 Weld Erase ( Modeling )
Tool summary :
Also see :
- A solid form (welded material must be displayed in)
- Point selection by area box (affects Weld Erase )
- Model completed (welds cannot be erased from a member with this date set)
- Display Options (to hide, but not erase, welds)
page 1 | contents | model > weld > | model -- weld | 3D welds
Step-by-step instructions :
The following instructions assume that you are in Modeling with at least one weld on screen, and you are using a 3-button mouse. You must do either step 1c (preselection) or step 3 (in-tool selection) to perform this operation.
| Tip: If the welds you select for erasing are hidden by materials, look at the selection count decoration to determine the number of welds you have selected. |
1 . Before using this tool:
1a : Members associated with the to-be-welded materials must be displayed in one of the three solid forms . Also, the box for " Welds " must be checked on the Display Options window.
1b (tip) : If you are going to do 1c, you may want to set the selection filter to ' Welds '.

Select Items bindings (step 1c) 1c (optional) : In Select Items mode with an appropriate selection filter selected, use Select or Select+ (or draw an area box ) to select the weld(s) that you want to erase. When selected, welds are displayed in the " Primary selection color ," which by default is green. Use Select- if you want to deselect welds.
2 . Invoke Weld Erase using any one (1) of the following methods:
Method 1 : Click the Weld Erase icon, which is pictured above. The icon can be taken from the group named ' Model -- Weld ' and placed on a toolbar (classic) or the ribbon (lightning).
Method 2 : If " Modeling layout style " is ' Classic ', you can use the menu system to choose Model > Weld > Erase .
Method 3, 4 or 5 : Weld Erase can also be configured to be invoked using a keyboard shortcut , the context menu , or a mode . For the lightning interface, this configuration is done using Customize Interface .
Method 6 : With Weld Mode mouse bindings active, rght-click ( Erase ).
3 . Skip this step if you preselected the weld(s) you want in step 1c.
|
|
|
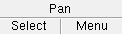
Select Item(s) bindings |
3a (if you didn't preselect) : Weld Erase prompts you to use Select Item(s) mouse bindings to select the one or more welds. Press the Enter key or right-click ( Menu ) and choose " OK " on the context menu to signal when you are done selecting the weld(s).
4 . Warning messages notify you of the effects of the changes you are making. At the very least, you are notified that "These welds will be erased."
![]()
![]()
Alternative 1 : Press the " OK " button to complete the Weld Erase operation. The weld(s) are removed from the 3D model, and the view is redrawn so that the welds disappear from it.
Alternative 2 : Press " Cancel " to end the Weld Erase operation without erasing any welds. The welds cease to be selected (displayed the " Primary selection color ") if you in-tool selected them in step 3; they remain selected if you preselected them in step 1c.
5 . The mouse bindings that were active before you invoked Weld Erase are again active.
page 1 | contents | model > weld > | model -- weld | 3D welds | top