Tiles
- General Overview
- Related Tools
Overview
Activating tile tools
Split Tile Horizontally and Split Tile Vertically
Preset tile configurations
Resize tiles
Set Active Tile
Clear Active Tile
Toggle Active Tile
Remove Tile
Single Tile
Overview
- The view window in Modeling or the Drawing Editor can be split into separate tiles. You can re-size the tiles, edit or relocate a view within a tile, and display different views in different tiles.
For example, in Modeling you can create one tile to show a plan view and another tile to show an elevation view. The views can show different members, or they can show the same members from different perspectives.

- The current view is initially displayed in a single tile when Modeling or the Drawing Editor opens. That first tile has the focus. When a tile has the focus, navigation and view operations are applied to it, including zooming, panning, and depth check changes. When there are multiple tiles, only one tile can have focus at a time.
- Focus follows the mouse pointer (
 ) until a tile has been made active. Navigation and view operations are applied to the tile that you're hovering over, such as zooming in and out with your mouse wheel, even if you haven't clicked inside of it. The tile decoration or border of a tile that has focus is highlighted in the Hover tile color. The tile retains the focus until you hover over another tile. This behavior is convenient if you want to switch rapidly between tiles.
- When a tile is made active using Toggle Active Tile or Set Active Tile, it has the focus at all times. Only one tile can be set active at a time. The active tile is the only tile where navigation and commands can be performed. All other tiles are frozen and you cannot interact with them. The border or tile decoration of an active tile is highlighted in the Active tile color. You cannot change the focus until you clear the active tile using Toggle Active Tile again or Clear Active Tile.
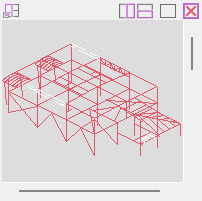
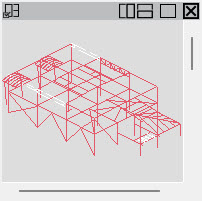
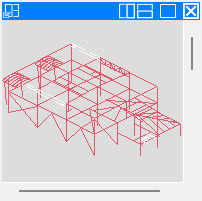
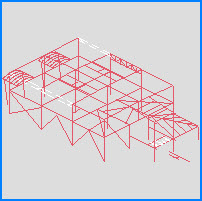
- Tiles have either tile decorations or borders, depending on how you set User and Site Preferences > General > Tile decorations active.
|
|
|
| A tile without the mouse focus has no tile decoration highlighting | A focused tile with a highlighted decoration -- dark gray, in this example | An active tile has a highlighted decoration -- blue, in this example |
|
|
|
 Tile decorations active Tile decorations active |
 Tile decorations active Tile decorations active |
Activating tile tools
Method 1: Click the tile decoration icons found at the top of a tile.
Split Tile Vertically
Split Tile Horizontally
Single Tile
Remove Tile
Method 2: Click the icons found on the Display page > Tiles section.
Remove Tile
Method 3: Right-click to open the context menu and choose Set Active Tile or Clear Active Tile, or choose Tiles > xxx to remove or split tiles. Note that if a tile is active, the context menu is only available in that tile.
 Learn more about alternative methods for launching commands.
Split Tile Horizontally
Split Tile Vertically
Split Tile Horizontally divides a focused tile horizontally into two tiles of equal size.
Split Tile Vertically divides the tile vertically.
Both commands create a new tile within the active tile if there is one. If there is no active tile, the tile will be created in the tile that you hover your mouse pointer ( ![]() ) over.
) over.
 Preset Tile Configurations
|
|
|
|
|
|
|
|
|
|
|
|
|
|
|
Note: If you've already created your own tile configuration, the preset configuration that you choose will replace it.
Resize tiles
Hover your mouse pointer ( ![]() ) over the boundary that separates two tiles. The pointer changes to a double-sided arrow. Drag the boundary to resize the adjacent tiles.
) over the boundary that separates two tiles. The pointer changes to a double-sided arrow. Drag the boundary to resize the adjacent tiles.
 Set Active Tile
Hover your mouse pointer ( ![]() ) over the tile that you want to activate so that it has the focus. The tile decoration or border of a tile you hover is highlighted in the Hover tile color. Click the Set Active Tile icon. The tile decoration or border of the tile you activated is highlighted in the Active tile color.
) over the tile that you want to activate so that it has the focus. The tile decoration or border of a tile you hover is highlighted in the Hover tile color. Click the Set Active Tile icon. The tile decoration or border of the tile you activated is highlighted in the Active tile color.
The active tile is the only tile where navigation and commands can be performed. All other tiles are frozen and you cannot interact with them. Only one tile can be set active at a time. Once activated, it will remain active until you Clear Active Tile or Toggle Active Tile. If no tile is active, focus follows the mouse pointer.
Tip: If another tile is already set to active, you must first deactivate it using Clear Active Tile before using Set Active Tile.
Also see: The Toggle Active Tile decoration can be used to set and clear an active tile with one click.
 Clear Active Tile
Click the Clear Active Tile icon to deactivate the active tile. The tile decoration or border of that tile is no longer highlighted in the Active tile color. Since there is not an active tile, focus follows the mouse pointer.
Also see: The Toggle Active Tile decoration can be used to set and clear an active tile with one click.
 Toggle Active Tile
The Toggle Active Tile decoration performs Set Active Tile and Clear Active Tile simultaneously with a single click. If a tile is already active, you can click Toggle Active Tile in the decoration bar of another tile to make it active and clear the previously active tile at the same time.
Tip: If you are using a keyboard shortcut to set an active tile using Toggle Active Tile, your mouse pointer ( ![]() ) must be hovering over the tile so it has the focus.
) must be hovering over the tile so it has the focus.
Remove Tile
Remove Tile (decoration)
Individual tiles can be removed. You cannot have less than one tile.
Tip: Single Tile is a much faster alternative to Remove Tile if you have multiple tiles and you want to remove them all.
Single Tile
The view window can be quickly reverted to show a single tile. You cannot have less than one tile.
Tip: Remove Tile is a better alternative to Single Tile if you have multiple tiles but you don't want to remove them all.
- Reuse previous session's tile layout (User and Site Options > Modeling)
- Reuse previous session's tile layout (User and Site Options > Drawings)
- Hover tile color (User and Site Options > General )
- Active tile color (User and Site Options > General)

