 Selection Mode
Tool summary :
- Activates Select Items mode, which is Modeling 's base mode. The mode is primarily used for preselecting items to edit or move or modify.
- This help page assumes that you are using a 3-button mouse and have not modified this mode using Mode Configuration . SDS2 recommends using a mouse with a mouse wheel .
- 3-button mouse bindings discussed on this page include:
- Select (left-click) (
 )
)
- Double-click (left-click twice)
- Menu (right-click to open the context menu) (
 )
)
- Select+ (left-click with Shift pressed) (
 )
)
- Select- (left-click with Ctrl pressed) (
 )
)
- Toggle (left-click with Ctrl+Shift pressed)
- Select Items mode also has mouse bindings that are discussed elsewhere:
- See the step-by-step instructions .
Also see :
page 1 | contents | selection | selection (index) | top
 Step-by-step instructions :
Select Items mode is the base mode of Modeling . Immediately after you start up Modeling , you will automatically be in Select Items mode. The mode is designed for pre-tool selection. First you select items, then you activate the tool that acts on the items. Other modes -- Select Item(s) and Select One Item -- are used for in-tool selection (if you start up a tool without having first made an appropriate pre-tool selection).
1 . To invoke Select Items mode, use any of the following methods:
Method 1 : Start up Modeling . You will automatically be in Select Items mode.
Method 2 : Click the icon pictured above . In classic, the icon can be found on a toolbar. In lightning, the ribbon editor.
Method 3 : Use Mode Return or press the Esc key to pop out of your current mode and back into Select Items mode.
2 . While in Select Items mode, the following options are available on a 3-button mouse:

|

|
no key pressed
|
- Select (left-click)
- Double-click (left-click)
- Pan (drag while holding down the middle mouse button)
- Menu (right-click to open the context menu)
- Select+ (left-click with the Shift key pressed)
- Select- (left-click with the Ctrl key pressed)
- Rotate (drag while holding down middle mouse button with Shift pressed)
- Toggle (left-click with the Ctrl+Shift keys pressed)
- If you have a roller mouse , the roller can be used to zoom in and zoom out from the position of the mouse pointer (
 ).
).
- You can invoke any tool available in Modeling (e.g., Add Beam , Construction Line Add , etc.).
3 . To get out of Select Items mode:
3a : Invoke any other mode that is available in Modeling . For example, invoke Member Mode .
page 1 | contents | selection | selection (index) | top
Select (left-click)

|

|
default bindings ( no key pressed)
|
| VIDEO
|

|
Select Items mode is used to select and deselect members in the model.
|
|
If the material you click on is a " user created material ," then clicking it selects that material. This also applies to materials that are parts of custom members or parametrics , even if they are not tagged as " user created material ."
If the material you click on is a connection material , clicking that material does not select the material -- it selects the entire connection (the connection component ).
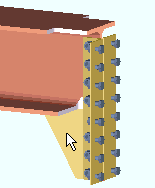
If the material you hover is a connection material , you can select that material -- instead of the connection component -- by using the context menu (right-click and choose that material's piecemark on the menu).
| To select a connection material when the filter = ' Default '.
|
 |
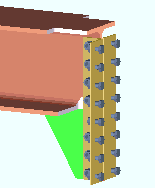 |
| 1 . Hover the material you want with your mouse pointer, right-click ( Menu ), then choose " Select Other " on the menu and select the material you want.
|
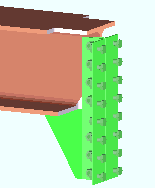
2 . The selected material turns the " Primary selection color " (green in this example).
|
If the material you click is a member main material , clicking that material does not select the material -- it selects the member.
Tip: To select the member main material instead of the member for the situation shown below, hover the main material with your mouse pointer (  ), then right-click and choose " Select Other " on the context menu . ), then right-click and choose " Select Other " on the context menu .
|
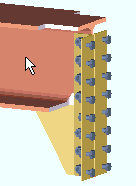
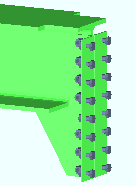
| To select a solid form member with the filter set to ' Default '.
|
 |
|
| 1 . Left-click ( Select ) the main material of the member you want.
|
2 . The selected member turns the " Primary selection color " (green in this example).
|
| To select multiple items by area.
|
|
Set the selection filter , then hold down the left mouse button ( Select or Select+ or Toggle ) and drag the mouse pointer to form an area box around the items you want.
|

|
| Also see: When " Point selection by area box " is set to ' Directional ' and the area box is drawn from right to left, the area box potentially selects more items.
|
Tips and tricks for Select:
- Select lets you select one item at a time. To select more than one item, hold down the Shift key. See Select+ .
- By default, the Select mouse button is the left mouse button for a 2-, 3-button mouse. You can change this using Mode Configuration .
- Notice that an item highlights when the mouse pointer (
 ) hovers it ( exception: see " Highlight surfaces "). The highlighting tells you that the item will be selected when you left-click ( Select ) that item.
- Once an item is selected, you can use the context menu to perform operations on that item or to select a different item.
- Items that can be selected include members, materials, holes and bolts.
- To select a member when ' Default ' is the selection filter , click the member main material. To select the member main material instead of the member, choose " Select Other " on the context menu .
- If the model is in stick form, only members can be selected.
page 1 | contents | selection | selection (index) | top
Double-click (left-click twice)

|

|
default bindings ( no key pressed)
|
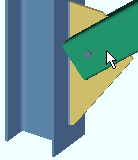
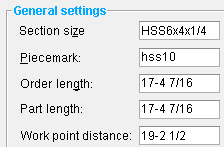
Double-click a member's main material to edit that material
(The selection filter must = ' Material ')
|
|
|
|
With ' Material ' the selection filter, double-click a member main material to open the edit window for that material. In this example, the Rolled Section Material window opens.
|
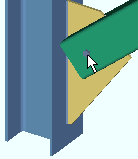
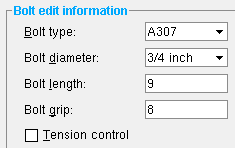
Double-click a connection bolt to edit that bolt
(The selection filter must = ' Bolts ' or ' Legacy Default ')
|
|
|
|
With ' Bolts ' the selection filter , double-click a bolt to open the Bolt Edit window for that bolt. Note: If the selection filter had been ' Default ' in this example, the Connection Component Edit window for that end of the member would have opened instead of the Bolt Edit window.
|
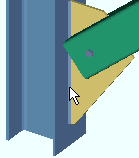
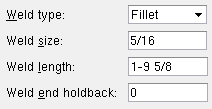
Double-click connection weld to edit that weld
(The selection filter must = ' Welds ' or ' Legacy Default ')
|
|
|
|
With ' Welds ' the selection filter , double-click a weld to open the Edit Weld window for that weld. Note: If the selection filter had been ' Default ' in this example, the Connection Component Edit window for that end of the member would have opened instead of the Edit Weld window.
|
page 1 | contents | selection | selection (index) | top
Menu (right-click opens the context menu).

|

|
default bindings ( no key pressed)
|
To configure a context menu:
In classic, Modeling or Drawing Editor , choose Load Configuration to set the context menu configuration > choose Settings > Context Menu Editor .
In lightning, Home > Utilites > Customize Interface > select the desired current role configuration > select a role or create a new role > click  next to " Shortcut menu configuration " to choose the context menu configuration > press " Edit "
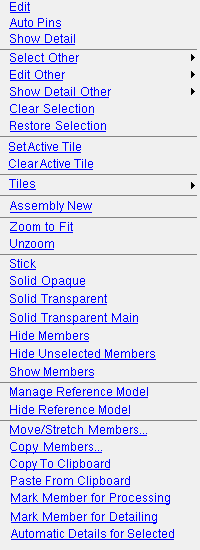
Modeling 's default context menu (members selected): Following is the default context menu (with all items shown) that you get when you right-click in the drawing area in Modeling with members selected. A similar menu with fewer options is shown when no members are selected or hovered with your mouse pointer (  ).
).
Model Tree's default context menu: Following is the default context menu that you get when you click the mouse button for ( Menu ) (by default, right-click) in the Model Tree .
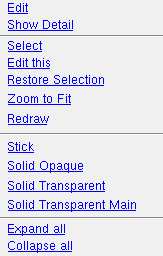 |
" Edit this " and " Select " are visible only when an item is hovered with the mouse pointer (  ). Other commands are visible only when there is an appropriate selection. " Expand all " and " Collapse all " are always visible. ). Other commands are visible only when there is an appropriate selection. " Expand all " and " Collapse all " are always visible.
|
 |
The " Tiles " cascade menu.
|
page 1 | contents | selection | selection (index) | top
Select+ (left mouse button with the Shift key pressed)

|

|
default bindings ( Shift key pressed)
|
| VIDEO
|

|
Select Items mode is used to select and deselect members in the model.
|
|
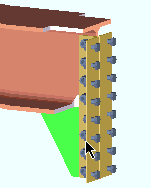
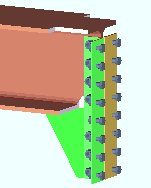
Select + to select multiple items
(selection filter = ' Material ' in this example)
|
 |
|
| 1 . Set the selection filter to the desired type of item. While pressing the Shift key, left-click ( Select+ ) the desired item.
|
2 . The item turns the " Primary selection color " (green in this example). You can then select more items using Select+ .
|
| To select multiple items by area
|
|
Set the selection filter . Hold down the left mouse button ( Select or Select + ) and drag the mouse pointer to form an area box around the items you want.
|

|
| Also see: When " Point selection by area box " is set to ' Directional ' and the area box is drawn from right to left, the area box potentially selects more items.
|
Tips and tricks for Select+:
- By default, the Select+ mouse button for a 3-button mouse is the left button with the Shift key pressed. You can change this using Mode Configuration .
- To select members, hold down the Shift key and left-click ( Select+ ) the member main material. To select materials, left-click ( Select+ ) on those materials.
- Once all items you want are selected, you can right-click ( Menu ) and use the context menu to perform operations on those items.
- To deselect all items except the one you click on, use Select .
- To deselect items, use Select- .
page 1 | contents | selection | selection (index) | top
Select- (left mouse button with Ctrl pressed)

|

|
default bindings ( Ctrl key pressed)
|
| VIDEO
|

|
Select Items mode is used to select and deselect members in the model.
|
|
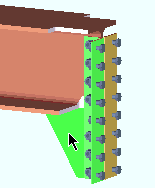
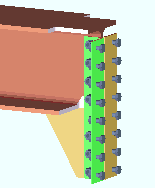
Select- to deselect a material
(Selection filter = ' Material ' in this example)
|
 |
|
| 1 . Set the selection filter to the desired type of item. While pressing the Ctrl key, left-click ( Select- ) a selected material.
|
2 . The material is deselected (no longer displayed in the selection color).
|
Tips and tricks for Select-:
- By default, the Select- mouse button for a 3-button mouse is the left button with Ctrl pressed. You can change this using Mode Configuration .
- Select- can only be used to deselect one or more items that are currently selected. If you draw an area box using Select- , multiple items can be deselected simultaneously.
- With ' Default ' the selection filter : Press the Ctrl keys and left-click ( Select- ) the main material of a member to deselect that member; left-click ( Select- ) a material other than main material to deselect that material.
page 1 | contents | selection | selection (index) | top
Toggle (left button with Ctrl+Shift pressed)

|

|
default bindings ( Ctrl+Shift )
|
| Toggle to deselect an item
|

|

|
| 1 . While pressing the Ctrl+Shift keys, left-click ( Toggle ) a selected item ( stick member in this example).
|
2 . The member is deselected (no longer displayed in the selection color).
|
| Toggle to select an item
|

|

|
| 1 . While pressing the Ctrl+Shift keys, left-click ( Toggle ) an item ( stick member in this example).
|
2 . The newly selected member turns the " Primary selection color " (green in this example).
|
Tips and tricks for Toggle:
- By default, the Toggle mouse button for a 3-button mouse is the left button with Ctrl+Shift pressed. You can change this using Mode Configuration .
- Toggle can be used to select an item as well as to deselect.
- Warning: Drawing an area box using Toggle inverts the selection. That is, selected items are deselected, while previously unselected items become selected.
page 1 | contents | selection | selection (index) | top
 Selection Mode ( Modeling - for preselection )
 Step-by-step instructions :
 ).
).








next to " Shortcut menu configuration " to choose the context menu configuration > press " Edit "
).
