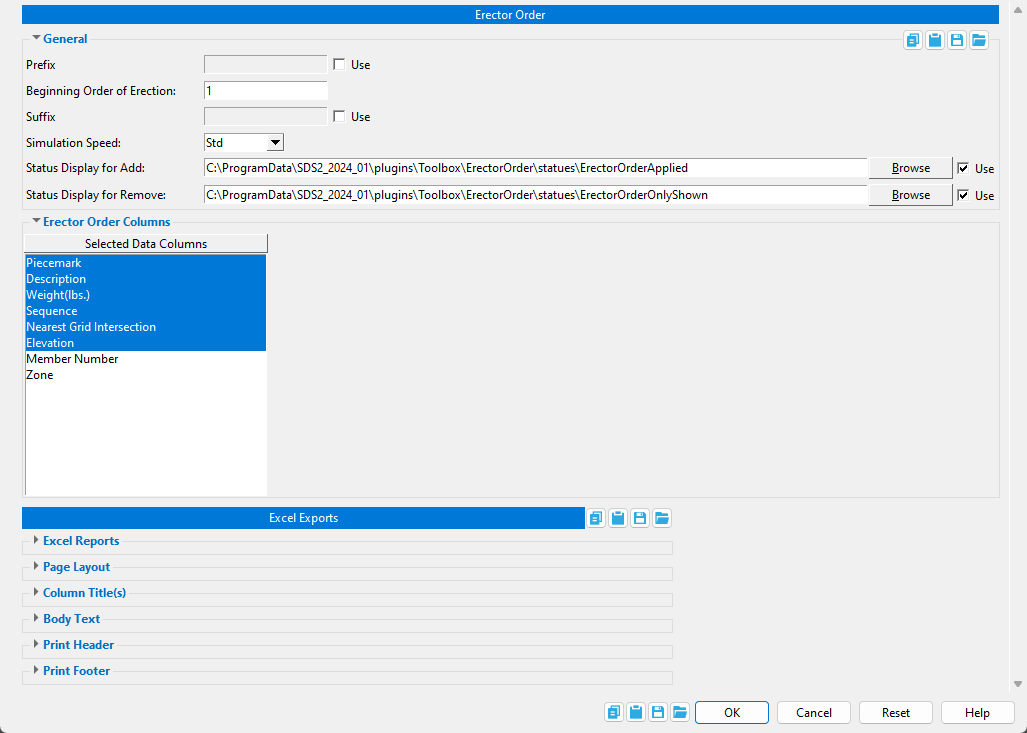
Erector Order Setup window
Some of the links in the image above take you to the Erector Order page for more information.
To open this window: Home > Project Settings > Job > Plugin Defaults > Command Plugin Defaults > Erector Order Setup.
Status Display for Add: The Status Display file that is temporarily used in modeling while the Erector Order window is open and when the Add button is pressed. The default status display shows 3D solid members as opaque when they have been added to Erector Order and translucent when they have not been added. You can also use your own status display file.
When Use is checked
( , the status display is active.)
When Use is not checked
( , the status display is not active.)
Status Display for Remove: The Status Display file that is temporarily used in modeling when the Remove button is pressed. The default status display shows only members that have been added to Erector Order and masks all other members. You can also use your own status display file.
When Use is checked
( , the status display is active.When Use is not checked
( , the status display is not active.
Selected Data Columns: When the name of a data column is selected in this field, the data column will appear in the Erector Order window once a member has been added to the tool. The top-to-bottom ordering of the names in this field translates to left-to-right ordering of the data columns in the Erector Order window. To customize the order of the names on this list, left-click a name once to select it, then left-click-hold and drag the name up or down in the list. Only one name can be selected at a time to change its order.

