 Construction Ellipse Add Axis End
- Step-By-Step
- Tips and Tricks
- Related Tools
1. Click the Construction Ellipse Add Axis End icon, which is pictured above. The icon can be found on the Drafting page > Layout section.
Alternative: Invoke Construction Ellipse Add Axis End using the Find Tool by searching the command name and clicking the icon, which is pictured above.
Learn more about alternative methods for launching commands.
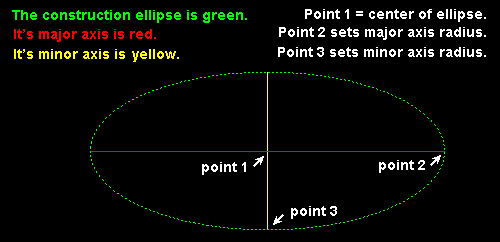
2. The status line prompts you to locate the first major axis point. The Locate-Repeat-Return mouse bindings become active, and the Locate contextual page becomes active. Left-click (Locate) to set the axis point.
Alternative: Press Esc or right-click (Return) to the cancel the command without adding a construction ellipse at any time.
Tip: At any time while this command is active, you can set the Pen color in the Palette section on the Locate contextual page.
3. The status line prompts you to locate the second major axis point. This also sets the major axis' rotation. Drag the mouse pointer to the desired location and left-click (Locate).
Tip: You can also type the diameter of the major axis (which is converted to and stored as the major axis radius) and press Enter. Set the axis rotation at the same time by typing the @ symbol followed by the degrees of rotation.
Example: 36@45 (or 3-0@45) sets the major axis radius to 1 foot, 6 inches (or 18 mm) and rotates the major axis to 45 degrees. The degrees of rotation can be entered as a negative value (36@-45). You can also type the degrees of rotation without the diameter (@45).
4. The status line prompts you to locate the semi-minor axis distance. Drag the mouse pointer to the desired location and left-click (Locate).
5. The command repeats step 2, allowing you to continue adding construction ellipses. Alternatively, you can press Esc or right-click (Return) to end the command.
Tip: Middle-click (Repeat) to add another construction ellipse that matches the one you just added.


