 Construction Circle Add Tan Tan Radius
- Step-By-Step
- Tips and Tricks
- Related Tools
1. Click the Construction Circle Add Tan Tan Radius icon, which is pictured above. The icon can be found on the Drafting page > Layout section.
Alternative: Invoke Construction Circle Add Tan Tan Radius using the Find Tool by searching the command name and clicking the icon, which is pictured above.
Learn more about alternative methods for launching commands.
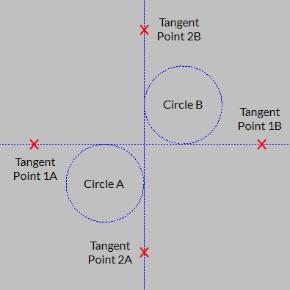
2. The status line prompts you to locate the first tangent point of the construction circle. The Locate-Pan-Return mouse bindings become active, and the Locate contextual page becomes active. Place your mouse pointer on a line, circle, construction line, or construction circle. When a white line indicating tangency appears on that object, left-click (Locate) to set the first tangent point.
Alternative: Press Esc or right-click (Return) to cancel the command without adding a construction circle at any time.
Tip: At any time while this command is active, you can set the Pen color and Radius in the Palette section on the Locate contextual page.
3. The status line prompts you to locate the second tangent point. Place your mouse pointer on a different line, circle, construction line, or construction circle. When a white line indicating tangency appears on that object, left-click (Locate) to set the second tangent point.
Note: The location of the construction circle is relative to where you locate the tangent points in steps 2 and 3. The exact points of tangency depend on the value of the Radius in the Palette section on the Locate contextual page.
4. The command repeats step 2, allowing you to continue adding construction circles. Alternatively, you can press Esc or right-click (Return) to end the command.

