Concrete Material window
To open this window :
- Edit One Material (gives change options)
- Edit Multiple Materials (no change options)
- Double-click the material
- "Edit Other"
- Double-click a material in the Model Tree
- Review 2D Items ( Drawing Editor -- non-editable)
Also see :
- General Information (can be opened from this window)
- Submaterial piecemark (each unique material identified by)
- submaterial detail (2D drawing of a material)
- concrete members (member types composed of this material)
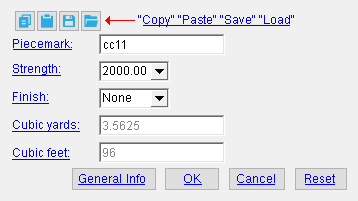
 " Copy " " Paste " " Save " " Load " buttons
- You'll find buttons like these at the top of this window. They apply to all user-editable settings (except " Piecemark ") that are on this window. Click here for more information.
- You can " Copy " (
 ) the settings on this window, then " Paste " (
  ) those settings to different concrete material.
- " Save " (
 ) saves a"form" file to the
  form/ConcreteMaterial_GenSettings folder that is used by your current version of SDS2. Give the form a name that will help other users identify its purpose. " Load " (
  ) copies over all user-editable settings on this window (except " Piecemark ") with the settings that are stored in the file that you select.
- " Paste " and " Load " replace mixed entries to a single field with a single entry. " Copy " and " Save " ignore fields with mixed entries, treating them as if they have no entry or do not exist.
Options :
Cubic yards: read-only . The calculated volume of the concrete, expressed in cubic yards if you are using ' Imperial ' units.
Report Writer: MemberMaterial.Material.ConcreteMaterials.volume_cubic_yards
Cubic feet: read-only . The calculated volume of the concrete. The volume is expressed in cubic feet if you are using ' Imperial ' units.
Tip: The " Cubic yards " and " Cubic feet " fields provide a convenient way within Modeling to check the quantity of concrete in a member.
Report Writer: MemberMaterial.Material.ConcreteMaterials.volume_cubic_feet
To close this window :
![]()
![]()
![]()
![]()
![]()
" General Information " opens the General Information window, which provides additional information and settings that pertain to this concrete material.
Tip: You can use the General Information window to change the material's " X ," " Y ," or " Z " global coordinates (and thus reposition the material within the 3D model).
Also: A " Properties " button at the bottom of the General Information window lets you set Custom Properties for this material.
"OK" (or the Enter key) closes this window and applies the settings on it.
"Cancel" (or the Esc key or the ![]() button) closes this window without making any changes to the material.
button) closes this window without making any changes to the material.
Tip: When you open this window to review information only, (and you do not want to set the defaults for to-be-added materials), the best way to close this window is to press " Cancel. "
"Reset" undoes all changes made to this window since you first opened it. The window remains open.

