 Bevel Add ( Drawing Editor )
Tool summary :
Also see :
- Bevel Symbol window (opened with Bevel Add )
- Bevel symbol base dimension (setup for Bevel Add )
- Show bevel angle degrees (setup for Bevel Add )
- Bevel symbol exact points (defined with Bevel Add )
- Comment layer (on most drawings, you must add objects to this type of layer)
- Crane placement drawings (drawing type on which you can add objects to non-comment layers)
page 1 | contents | objects > bevel symbols > | objects -- bevels | xxx add | bevels
 Quick instructions (also see the detailed instructions ) :

|
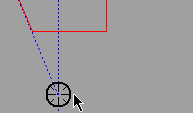
1 . Left-click ( Locate ) to place the tip of the bevel symbol's tail. |

|
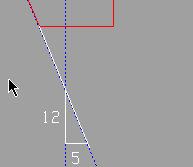
2 . Left-click ( Locate ) where you want the bevel symbol. |

|
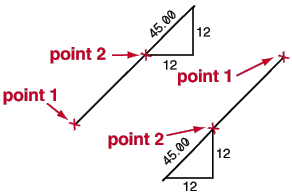
3 . The program calculates the angle, rise and run from the located points. |

|
4 . The program draws the bevel symbol. You can now middle-click ( Repeat ) to place a duplicate bevel symbol. Or left-click ( Locate ) to place another bevel symbol. Or right-click ( Return ) if you are done. |
page 1 | contents | objects > bevel symbols > | objects -- bevels | xxx add | bevels | top
 Detailed instructions (also see the quick instructions ) :
The following instructions assume that you are using a 3-button mouse.
1 . Invoke Bevel Add using one (1) of the following methods:
Method 1 : Click the Bevel Add icon. The icon can be taken from the group named ' Objects -- Arcs ' and placed on a toolbar (classic) or the ribbon (lightning).
Method 2 : If " Drawing Editor layout style " is ' Classic ', you can use the menu system to choose Objects > Bevel Symbols > Add .
Method 3, 4 or 5 : Bevel Add can also be invoked using a keyboard shortcut , the context menu , or a mode . For the ' Lightning ' layout style, configuration of the interface is done using Customize Interface .
Method 6 : With Bevel Mode mouse bindings active, middle-click ( Add ).
2 . Locate - Repeat - Return mouse bindings become active along with various Locate options.
|
|
|
bindings |
Alternative 1 : Select the Locate icon that you want (if it's not pressed already). Place the mouse pointer (
) so that the point location target (
) snaps to where you want the tip of the bevel symbol's tail, then left-click ( Locate ).
Alternative 2 : Right-click ( Return ) if you do not want to add any more bevel symbols. Do not continue.
3 . The status line prompts, " Locate second point ." Locate- Pan -Return mouse bindings become active.
|
|
|
bindings |
3a : Place your mouse pointer (
) so that the point location target (
) snaps to where you want the tail to end and the part of the symbol that is a triangle to begin, then left-click ( Locate ).
4 . The Bevel Symbol window opens.
Alternative 1 : Make appropriate entries to " Angle ," " Rise ," " Run ," " Tails shown " and " Character height ," then press the " OK " button at the bottom of the window and go to step 5.
Alternative 2 : Press the " Cancel " button to end the Bevel Add operation without adding this bevel symbol. Do not continue.
5 . The bevel symbol is drawn on your computer screen. Locate - Repeat - Return mouse bindings become active. Do one (1) of the following:
|
|
|
bindings |
Alternative 1 : To place another bevel symbol that is not a duplicate of the one you just added, follow these instructions beginning with step 2.
Alternative 2 : Middle-click ( Repeat ) to cause an exact duplicate of the bevel symbol to be drawn from whatever location the point location target (
) is at. Do this as many times as you like, then right-click ( Return ) and go to step 6.
Alternative 3 : Right-click ( Return ) if you are done adding bevel symbols. Go to step 6.
6 . The mouse bindings that were active when you invoked Bevel Add become active again.
Note: Any bevel symbols added using this procedure can be instantly removed (one at a time, in reverse-order of their addition) by using Undo .
page 1 | contents | objects > bevel symbols > | objects -- bevels | xxx add | bevels | top
