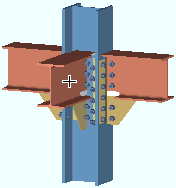
 Seek to Face ( Modeling )
Tool summary :
Also see :
- A solid form (material surface needs to be in)
- Undo View Change (undoes Seek to Face )
- Surfacing Depth (' Out ' option applies to Seek to Face )
- Work plane highlighting (helps you know where you're at)
- Snap to Surface (a similar tool)
page 1 | contents | navigate > | navigate -- nav mode | 3d erection views
Step-by-step instructions :
1 . Invoke Seek to Face using one (1) of the following methods:
Method 1 : Click the Seek to Face icon, which is pictured above. The icon can be taken from the group named ' Navigate -- Navigation Mode ' and placed on a toolbar (classic) or the ribbon (lightning).
Method 2 : If " Modeling layout style " is ' Classic ', you can use the menu system to choose Navigate > Seek to Face .
Method 3, 4 or 5 : Seek to Face can also be configured to be invoked using a keyboard shortcut , the context menu , or a mode . For the lightning interface, this configuration is done using Customize Interface .
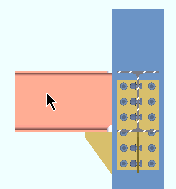
2 . The mouse pointer ( ![]() ) changes into a cross (
) changes into a cross ( ![]() ). Do the following:
). Do the following:
2a : Place the mouse pointer on the material surface that you want to look at, then left-click or right-click or middle-click.
3 . The program brings you to a view showing the material face that you clicked on. Since the selected surface is now your work plane, it is now displayed in a lighter color than it would if it were not your work plane (see work plane highlighting ).
page 1 | contents | navigate > | navigate -- nav mode | 3d erection views | top