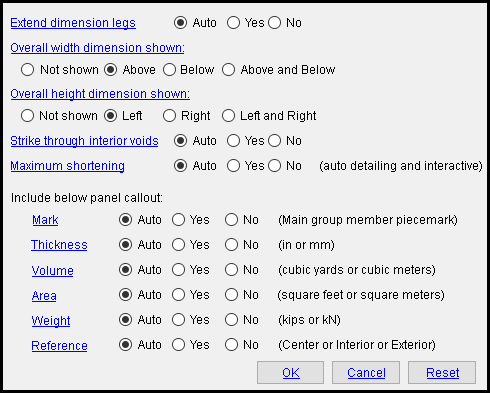
The Tilt-Up Panel Detail Settings window (setup overrides)
Also see :
- Home > Project Settings > Fabricator > Tilt-Up Panel Detail Settings (setup window that this window can override)
page 1 | contents | settings > drawing settings | top
To open setup overrides for Tilt-Up Panel Detail Settings :
In the Drawing Editor , while in a tilt-up panel ' Detail ' (system-generated), choose Home > Project Settings > Fabricator > Concrete > Tilt-Up Panel Detail Settings .
page 1 | contents | settings > drawing settings | top
------ Settings ------
Extend dimension legs: ![]() Auto or
Auto or ![]() Yes or
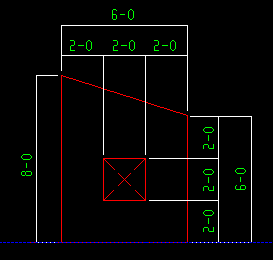
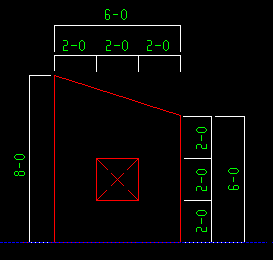
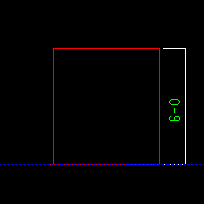
Yes or ![]() No . This applies to tilt-up panels with interior voids, or to panels that have sloping ends. The selection made applies to the main view if, after exiting the drawing, you select that drawing for Detail Member Groups with templates .
No . This applies to tilt-up panels with interior voids, or to panels that have sloping ends. The selection made applies to the main view if, after exiting the drawing, you select that drawing for Detail Member Groups with templates .
|
' Auto ' instructs group member detailing with templates to apply the setup choice made to Home > Project Settings > Fabricator > Concrete > Tilt-Up Panel Detail Settings > " Extend dimension legs " when you next auto detail your current drawing.
' Yes ' extends dimension legs (extension lines) through the tilt-up panel to interior voids and the corners of sloping edges when your current drawing is subsequently detailed.
' No ' causes the dimension legs not to be extended.
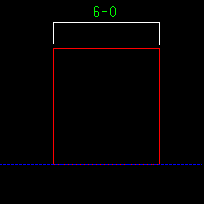
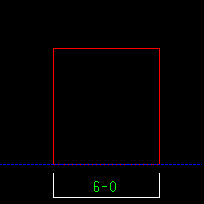
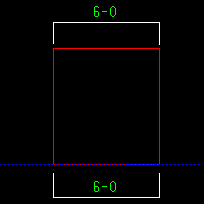
Overall width dimension shown: ![]() Auto or
Auto or ![]() Not shown or
Not shown or ![]() Above or
Above or ![]() Below or
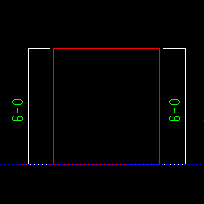
Below or ![]() Above and Below . The selection made applies to the main view if, after exiting the drawing, you select that drawing for Detail Member Groups with templates .
Above and Below . The selection made applies to the main view if, after exiting the drawing, you select that drawing for Detail Member Groups with templates .
|
' Auto ' instructs group member detailing with templates to apply the setup choice made to Home > Project Settings > Fabricator > Concrete > Tilt-Up Panel Detail Settings > " Overall width dimension shown " when you next auto detail your current drawing.
' Not shown ' causes the overall width dimension not to be shown.
' Above ' results in the showing of the overall width dimension above the tilt-up panel when your current drawing is subsequently detailed.
' Below ' results in the showing of the overall width dimension below the tilt-up panel when your current drawing is subsequently detailed.
' Above and Below ' results in the showing of the overall width dimension both above and below the tilt-up panel when your current drawing is subsequently detailed.
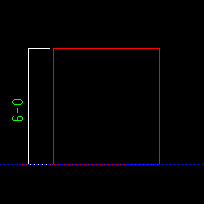
Overall height dimension shown: ![]() Auto
Auto ![]() or Not shown or
or Not shown or ![]() Left or
Left or ![]() Right or
Right or ![]() Left and Right . The selection made applies to the main view if, after exiting the drawing, you select that drawing for Detail Member Groups with templates .
Left and Right . The selection made applies to the main view if, after exiting the drawing, you select that drawing for Detail Member Groups with templates .
|
' Auto ' instructs group member detailing with templates to apply the setup choice made to Home > Project Settings > Fabricator > Concrete > Tilt-Up Panel Detail Settings > " Overall height dimension shown " when you next auto detail your current drawing.
' Not shown ' causes the overall height dimension not to be shown.
' Left ' results in the showing of the overall height dimension to the left of the panel when your current drawing is subsequently detailed.
' Right ' results in the showing of the overall height dimension to the right of the panel when your current drawing is subsequently detailed.
' Left and Right ' results in the showing of the overall height dimension to both the left and the right of the panel when your current drawing is subsequently detailed.
Strike through interior voids: ![]() Auto or
Auto or ![]() Yes or
Yes or ![]() No . The selection made applies to the main view if, after exiting the drawing, you select that drawing for Detail Member Groups with templates .
No . The selection made applies to the main view if, after exiting the drawing, you select that drawing for Detail Member Groups with templates .
|
' Auto ' instructs group member detailing with templates to apply the setup choice made to Home > Project Settings > Fabricator > Concrete > Tilt-Up Panel Detail Settings > " Strike through interior voids " when you next auto detail your current drawing.
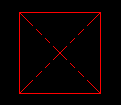
' Yes ' results in the showing of a strike through symbol -- a pair of crossing phantom lines -- in interior voids when your current drawing is subsequently detailed.
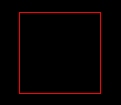
' No ' causes the phantom lines not to be shown.
Maximum shortening: ![]() Auto or
Auto or ![]() Yes or
Yes or ![]() No . This applies to both automatic detailing and interactive detailing of tilt-up panel member groups. The selection made here applies if, after exiting the drawing, you select that drawing for Detail Member Groups with templates .
No . This applies to both automatic detailing and interactive detailing of tilt-up panel member groups. The selection made here applies if, after exiting the drawing, you select that drawing for Detail Member Groups with templates .
' Auto ' instructs group member detailing with templates to apply the setup choice made to Home > Project Settings > Fabricator > Concrete > Tilt-Up Panel Detail Settings > " Maximum shortening " when you next auto detail your current drawing.
' Yes ' applies maximum shortening so that when drawing is shortened void openings may also be shortened. However, if the opening has a line across its length or width, it will not be shortened in that direction. Consequently, the opening will not be shortened at all when " Strike through interior voids " is also enabled.
' No ' causes maximum shortening not to be applied
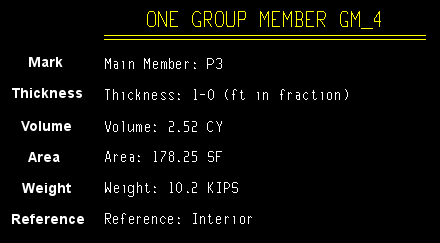
Detail label toggles :
|
|||
| Each option controls the display of a label below the detail callout. |
Mark: ![]() Auto or
Auto or ![]() Yes or
Yes or ![]() No . The selection made here applies if, after exiting the drawing, you select that drawing for Detail Member Groups with templates .
No . The selection made here applies if, after exiting the drawing, you select that drawing for Detail Member Groups with templates .
' Auto ' instructs group member detailing with templates to apply the setup choice made to Home > Project Settings > Fabricator > Concrete > Tilt-Up Panel Detail Settings > " Mark " when you next auto detail your current drawing.
' Yes ' results in the labeling of the main member piecemark of tilt up panel members when your current drawing is subsequently detailed.
' No ' causes the piecemark label not to be shown.
Thickness: ![]() Auto or
Auto or ![]() Yes or
Yes or ![]() No . The selection made here applies if, after exiting the drawing, you select that drawing for Detail Member Groups with templates .
No . The selection made here applies if, after exiting the drawing, you select that drawing for Detail Member Groups with templates .
' Auto ' instructs group member detailing with templates to apply the setup choice made to Home > Project Settings > Fabricator > Concrete > Tilt-Up Panel Detail Settings > " Thickness " when you next auto detail your current drawing.
' Yes ' results in the labeling of the " Thickness " (in the primary dimension " Units ") of tilt up panel members when your current drawing is subsequently detailed.
' No ' causes the thickness label not to be shown.
Volume: ![]() Auto or
Auto or ![]() Yes or
Yes or ![]() No . The selection made here applies if, after exiting the drawing, you select that drawing for Detail Member Groups with templates .
No . The selection made here applies if, after exiting the drawing, you select that drawing for Detail Member Groups with templates .
' Auto ' instructs group member detailing with templates to apply the setup choice made to Home > Project Settings > Fabricator > Concrete > Tilt-Up Panel Detail Settings > " Volume " when you next auto detail your current drawing.
' Yes ' results in the labeling of the volume (in the primary dimension " Units ") of tilt up panel members when your current drawing is subsequently detailed.
' No ' causes the volume label not to be shown.
Area: ![]() Auto or
Auto or ![]() Yes or
Yes or ![]() No . The selection made here applies if, after exiting the drawing, you select that drawing for Detail Member Groups with templates .
No . The selection made here applies if, after exiting the drawing, you select that drawing for Detail Member Groups with templates .
' Auto ' instructs group member detailing with templates to apply the setup choice made to Home > Project Settings > Fabricator > Concrete > Tilt-Up Panel Detail Settings > " Area " when you next auto detail your current drawing.
' Yes ' results in the labeling of the area (in the primary dimension " Units ") of tilt up panel members when your current drawing is subsequently detailed.
' No ' causes the area label not to be shown.
Weight: ![]() Auto or
Auto or ![]() Yes or
Yes or ![]() No . The selection made here applies if, after exiting the drawing, you select that drawing for Detail Member Groups with templates .
No . The selection made here applies if, after exiting the drawing, you select that drawing for Detail Member Groups with templates .
' Auto ' instructs group member detailing with templates to apply the setup choice made to Home > Project Settings > Fabricator > Concrete > Tilt-Up Panel Detail Settings > " Weight " when you next auto detail your current drawing.
' Yes ' results in the labeling of the weight (in the primary dimension " Units ") of tilt up panel members when your current drawing is subsequently detailed.
' No ' causes the weight label not to be shown.
Reference: ![]() Auto or
Auto or ![]() Yes or
Yes or ![]() No . The selection made here applies if, after exiting the drawing, you select that drawing for Detail Member Groups with templates .
No . The selection made here applies if, after exiting the drawing, you select that drawing for Detail Member Groups with templates .
' Auto ' instructs group member detailing with templates to apply the setup choice made to Home > Project Settings > Fabricator > Concrete > Tilt-Up Panel Detail Settings > " Reference " when you next auto detail your current drawing.
' Yes ' results in the labeling of the " Reference " ( ' Center ' or ' Interior ' or ' Exterior ' ) of tilt up panel members when your current drawing is subsequently detailed.
' No ' causes the reference label not to be shown.
page 1 | contents | settings > drawing settings | top
To close Tilt-Up Panel Detail Settings :
![]()
![]()
![]()
"OK" (or the Enter key) closes the Rebar Schedule Placements window and saves its contents to the current Fabricator . Settings on this window will be applied only so long as that Fabricator remains your current Fabricator. To change to a different Fabricator , Home > press "fabname" > double-click the Fabricator you want.
"Cancel" (or the Esc key or the
button) closes this window without saving any changes made to it.
"Reset" undoes all changes made to this window since you first opened it. The window remains open.
page 1 | contents | settings > drawing settings | top
