Sheet Revisions
- General Overview
- Tips and Tricks
- Related Tools
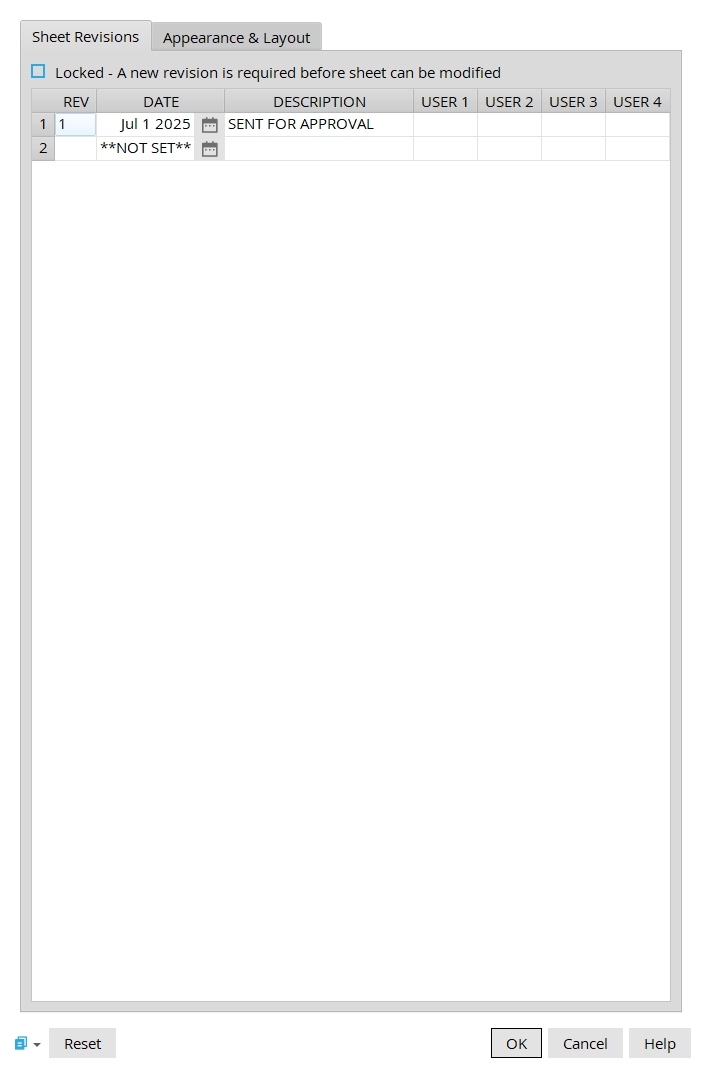
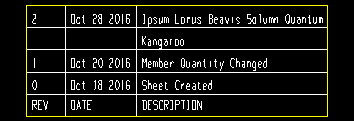
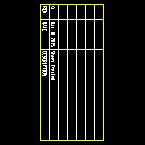
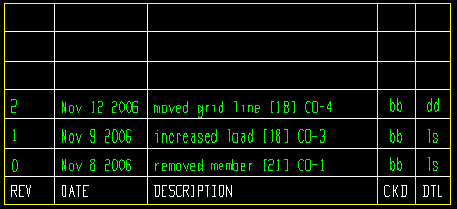
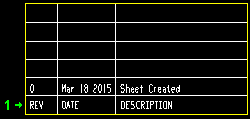
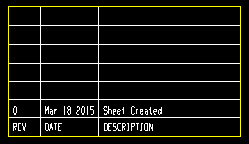
REV: Alphabetical or numerical entries, depending on the selection made to Increment sheet revision when you Increment Sheet Revisions. Also, if the box is checked for Locked... in the sheet revision editor, automatic detailing enters the next letter or number to this column if a member detail on the sheet is changed as a result of re-detailing with the box checked for Detail with revisions.
DATE: If editing the revision chart, select a date from the widget. When you Increment Sheet Revisions, the default entry made to this column on the revision chart is today's date in the form of month day year (Jul 1 2025).
DESCRIPTION: When a member is detailed, if Detail with revisions is selected and the member shows up on a sheet that contains a revision chart, the Short revision description from Member Status Review will be entered in the revision chart’s column, but only if the description has changed since the last time this member was detailed. If Increment Sheet Revisions is used, any entry added to the Revision description will show up in this column.
USER 1 or USER 2 or USER 3 or USER 4: Entries can be made to these columns by editing the revision chart on the sheet, using Sheet Revision Chart Editor or Increment Sheet Revisions.
Appearance & Layout
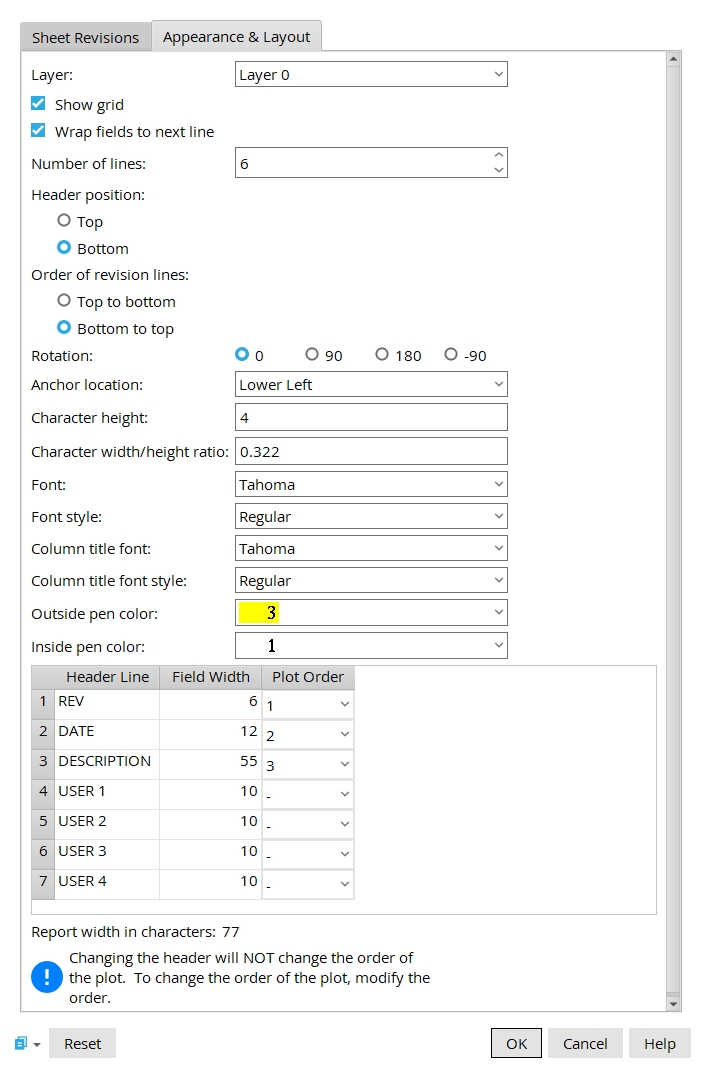
Layer: The drawing layer the revision chart is added to.
|
|
|
|
|
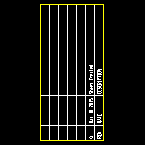
If this box
is checked, the perimeter and interior lines will be shown on the revision chart.
If the box
is not checked, only the revision line text and column text will be shown.
Setup: Home > Project Settings > Fabricator > Detailing > Drawing Presentaton > Revision Chart > Show grid.
Wrap fields to next line: ![]() or
or ![]() . This applies to the revision chart that you are editing when, in the Sheet Revision Chart Editor, more characters have been entered to a cell than that cell has room for.
. This applies to the revision chart that you are editing when, in the Sheet Revision Chart Editor, more characters have been entered to a cell than that cell has room for.
|
If this box
If the box
Setup: Home > Project Settings > Fabricator > Detailing > Drawing Presentaton > Revision Chart > Wrap fields to next line.
Number of lines: The minimum number of lines (including the header) that will be shown in this revision chart. This number is a minimum because it will be changed automatically, as needed, when new lines are entered to the Sheet Revision Chart Editor.
For multiple revision charts on a sheet, the first chart will be filled until all of the Number of lines are filled, then the second chart will begin to be filled.
Setup: Home > Project Settings > Fabricator > Detailing > Drawing Presentaton > Revision Chart > Number of lines.
Header position: ![]() Top or
Top or ![]() Bottom. Assuming that Rotation is set to 0, the top of a revision chart is the actual top of the revision chart.
Bottom. Assuming that Rotation is set to 0, the top of a revision chart is the actual top of the revision chart.
Top places the Header Line text at the top of the revision chart.
Setup: Home > Project Settings > Fabricator > Detailing > Drawing Presentaton > Revision Chart > Header position.
Order of revision lines : ![]() Top to bottom or
Top to bottom or ![]() Bottom to top.
Bottom to top.
Setup: Home > Project Settings > Fabricator > Detailing > Drawing Presentaton > Revision Chart > Order of revision lines.
Rotation: 0º or 90º or 180º or -90º. Rotation is counterclockwise around the Anchor location of the revision chart.
| Anchor location = Lower left | |||
| 0º | 90º | 180º | -90º |

|
|
|
|
Setup: Home > Project Settings > Fabricator > Detailing > Drawing Presentaton > Revision Chart > Rotation.
Anchor location : Upper left or Upper right or Lower left or Lower right. This option lets you change the spatial orientation of an already located revision chart with respect to its anchor point. Changing the Anchor location moves the revision chart, not the anchor point.
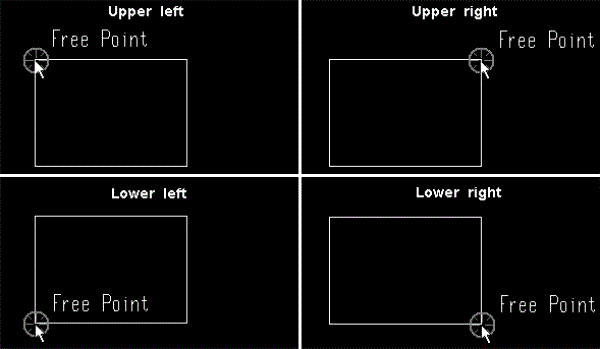
Upper left orients the revision chart so that its anchor point is at its upper, left corner.
Upper right orients the revision chart so that its anchor point is at its upper, right corner.
Lower left orients the revision chart so that its anchor point is at its lower, left corner.
Lower right orients the revision chart so that its anchor point is at its lower, right corner.
Setup: Home > Project Settings > Fabricator > Detailing > Drawing Presentaton > Revision Chart > Anchor location.
Character height: The character height (in millimeters) of all text in the revision chart. This includes both the revision line text and the column title text.
Setup: Home > Project Settings > Fabricator > Detailing > Drawing Presentaton > Revision Chart > Character height.
Character width/height ratio: The width/height of the characters that make up the text in the revision chart. This includes both the revision line text and the column title text.
Font dependencies: A ratio of 0.6 renders a TrueType font at its native width. A ratio larger than 0.6 stretches the font.
Setup: Home > Project Settings > Fabricator > Detailing > Drawing Presentaton > Revision Chart > Character width/height ratio.
Font: Any font that is listed can be selected. The font that is selected applies to the revision line text only.
|
The green-colored text in this revision chart is printed in the Font that is selected here. |
Be sure to also choose the Font style that you want. The Character height and Character width/height ratio set the font size.
Setup: Home > Project Settings > Fabricator > Detailing > Drawing Presentaton > Revision Chart > Sheet revision font.
Font style: The style ( Bold or Bold Italic or Italic or Regular ) of the selectedFont. Different fonts have different styles available to them.
Available styles are listed alphabetically in the font style list box, and the first style that is listed is the style that is selected by default.
Setup: Home > Project Settings > Fabricator > Detailing > Drawing Presentaton > Revision Chart >Sheet revision font style.
Column title font: Any font that is listed can be selected. The font that is selected applies to the column title text, not to revision line text.
|
Line 1 is where the Column title font applies. |
Be sure to also choose the Column title font style that you want. The Character height and Character width/height ratio set the font size.
Setup: Home > Project Settings > Fabricator > Detailing > Drawing Presentaton > Revision Chart > Column title font.
Column title font style: The style ( Bold or Bold Italic or Italic or Regular ) of the selected Column title font. Different fonts may have different styles available to them.
Available styles are listed alphabetically in the font style list box, and the first style that is listed when you change to a different Column title font is automatically selected as the style for that font.
Setup: Home > Project Settings > Fabricator > Detailing > Drawing Presentaton > Revision Chart > Column title font style.
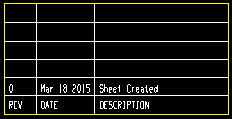
Outside pen color: 1 or 2 or 3 or 4 or 5 or 6 or 7. This sets the Inside pen color and Line Weights that will be applied to the revision chart's perimeter.
|
In this example, the color is pen 3 (yellow). |
Setup: Home > Project Settings > Fabricator > Detailing > Drawing Presentaton > Revision Chart > Outside pen color.
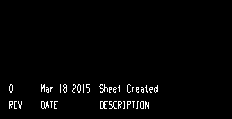
Inside pen color: 1 or 2 or 3 or 4 or 5 or 6 or 7. This sets the Inside pen color and Line Weights that will be applied to the interior grid of the revision chart.
|
|
In this example, the color is pen 1 (white). |
Setup for Objects > Revision Chart > Place: Home > Project Settings > Fabricator > Detailing > Drawing Presentaton > the Revision Chart tab > Inside pen color.
Chart layout
Header Line: The text you want for a particular column in the revision chart. You can type over the current header line with any number of characters up to the Field Width number.
Field Width: The number of characters that you want each column to be wide. A space is added to the beginning and the end to create margins for each column. Note that if you do not allocate enough space for an entry in a column, the entry will overwrite into the next column if Wrap fields to next line is ![]() unchecked.
unchecked.
Plot Order: Inactive (-) or 1 or 2 or 3, etc.
Inactive (-) prevents a column from appearing on the revision chart.
1 or 2 or 3, etc. sets the order in which the column appears on the revision chart from left to right.
Report width in characters: The total number of characters that the revision chart will be wide. This number is automatically calculated from the Field Width assigned to columns on the revision chart for which a Plot Order of 1 or greater has been assigned. Two characters are added for each column in the chart (one space at the beginning, the other at the end) to create margins for separating the columns in the report. Making a particular column on the report Inactive decreases the chart width. Assigning a Print Order number to a column that was formerly Inactive increases the chart width.
![]() Copy, Paste, Save, Load buttons:The position of these "form" buttons on the window tells you what settings they apply to. Click here for more information.
You can
Copy, Paste, Save, Load buttons:The position of these "form" buttons on the window tells you what settings they apply to. Click here for more information.
You can ![]() Copy the settings on this window, then
Copy the settings on this window, then ![]() Paste those settings to a different edit window of the same type.
You can
Paste those settings to a different edit window of the same type.
You can ![]() Save the settings on this window to a file stored in a global folder that is used by your current version of SDS2. Give the file a name that will help other users identify its purpose. You can
Save the settings on this window to a file stored in a global folder that is used by your current version of SDS2. Give the file a name that will help other users identify its purpose. You can ![]() Load a saved file to replace the settings on this window (except Piecemark) with the settings that are stored in the file you select.
When editing multiple windows at the same time, Paste and Load replace mixed entries to a single field with a single entry. Copy and Save ignore fields with mixed entries, treating them as if they have no entry or do not exist.
Load a saved file to replace the settings on this window (except Piecemark) with the settings that are stored in the file you select.
When editing multiple windows at the same time, Paste and Load replace mixed entries to a single field with a single entry. Copy and Save ignore fields with mixed entries, treating them as if they have no entry or do not exist.
OK (or the Enter key) closes this screen and applies the settings.
Cancel (or the Esc key) closes this screen without saving any changes.
Reset undoes all changes made to this screen since you first opened it. The screen remains open.