 Layer Add ( Drawing Editor )
Tool summary :
Also see :
- Layer selection tool (menu updates as a result of Layer Add )
- Edit Layer (lets you change the name of the new layer)
- Undo (undoes drawing layer changes)
page 1 | contents | objects > layers > | objects -- layers
 Comment layers in Site Planning:
If your current drawing is not a crane placement drawing , then when you Layer Add in Site Planning the newly added layer is a comment layer.
A comment layer is a type of drawing layer. On drawing types other than crane placement drawings, users of Site Planning can add objects only to comment layers. A comment layer is automatically created for you the first time you Open a non crane placement drawing that created in a full-featured SDS2 program . If you then alter that drawing and Save your changes, that comment layer becomes a permanent part of that drawing.
On non crane placement drawings, graphic objects on non-comment layers can be reviewed in Site Planning, but cannot be changed. Nor can new objects be placed onto non-comment layers. You can, however, copy items from non-comment layer to comment layers using Area Copy or Save Standard Detail together with Add Standard Detail or Copy together with Paste .
Comment layers can optionally be Plotted , or they can be masked while other layers are plotted.
Comment layers can be reviewed, deleted or altered in SDS2 Detailing and other full-featured SDS2 programs . For example, an SDS2 Detailing user can add comments to a comment layer or create an entirely new comment layer so that a user of Site Planning can see those comments.
Also see: Making comments & entering status data .
page 1 | contents | objects > layers > | objects -- layers | top
 Step-by-step instructions :
1 . In the Drawing Editor , invoke Layer Add using any one (1) of the following methods:
Method 1 : Click the Layer Add icon. The icon can be taken from the group named ' Objects -- Layers ' and placed on a toolbar (classic) or the ribbon (lightning).
Method 2 : If " Drawing Editor layout style " is ' Classic ', you can use the menu system to choose Objects > Layers > Add .
Method 3, 4 or 5 : Layer Add can also be invoked using a keyboard shortcut , the context menu , or a mode . For the ' Lightning ' layout style, configuration of the interface is done using Customize Interface .
Method 6 : While Layers Mode mouse bindings are active, middle-click ( Add ).
2 . The Layer Name dialog opens. On it is an entry field for naming the layer. Since the layer is a comment layer, you may want to give it a name that identifies it as such.
Alternative 1 : Type in the name you want to give the new layer you are creating (or use the default name the program assigns), then press the " OK " button. Go to step 3.
Alternative 2 : Press the " Cancel " button to end this operation without adding a new layer. Do not continue.
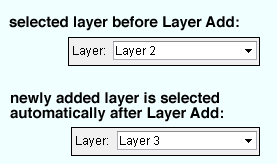
3 . A new layer is added to your current drawing. The new layer is the selected layer . Unless you select a different layer on your layer selection tool, all graphical objects you subsequently Add to your current drawing are, by default, added to this layer.

Note: Unless you select a different layer on your layer selection tool, all graphical objects you subsequently add to your current drawing are, by default, added to this layer. Also, you can Undo the adding of a new layer.
page 1 | contents | objects > layers > | objects -- layers | top