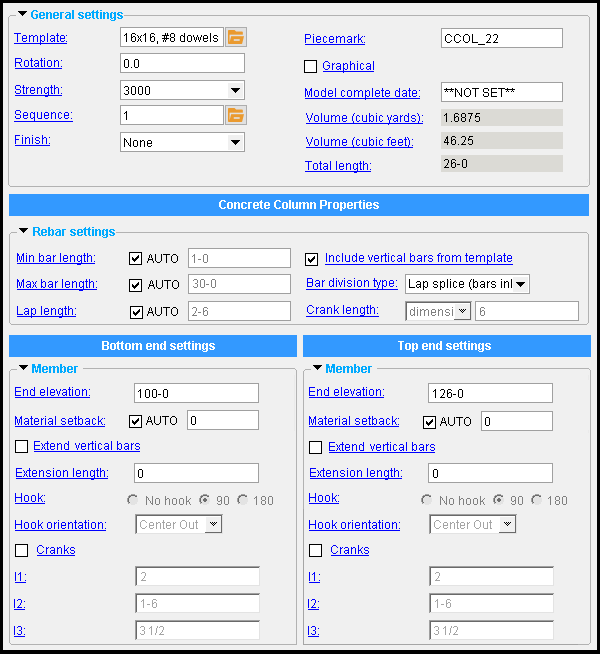
 CIP Column ( Modeling > F2 >
  Concrete / Rebar > select " CIP Column ")
Tool summary :

|
To open this window :
- With the Default filter selected, double-click a cast in place column member.
- Add a cast in place column .
On this page :
Also see :
- Modeling (where a concrete column can be added or edited)
- Cast in place column (definition)
- Concrete Column Edit window, whose options are identical to those for the cast in place column.
- Column Templates (setup window that lists available cast in place column templates)
- Column Template Editor (setup window for editing/reviewing an individual template)
- Tie Zone (may be added to a concrete column)
- Spiral Zone (may be added to a concrete column)
concrete | F2 > concrete / rebar > | cast in place column | top
 To add a cast in place column :
Before adding a cast in place column , you should confirm that the " Template " that you want to use for the column has been properly set up on the Column Templates window. The template sets, for example, whether the profile of the column is rectangular, square, round, or an irregular shape.
A cast in place column can be added in Modeling by pressing F2 to open the Member Type Selection window, then double-clicking " Cast in Place Column ."
Only one work point is required to locate a column in a plan view . If that plan view is at the elevation you want for the bottom end of the column, then locating a point using INCL ( Intersection of Construction Lines ) will place the bottom end of the column at that elevation. A column added in this way is perfectly vertical.
Two work points are required to add a column in an elevation view. The order in which you locate these points does not matter since the work point located at lower elevation will always be recorded as the " Bottom end " work point.
On the Cast in PlaceColumn Edit window, you must set a different " End elevation " for each end of the column. Also, the entering of a " Template " is required.
concrete | F2 > concrete / rebar > | cast in place column | top


