The General Presentation setup window ( Fabricator Settings )
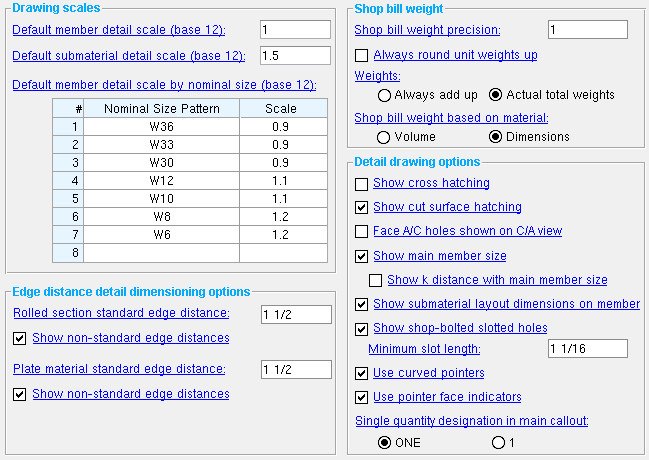
| Settings on this window are read-only . They tell you how this window has been set up for this Fabricator in a full-featured SDS2 program . |
- When members and submaterials are automatically detailed in a full-featured SDS2 program , the program will look to the Fabricator Options that you can review on window to determine the scale of the drawings and how, for example, holes and cuts in material are to be represented on the drawings. This window also affects how material weights are calculated in the member bill of material.
page 1 | contents | home > project settings > fabricator > detailing > | classic
To open General Presentation :
Method 1 : Home > Project Settings > Fabricator > Detailing > General Presentation .
Methods 2, 3 & 4 : In Modeling or the Drawing Editor , choose Settings > Fabricator Settings > General Presentation (classic), or use a keyboard shortcut , or click the icon.
page 1 | contents | home > project settings > fabricator > detailing > | classic | top
Default member detail scale (base 12 or base 10): The default scale ( base 12 or base 10 ) that member details will be drawn to the next time members other than stairs are automatically detailed in a full-featured SDS2 program . The words in parenthesis tell you which type of scale is used. This default scale may be overridden, for example, if the " Default member scale by nominal size " table has been filled out.
(base 12) means imperial dimensioning is being used, and the scale shown here is the number of inches that represent 1 ft in the shop. ( Example: if ' 1 ' is entered, 1 inch on the detail equals 1 ft in the shop; if ' 12 ' is entered, 12 inches on the detail equals 1 ft in the shop; if ' 0.125 ' is entered, 1/8 inch equals 1 ft in the shop).
(base 10) means metric dimensioning is being used, and the scale shown here is the number of millimeters that represent 10 mm in the shop. ( Example: If ' 10 ' is entered here, 10 mm on the detail equals 10 mm in the shop; if ' 1 ' is entered, 1 mm on the detail equals 10 mm in the shop).
Default submaterial detail scale: The scale ( base 12 or base 10 ) that submaterial details will be drawn to the next time submaterial is automatically detailed in a full-featured SDS2 program . The words in parenthesis tell you which type of scale is used.
(base 12) means imperial dimensioning is being used, and the scale shown here is the number of inches that represent 1 ft in the shop. ( Example: if ' 1 ' is entered, 1 inch on the detail equals 1 ft in the shop; if ' 12 ' is entered, 12 inches on the detail equals 1 ft in the shop; if ' 0.125 ' is entered, 1/8 inch equals 1 ft in the shop).
(base 10) means metric dimensioning is being used, and the scale shown here is the number of millimeters that represent 10 mm in the shop. ( Example: If ' 10 ' is entered here, 10 mm on the detail equals 10 mm in the shop; if ' 1 ' is entered, 1 mm on the detail equals 10 mm in the shop).
Default member detail scale by nominal size (base 12 or base 10): This applies to beams, columns, braces, girts and purlins, but not to stairs or handrails. It sets the scale for automatic detailing of members in a full-featured SDS2 program . If automatic detailing cannot find a nominal size pattern from this table and a different scale has not been specified, the program uses the " Default member detail scale ."
Nominal Size Pattern Scale (base 12 or base 10) To this column, enter a pattern from the beginning of a section size name. For example, ' W14 ' catches all wide flange members whose section size names begin with "W14". The words in parenthesis tell you whether to use a 12:1 (base 12) or 10:1 (base 10) scale. You should enter a scale that is larger than or smaller than the " Default member detail scale ." ' W24 ' and ' w24' are seen as equivalent entries since the search for matching strings that Detail Members performs is not case sensitive.
If a scale is set for the pattern ' W14x90 ', Detail Members applies that scale only to members with W14x90 section sizes. If one scale is set for the pattern ' W14x90 ', a second scale for ' W14x9 ', and a third scale for ' W14 ', member detailing will apply the first scale for a W14x90 member, that second scale for a W14x99 member and the third scale for a W14x60 member.
A pattern of ' W ' will catch all wide flange members. A pattern of ' W4 ' will catch all wide flange members with section sizes that begin with "W4". In the default USA file , for example, that is all section sizes from W40x149 to W44x335.
You can enter a pattern that can recognize any material section size in the local shape file, including channel, angle, W tee, welded plate wide flange, welded plate box, etc.
The " Labels character height " " Labels width/height ratio " " Weld symbols character height " and dimension " Character height " and dimension " Character width " are set independently of the member scale, in Drawing Presentation .
page 1 | contents | home > project settings > fabricator > detailing > | classic | top
------ Edge distance detail dimensioning options ------
Rolled section standard edge distance: The distance (in the appropriate " Units ") from the edge of the material to the center of the first hole. Rolled sections are channel , wide flange , HSS rectangular (tube), angle or HSS round (pipe) sections.
Effect on full-featured SDS2 programs: The standard edge distance entered here is referenced if details are generated when the box for " Show non-standard edge distances " is checked.
Show non-standard edge distances: ![]() or
or ![]() . The edge distance is the distance from the edge of the material to the center of the first hole.
. The edge distance is the distance from the edge of the material to the center of the first hole.
If this box is checked (
), the edge distance will be dimensioned on details where the actual edge distance is something other than that specified as the " Rolled section standard edge distance ."
Plate material standard edge distance: The distance (in the appropriate " Units ") from the edge of the plate to the center of the first hole.
Effect on full-featured SDS2 programs: The standard edge distance entered here is referenced when details are generated if the box for " Show non-standard edge distances " is checked (below).
Show non-standard edge distances: ![]() or
or ![]() . The edge distance is the distance from the edge of the plate to the center of the first hole.
. The edge distance is the distance from the edge of the plate to the center of the first hole.
If this box is checked (
), the edge distance will be dimensioned on details where the actual edge distance is something other than that specified as the " Plate material standard edge distance ."
page 1 | contents | home > project settings > fabricator > detailing > | classic | top
------ Shop bill weight ------
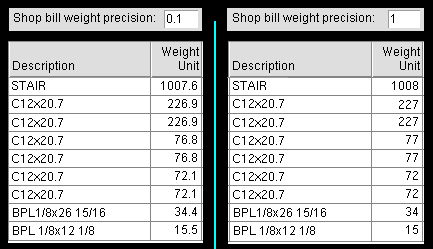
Shop bill weight precision: A decimal value from 0.1 to 1 . The entry shown here applies to the bills of material of all member details that currently exist in your current Job as well as to yet-to-be-created member details.
|
Effect on a full-featured SDS2 program: The precision shown here is the accuracy to which the weight of the material will be calculated on the bill of material. You can see this value reflected in the " Unit Weight " or " Total Weight " columns in the Bill Editor , or on a plotted bill of material, or on a Bill of Material Report (or any other report based on the bill of material).
Examples: If metric dimensioning is used, and the user of a full-featured SDS2 program wants the shop bill weight to be calculated to the nearest kilogram, the user would enter ' 1 '. For imperial dimensioning, if the user wants the shop bill weight to be calculated to the nearest 0.1 pound, the user would enter ' 0.1 '.
Always round unit weights up: ![]() or
or ![]() . This applies to the member bill of material that is generated during automatic detailing of members in a full-featured SDS2 program . It also applies to reports that are based on the bill of material.
. This applies to the member bill of material that is generated during automatic detailing of members in a full-featured SDS2 program . It also applies to reports that are based on the bill of material.
|
If this box is checked (
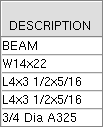
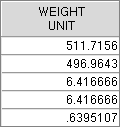
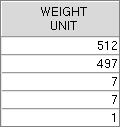
), the reported value for the " Unit Weight " is calculated from the stored value by always rounding up to the nearest increment that is set by the " Shop bill weight precision ." In the above example, the weights of the L4x3 1/2x5/16 angles are rounded up ( 6.416666 to 7 ).
If the box is not checked (
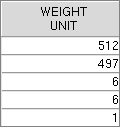
), the reported value of the " Unit Weight " is calculated from the stored value by rounding up or down to the nearest increment that is set by the " Shop bill weight precision ." In the above example, the weights of the L4x3 1/2x5/16 angles are rounded down ( 6.416666 to 6 ).
Weights: ![]() Always add up or
Always add up or ![]() Actual total weights . This applies to the member bill of material that is generated during automatic detailing of members in a full-featured SDS2 program . It also applies to reports that are based on the bill of material.
Actual total weights . This applies to the member bill of material that is generated during automatic detailing of members in a full-featured SDS2 program . It also applies to reports that are based on the bill of material.
|
'
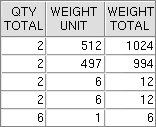
Always add up ' instructs the bill editor in a full-featured SDS2 program to calculate each submaterial's " Total Weight " by multiplying its " Total Quantity " by the reported value for its " Unit Weight " ( 12 = 2 x 6 in the example, line 3). The " Total Weight " of the member, as reported in line 1, is also an exact multiple of its " Unit Weight " times its " Total Quantity " ( 1024 = 512 x 2 in the example).
'
Actual total weights ' instructs the program to calculate each submaterial's " Total Weight " by multiplying its " Total Quantity " by the stored value of its " Unit Weight " ( 13 = 2 x 6.416666 in the example, line 3). As a result, the actual total weight (after rounding to the setup precision) will be shown for each line in the " Total Weight " column.
Note: The stored value for " Unit Weight " can be shown by doing a right-click . The reported value for " Unit Weight " is subject to the " Shop bill weight precision " and whether or not you choose to " Always round unit weights up ."
Shop bill weight based on material: Volume or Dimensions . Since member details are the only drawing type that has a system-generated bill of material, this option only applies to automatically detailing of members in a full-featured SDS2 program .
' Volume ' indicates that the actual shipping weight of the material is reported in the bill of material and on the total weight line. The weight of the material is calculated by subtracting the cut-off material (copes and holes) from the dimensional weight.
' Dimensions ' indicates that a calculated weight based on the material's overall dimensions is reported in the bill of material and on the total weight line.
page 1 | contents | home > project settings > fabricator > detailing > | classic | top
------ Detail drawing options ------
Show cross hatching: ![]() or
or ![]() . The selection shown here applies during automatic detailing of members in a full-featured SDS2 program . There is no need to ever show hatch lines on submaterial details.
. The selection shown here applies during automatic detailing of members in a full-featured SDS2 program . There is no need to ever show hatch lines on submaterial details.
|
If this box is checked (
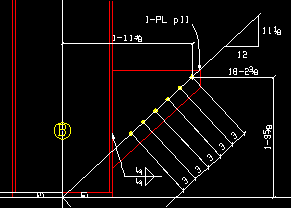
), then hatch lines (/ / / / /) are drawn when a material cross-section is to be designated on a system-generated member details.
If the box is not checked (
), no such hatch lines are drawn on member details.
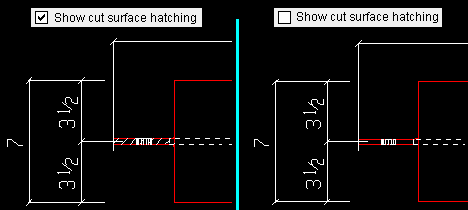
Show cut surface hatching: ![]() or
or ![]() . The choice shown here applies during automatic detailing of members or submaterial in a full-featured SDS2 program .
. The choice shown here applies during automatic detailing of members or submaterial in a full-featured SDS2 program .
|
If the box is checked (
), then hatch lines (/ / /) are drawn on a system-generated member and submaterial details to designate cut surfaces resulting from copes, flange thinning, etc.
If the box is not checked (
), hatch lines are not drawn.
Face A/C holes shown on face C/A view on member detail: ![]() or
or ![]() . The choice shown here applies during automatic detailing of members in a full-featured SDS2 program .
. The choice shown here applies during automatic detailing of members in a full-featured SDS2 program .
|
If this box is checked (
), flange holes in the opposite flange to the flange view shown on a member detail will be depicted on that flange view if the depth checking limits for that view are sufficient.
If the box is not checked (
), flange holes in the opposite flange to the flange view shown on a member detail will not be depicted on that flange view.
Show main member size: ![]() or
or ![]() . The selection shown here applies to the callouts on member details generated during automatic detailing of members in a full-featured SDS2 program .
. The selection shown here applies to the callouts on member details generated during automatic detailing of members in a full-featured SDS2 program .
|
If the box is checked (
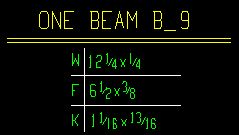
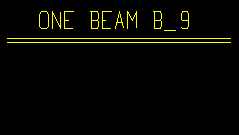
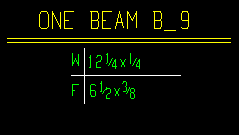
), the member size is shown beneath the callout on member details.
If the box is not checked (
), the member size is not shown in this way.
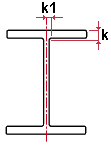
Show k distance with main member size: ![]() or
or ![]() . The choice shown here applies during automatic detailing of members in a full-featured SDS2 program .
. The choice shown here applies during automatic detailing of members in a full-featured SDS2 program .
|
The values for " k distance (detail) " ( k ) and " Flange thickness " ( tf ) and " Web thickness " ( tw ) and " k1 distance " ( k1 ) are stored in the local shape file . |
|
If this box and " Show main member size " are checked (
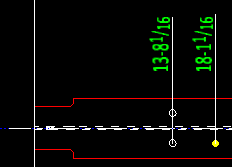
), the " k distance x k1 distance " will be reported under the main member size on the member detail.
If this box is not checked (
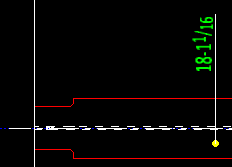
), the k distance and k1 distance are not be shown under the main member size.
Show sub-material layout dimensions on member detail: ![]() or
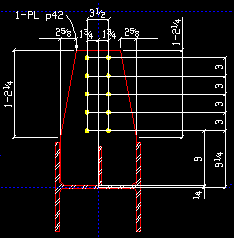
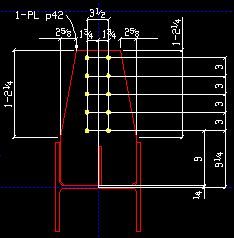
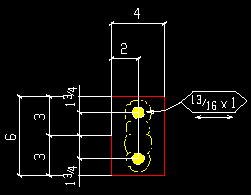
or ![]() . The choice shown here applies during automatic detailing of members in a full-featured SDS2 program . This is a special-case option that applies when showing layout dimensions would cause the sloping hole dimensions to be drawn on the opposite side of the material. This rarely occurs. One special case where it will occur is a gusset plate to the base of a column with a base plate.
. The choice shown here applies during automatic detailing of members in a full-featured SDS2 program . This is a special-case option that applies when showing layout dimensions would cause the sloping hole dimensions to be drawn on the opposite side of the material. This rarely occurs. One special case where it will occur is a gusset plate to the base of a column with a base plate.
|
If the box is checked (
), then submaterial layout dimensions are shown on the member detail.
If the box is not checked (
), complete submaterial layout dimensions will appear on the submaterial details only.
Show shop-bolted slotted holes: ![]() or
or ![]() . The selection shown here applies to automatic detailing of members in a full-featured SDS2 program .
. The selection shown here applies to automatic detailing of members in a full-featured SDS2 program .
|
If this box is checked (
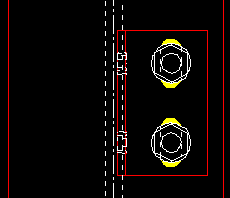
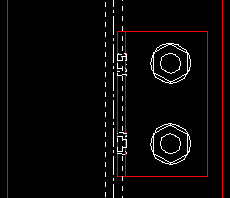
), then shop bolted slotted holes that are longer than the " Minimum slot length " (entered below) are shown along with shop bolts on member details.
If the box is not checked (
), then the slots are hidden and only the shop bolts are shown.
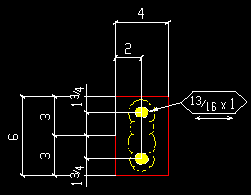
Minimum slot length: The minimum length (in the primary dimension " Units " or in other units ) of shop bolted slotted holes that will be shown on subsequently generated details when the box for " Show shop bolted slotted holes on details " is checked.
| slot length |
|
|
Slot length is the distance between the two points farthest from one another on the perimeter of a slot.
Use curved pointers: ![]() or
or ![]() . The selection shown here applies during automatic detailing of members or submaterial in a full-featured SDS2 program .
. The selection shown here applies during automatic detailing of members or submaterial in a full-featured SDS2 program .
|
If the box is checked (
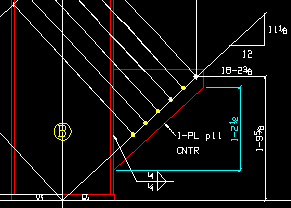
), automatic detailing is permitted to draw curved pointers on subsequently generated member details and submaterial details.
If the box is not checked (
), automatic detailing only draws straight pointers.
Use pointer face indicators: ![]() or
or ![]() . The selection shown here applies during automatic detailing of members in a full-featured SDS2 program .
. The selection shown here applies during automatic detailing of members in a full-featured SDS2 program .
|
If this box is checked (
), automatic detailing for members adds a face indicator to pointers drawn to the face of a material in order to call out the submaterial piecemark of that material.
If the box is not checked (
), automatic detailing for members does not include a face indicator on pointers that it draws.
Also see: Regardless of the choice made here, you can add or remove a face indicator in the Drawing Editor using " Face indicator " on the Pointer Edit window.
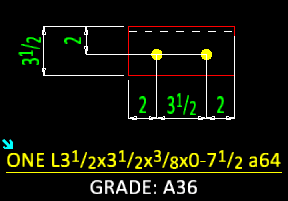
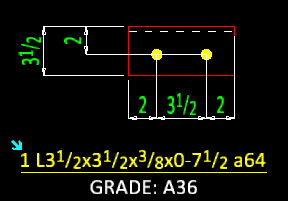
Single-quantity desgnation in main callout on details: ![]() ONE or
ONE or ![]() 1 . The choice made here applies to the details of members or submaterials during automatic detailing in a full-featured SDS2 program .
1 . The choice made here applies to the details of members or submaterials during automatic detailing in a full-featured SDS2 program .
|
||||||||
|
For this option to apply to submaterial details," |
'
ONE ' instructs automatic detailing to use ' ONE ' as the designation for quantity in the member or material main callout.
'
1 ' instructs automatic detailing to use ' 1 ' as the designation for quantity in the member or material main callout.
page 1 | contents | home > project settings > fabricator > detailing > | classic | top
