 Construction Line Add ( Modeling & Drawing Editor )
Tool summary :
Also see :
- User and Site Options > General > Default color (sets color of newly added construction lines)
- Comment layer (on most drawings, you must add objects to this type of layer)
- Crane placement drawings (drawing type on which you can add objects to non-comment layers)
- Construction Line Add Material (alternative to Construction Line Add )
- Add Construction Grid (alternative in Modeling )
page 1 | contents | model > (3d) | objects > (2d) | topic (3d) | topic (2d) | top
 To invoke Construction Line Add :
Method 1 : Click the Add Construction Line icon, which is pictured above. The icon can be taken from the group named ' Model -- Construction Lines ' ( Modeling ) or ' Objects -- Construction Lines ' ( Drawing Editor ) and placed on a toolbar (classic) or the ribbon (lightning).
Method 2 : If " Modeling layout style " is ' Classic ', you can use the menu system to choose Model > Construction Lines > Add . When " Drawing Editor layout style " is ' Classic ', choose Objects > Construction Lines > Add .
Method 3, 4 or 5 : Construction Line Add can also be configured to be invoked using a keyboard shortcut , the context menu , or a mode . For the lightning interface, this configuration is done using Customize Interface . The default keyboard shortcut is c a .
Method 6 : With Construction Line Mode mouse bindings active, middle-click ( Add ).
page 1 | contents | model > (3d) | objects > (2d) | topic (3d) | topic (2d) | top
 Construction Line Add (by locating two points) :
The following instructions assume that you are using a 3-button mouse and that User and Site Options > General > " Point location target " is set to ' Fancy ' ( ![]() ). Also, the mouse bindings shown in these instructions may look different on your workstation.
). Also, the mouse bindings shown in these instructions may look different on your workstation.
To be able to see the construction lines you are adding: If you are in the Drawing Editor , the display of "
Construction lines/circles " needs to be on (checked). In Modeling , the display of "
Construction lines/circles " needs to be on.
| This example shows EXPT only ... | |

|
1 . Invoke Construction Line Add . |

|
2 . Place the pointer ( |

|
3 . Place the pointer ( |
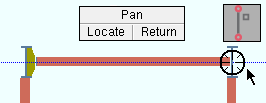
|
4 . A construction line is drawn through the two points. Right-click ( Return ) if you are done. |
Tip: Locating the same point in steps 2 and 3 (above) draws a construction line through that point at a 90 degree angle (vertical on the screen).
Note: Auto , INCL , INRL , EXPT , FRPT , VTPT , DXDY , MDPT , CNTR and ONLN can be used to locate points; ANGL , BSCL , BSMB and BSRL cannot. TANC and POLAR can be used to add a second point.
page 1 | contents | model > (3d) | objects > (2d) | topic (3d) | topic (2d) | top
 Construction Line Add (at an angle through a point) :
You can use Construction Line Add to locate a point through which you want the construction line to go and the angle you want the construction line to be at. The Locate option ANGL lets you designate any angle. The option PERP draws a construction line perpendicular to an existing construction line. Before adding construction lines in the Drawing Editor , use the layer selection tool to select the comment layer that you want to add the construction lines to. The following instructions assume that you are using a 3-button mouse and that the " Point location target " is set to ' Fancy ' ( ![]() ). Also, the mouse bindings shown in these instructions may look different on your workstation.
). Also, the mouse bindings shown in these instructions may look different on your workstation.
| This example shows ANGL only ... | |

|
1 . Invoke Construction Line Add . |

|
2 . Place the pointer ( |

|
3 . The status line prompts, "Locate second point ." Select ANGL , then left-click ( Locate ) anywhere in the drawing area. |

|
4 . Enter the angle that you want the construction line to be rotated from horizontal. |

|
5 . The construction line is drawn through the point at the angle you entered. Right-click ( Return ) unless you want to add more. |
page 1 | contents | model > (3d) | objects > (2d) | topic (3d) | topic (2d) | top
 Construction Line Add (by basing off a parallel item) :
Both Modeling and the Drawing Editor provide Locate options for generating up to 100 construction lines that are parallel to lines or construction lines or straight grid lines or to member worklines . The Locate options you can use to do this are BSMB , BSCL and BSRL . Before adding construction lines in the Drawing Editor , use the layer selection tool to select the comment layer that you want to add the construction lines to. The following instructions assume that you are using a 3-button mouse. Also, the mouse bindings shown in these instructions may look different on your workstation.
| This example shows BSMB only ... | |

|
1 . Invoke Construction Line Add . |
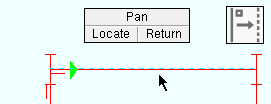
|
2 . With the member you want to base off of highlighted and BSMB the Locate option, left-click ( Locate ). |

|
3 . On the Base Member window, enter a dimension, then press the " Add " button. |

|
4 . The construction line appears on screen (1-0 foot from the member). |

|
5 . Either base more construction lines off the one just added, or press " Exit ." |
Tip: For BSMB , BSCL and BSRL , the X-Y-Z display tells you the angle of the construction line or line or member work line .
page 1 | contents | model > (3d) | objects > (2d) | topic (3d) | topic (2d) | top
 Construction Line Add (using BSCL , BSRL , BSMB for a second point) :
You can use Construction Line Add to draw a construction line through the first point that you locate that is parallel to the item you locate using BSMB , BSCL or BSRL . This is different than using BSMB , BSCL or BSRL instead of point location, which is discussed above . The following instructions assume that you are using a 3-button mouse and that the " Point location target " is set to ' Fancy ' ( ![]() ).
).
| This example shows BSMB only ... | |

|
1 . Invoke Construction Line Add . |
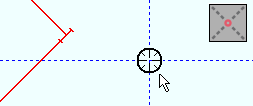
|
2 . Place the mouse pointer ( |
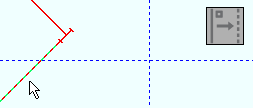
|
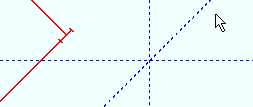
3 . Select BSMB as the Locate option. Place the mouse pointer ( |
|
4 . The program draws a construction line through the first point, parallel to the member located in step 3. |
page 1 | contents | model > (3d) | objects > (2d) | topic (3d) | topic (2d) | top