 Detail Submaterial ( Home & 3D & 2D)
Tool summary :
Also see :
- Submaterial details (topic)
- Submaterial Annotations and Dimensioning (window with detailing options)
- Detailing Defaults ( Fabricator > Detailing > )
- Default submaterial detail scale ( Fabricator > Detailing > General Presentation )
- Options applied during detailing (topic)
- Sheet Item Add (can add submaterials to various sheets and drawings)
- Detail complete flag (prevents redetailing of submaterial)
- Drawing List Panel (used in the Drawing Editor to open submaterials)
- Placing Submaterials on Gather Sheets (before printing)
page 1 | contents | home | process > | submaterial details
 Step-by-step instructions :
1 . Invoke Detail Submaterial using any one (1) of the following methods:
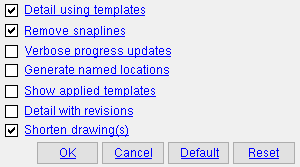
2 . A selection dialog opens. On it is a selection list of materials, identified by their submaterial mark . " Existing " materials and " Detail complete " materials and " Zero quantity material " are hidden by default. Submaterials that have not yet been detailed or whose quantities have changed are automatically selected on the list.
|
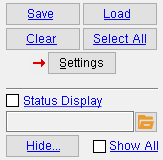
Press the " Settings " button to open the Submaterial Annotations and Dimensioning window, which has settings that are saved with the selected drawing(s). |
|
Submaterials that are marked for automatic detailing are highlighted automatically. All submaterials that have never been detailed are marked for detailing. If " |
(optional) : Select one or more submaterials, then press the " Settings " button to open the Submaterial Annotations and Dimensioning window for that/those submaterials. Unless you are detailing for the first time, the window will show the settings that were specified when the window was last opened. If you are detailing for the first time, the window will be populated with the Detailing Defaults (Fabricator Setup). Changes you make to the Submaterial Annotations and Dimensioning window will be saved when you press " OK " to close the window. Example: You save settings for one group of submaterials and different settings for a different group. When you select both groups of submaterials in Alternative 2 , the two groups are detailed differently, based on the different settings that you specified for each group.
Alternative 1 : If you want to detail only one material, double-click the submaterial mark of that material. Go to step 3 (if applicable) or to step 4. .
Alternative 2 : You may, at this point, select or deselect submaterials. With one or more submaterials selected, press the " OK " button at the bottom of the selection dialog. Go to step 3 (if applicable) or to step 4. .
Alternative 3 : Press the " Cancel " button to end the Detail Submaterial operation. Do not continue. Be aware, however, that " Cancel " does not cancel a change of " Settings ." Any changes you made to Submaterial Annotations and Dimensioning have already been saved and will be retained.
3 . (if applicable) : If User and Site Options > Drawings > " ![]() Always show Annotations and Dimensioning window " is turned on (checked), the Submaterial Annotations and Dimensioning window opens, allowing you to review or edit the settings that will be applied to the submaterials you selected for detailing. Mixed entries to this window are designated in the usual manner. Press the " OK " button to save changes and continue.
Always show Annotations and Dimensioning window " is turned on (checked), the Submaterial Annotations and Dimensioning window opens, allowing you to review or edit the settings that will be applied to the submaterials you selected for detailing. Mixed entries to this window are designated in the usual manner. Press the " OK " button to save changes and continue.
4 . A progress bar illustrates the progress of the automatic detailing as it takes place.
4a : When the progress bar reaches 100%, the progress bar window will close automatically if the box is checked (
) for " Close when done ." If the window does not close automatically, you can close it by checking that same box or by pressing the " OK " button.
4b : If applicable, you will receive warning or alert messages. For example, checking the box for " Detail with revisions " may result in your receiving a message notifying you that auto detailing incremented the " Sheet revision " of the sheet that a submaterial detail you selected is on.
5 . You may now, if you so choose, start up the Drawing Editor in order to review or make changes to the drawings you have created.
page 1 | contents | home | process > | submaterial details | top


