 Isolate Material by Location Command
- Step-by-step instructions
- Tips and Tricks
- Related Tools
1 . Select the material that you want to isolate. You must select a material, not a member.
2 . Invoke Isolate Material by Location using one (1) of the following methods:
Method 1: Click the Isolate Material by Location icon, which is pictured above. The icon can be found when a material is selected on the Materials contextual page > Drawings section.
Method 2: Isolate Material by Location can also be invoked using the Find Tool by searching the command name.
Learn more about alternative methods for launching commands.
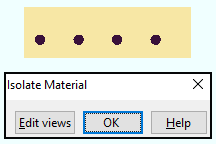
3 . Material isolation's edit the material mode opens. The isolated material is shown from the perspective of preset view number 0 and is displayed per User and Site Options > Modeling > " Member isolation solid display type ." To change to a different view or edit views, press the " Edit views " button.
Note: Ways to select a material for isolation include:
-
Use the Model Tree (as shown in step 1).
-
In Select Items mode with the selection filter set to " Default ' or " Material ', place the mouse pointer (
 ) over the one (1) material that you want to isolate, then left-click ( Select ).
 -
To select a material that is hidden by another material (or if " Default ' is the selection filter and you want a member main material), hover the material in Select Items mode, then right-click ( Menu ), choose " Select other " and select the material mark of the material.
- Modeling (where Isolate Material by Location is a tool)
- Material isolation's edit the material mode (result of using this tool)
- Material isolation's edit views mode (result of pressing " Edit views " in edit the material mode)
- Member isolation solid display type ( User and Site Options > Modeling > )
- Detail Submaterial (where view changes made in isolation are applied)
- Isolate Material by Piecemark (alternative to isolating by location)


