 Weld Add
Welds the first material that you select to the next material or materials that you select.
- Step-By-Step
- Undo a Chamfer
- Tips and Tricks
- Related Tools
1 . Click the Weld Add icon, which is pictured above. The icon can be found on the Material page > Fasteners section.
▸ Preselect a material to enable the Materials contextual page and click the Weld Add icon found in the Fasteners section.
Alternative: Invoke Weld Add using the Find Tool by searching the command name and clicking the icon, which is pictured above.
Learn more about alternative methods for launching commands.
2 . The status line prompts, "Select material to weld". Select the material to have the weld applied to.
Note : The weld(s) will be associated with this material's member.
Alternative: Press Esc to end the command.
3 . The status line prompts, "Select material to weld to". Select one or more materials to weld to, then press the Enter key or right-click (OK).
Alternative: Press Esc to end the command.
4 . Make the entries that you want to the Weld Add Path Options window, then press " OK " to continue.
Alternative: Press Esc or click Cancel to end the command.
5 . The status line prompts, " Select any new weld(s) you don't want ." Hold down the Shift key and left-click ( Select + ) to select the welds you do not want to add, then press Enter .
Alternative: Press Esc to end the command.
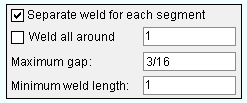
6 . The Weld Add(s) window opens. The settings in this window are filled out with default settings or the settings that match the last weld that you added or edited in your current Modeling session. Press the "OK" button when you are done with the settings in this window.
Alternative: Press Esc or click Cancel to end the command.
7 . Weld Add gives you " Options " for changing like materials. Press " OK " to continue.
Alternative: Press Esc or click Cancel to end the command.
When you use Weld Add , you can optionally perform a " ![]() Perform chamfer " operation if the " Weld type " is ' Bevel groove ' or ' V groove '. The following walks you through removing the chamfer.
Perform chamfer " operation if the " Weld type " is ' Bevel groove ' or ' V groove '. The following walks you through removing the chamfer.
1 . Open the chamfered material's edit window ( double-click the material, or hover the material and right-click ( Menu ) and choose " Edit Other " on the context menu ).
2 . Press the " OK " button at the bottom of the material edit window.
3 . A yes-no dialog opens. On it is the question, "Do you want to regenerate this material to clear user modified material operations? Press the " Yes " button.
3 . The Change All Options window opens. On it is a " Warnings " list and " Options ." Select the " Options " you want, then press the " OK " button.
4 . The material is regenerated per settings on its edit window. In other words, the chamfered edge goes back to being squared.
- A solid form (materials to weld must be displayed in)
- Model completed (setting this date prevents members from being welded to)
- Weld Add Layout (another way to add welds in Modeling )
- Weld Add Path Options (opened with Model > Weld > Add )
- Weld Add(s) window (opened with Model > Weld > Add )
- Perform chamfer (option on the Weld Add(s) window)
- Detail Members (generates weld symbols on details)
- Weld Add (to add weld symbols in the Drawing Editor )

