 Add CoreBrace Connection ( Modeling )
Tool summary :
Also see :
- Modeling (where custom components can be added)
- Custom components (topic)
- Explode Component (to reduce the component to its constituent materials)
- Component Selection Tool (to search for custom components of a selected type)
- Model Tree (to find custom components and select them for deletion, editing, etc.)
- corebrace.com (external link to the CoreBrace company website)
page 1 | contents | model > component > | toolbox | top
 To add, edit or delete the CoreBrace Connection custom component :
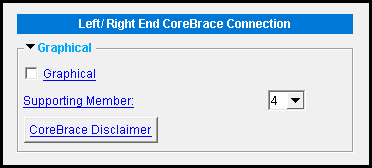
- To add a CoreBrace Connection custom component: 1 ) In Modeling , select an CoreBrace buckling-restrained brace (BRB) member. 2 ) Choose Model > Component > Add . 3 ) On the custom component selection list, choose " CoreBrace Connection " as the custom component you want to add. 4 ) The CoreBrace Connection window opens. Choose the number of the member supporting the left or right end of the brace, then press " OK ." 5 ) If User and Site Options > Modeling > " Automatically process after modeling operation " is set to ' Process and create solids ', the connection will be generated immediately. If not, the connection will be generated on the brace brace the next time that member undergoes Process and Create Solids .
Tip: If you use in-tool selection -- that is, select the BRB member after selecting " CoreBrace Connection " as the custom component you want to add -- only CoreBrace members will be selectable.
page 1 | contents | model > component > | toolbox | top
