Explode Component ( Modeling )

Tool summary :

  • Converts a component to its constituent parts (materials, welds, bolts). You can explode one or more components at a time.
  • After Explode Component , the component itself will no longer exist, but each of its constituant parts will remain a subpart of the member that the component was added to.
  • Explode Components can explode a custom component . It cannot explode a connection component . Custom components are created using Add Component .
  • Not all custom components are able to be exploded. For example, custom components that add holes or cuts without adding material cannot be exploded.
  • You may want to explode a component in order to keep it "as is" without making it " Graphical ."
  • See the step-by-step instructions and preselecting a custom component .

Also see :

page 1 | contents | model > component > | custom components


   Step-by-step instructions :

The members whose custom components you want to explode need to be displayed in a solid form before you begin this operation.

VIDEO Exploding a custom component stops it from being a component and makes its constituent materials individually editable using the ' Default ' selection filter. (Recorded in SDS2 Detailing , v2015.)

1 (optional) . You can begin by selecting one or more custom components . This step is optional. If you skip this step, you will be prompted to select custom components in step 3.

Select Items bindings (optional)

Before: ' Default ' is the selection filter . Compare this with the " after " example shown in step 5.

2 . Invoke Explode Component using one of the following methods.

Methods 1, 2 & 3 : Click the icon, or use a keyboard shortcut, or use the context menu. An Explode Component icon can be added to your toolbar (classic) or ribbon (lightning). The icon, keyboard shortcut or context menu command can be found in the group named ' Model -- Component '. For lightning, Customize Interface is used to configure ribbons, keyboards, the context menu and modes.

Method 4 : If " Modeling layout style " is ' Classic ', you can use the menu system to choose Model > Component > Explode .

3 . Skip this step if you already selected custom component(s) in step 1 .

Select Item(s) bindings

3a (if you didn't preselect) : Explode Component gives you Select Item(s) mouse bindings and prompts you to select the one or more custom components that you want to explode. The custom components can be from different members. Press the Enter key or right-click ( Menu ) and choose " OK " on the menu to signal that you are done selecting materials. Go to step 4.

4 . What you need to do next depends on the choice made to User and Site Options > Modeling > " Automatically process after modeling operation ."

Possibility 1 : If " Automatically process ... " is set to ' Process and create solids ', then Process and Create Solids will take place automatically. Skip this step and go to step 5.

Possibility 2 : If " Automatically process ... " is set to ' Do nothing ' or ' Process ', each of the members whose components you selected (in step 1 or step 3) will be marked for required phase of process or solids creation and their associated member will be displayed in stick form . You need to Process > Process and Create Solids before continuing to step 5.

5 . The components you selected (in step 1 or step 3) will be erased, but their constituent materials, welds and bolts will be preserved as subparts of the same members that the components originally belonged to. These exploded subparts of the component will be preserved through subsequent invocations of Process and Create Solids and may be edited, cut, bent, etc.
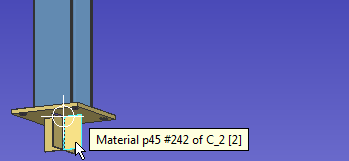
After: ' Default ' is the selection filter . The same results would be produced with the ' Legacy Default ' filter. Compare this example with the " before " example shown in step 1.

page 1 | contents | model > component > | custom components | top


  Preselecting a custom component (see step 1 ) :

  • Be aware that the ' Default ' connection filter will allow you to select entire system connections ( connection components ) as well as custom components. The ' Custom Components ' selection filter, on the other hand, limits your selection to custom components. You cannot use Explode Components on a system connection. Only the connection components that you select in step 1 will be exploded.
  • Most custom components can be selected by clicking a material that was generated by the custom component. When you click one material, all of that custom component's materials, bolts, etc. become selected.
  • To find a custom component in the Model Tree , set " View By " in the Model Tree to either ' Member Number ' or ' Member Piecemark '. The custom component will be listed under a member, after its connection components ( Left End and Right End ), before its submaterials, welds and bolts.
  • When exploding a custom component, you can skip step 1 ( preselection ) and, instead, do step 3 ( in-tool selection ).

page 1 | contents | model > component > | custom components | top