 Isolate Group Member by Piecemark ( Modeling )
Tool summary :
Also see :
- Modeling (where Isolate Group Member by Piecemark is a tool)
- Member isolation (result of using this tool)
- Special considerations for group members (in isolation)
- Member isolation solid display type ( User and Site Options > Modeling > )
- Detail Member Groups (applies views added in isolation)
- Section View (a way to add views in the Drawing Editor )
- OK (to exit member isolation)
page 1 | contents | model > group member > | group member | top
 Step-by-step instructions :
The following instructions assume that you are in Modeling and that the 3D model contains group members that been assigned piecemarks. The assigning of piecemarks takes place during Create Solids .
1 . Invoke Isolate Member by Piecemark using any one (1) of the following methods:
Method 1 : Click the Isolate Group Member by Piecemark icon, which is pictured above. The icon can be taken from the group named ' Model -- Group Member ' and placed on a toolbar (classic) or the ribbon (lightning).
Method 2 : If " Modeling layout style " is ' Classic ', you can use the menu system to choose Model > Group Member > Isolate Group Member by Piecemark .
Method 3, 4 or 5 : Isolate Group Member by Piecemark can also be configured to be invoked using a keyboard shortcut , the context menu , or a mode . For the lightning interface, this configuration is done using Customize Interface .
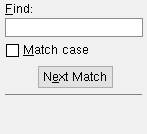
2 . A selection dialog opens. On it is a selection list of all piecemarks that have been assigned to group members.
|
Typing ' 03 ' to " Find " in this example would automatically select ' GM_103 ' since it is the first item with the character sequence 03 in it. |
Alternative 1 : Double-click the listing of the member you want to isolate.
Alternative 2 : Press the " Cancel " button to end the Isolate Group Member operation and stay in your current view of the 3D model. Do not continue.
Note: If there are more that one group members with the piecemark you selected, you will be prompted to select the one member that you want to isolate.
3 . The member isolation program opens preset view number 0 for the group member whose piecemark you selected. Preset view number 0 is its " MAIN VIEW ." The group member is displayed per User and Site Options > Modeling > " Member isolation solid display type ."
Tip 1: An alternative to adding views in member isolation is to Detail Member Groups , then use Section View in the Drawing Editor to create the views you want. The views created this way will also be added to the list of views in member isolation.
Tip 2: To exit member isolation, press the " OK " button on the Isolate Member toolbox.
Also see: Click here for information about creating views of group members. All views that you create in isolation will be drawn on the detail that is generated when you Detail Member Groups .
page 1 | contents | model > group member > | group member | top


