 Erase Material Command
- Step-By-Step
- Tips and Tricks
- Related Tools
1 . Invoke Erase Material using the Find Tool by searching the command name and clicking the Erase Material icon, which is pictured above.
Alternative : Preselect one (1) or more materials to enable the Materials contextual page and click the Delete icon (
) found in the Modify section, or press the Delete key. This excludes the option to change like members and deletes the selected material(s).
Method 1 : Right-click and select "OK" from the shortcut menu.
Method 2 : Press the Enter key.
Alternative : You can press the Esc key or right-click and choose "Cancel" on the shortcut menu to end the command.
3 . The Material Erase - Options dialog opens if members that are like the member from which you selected the material(s) exist in your current Job. The dialog's "All members with the same mark" option applies to members with the same member piecemark. The "All like members (any mark)" option applies to those same members and may additionally apply to members that are exactly the same but have different marks -- for example, because you have applied a "User piecemark".

Alternative 1 : Check the box for one or the other of these options (
) to erase the selected material(s) from all like members (the total number of members is listed in parenthesis). Press the "OK" button.
Alternative 2 : Leave both options unchecked (
) to erase the selected material(s) and let the unselected material(s) remain on the like members. Press the "OK" button.
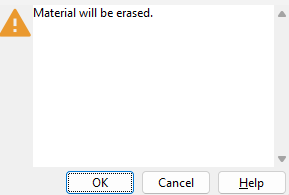
4 . The SDS2 Warning window opens. At the very least, it informs you that material will be erased.

Alternative 1 : Press the "OK" button at the bottom of the window to erase the materials.
Alternative 2 : Press the "Cancel" button to end the Erase Material command without erasing any materials.
- Point selection by area box (affects Erase Material )
- Depth checking (affects material selection by area box)
- Erase Member (to erase members)
- Delete (alternative to Erase Material )
- Release Submaterial Marks (Utilities > Delete)


