 Add/Edit Truck Crane Specification ( Modeling )
Tool summary :
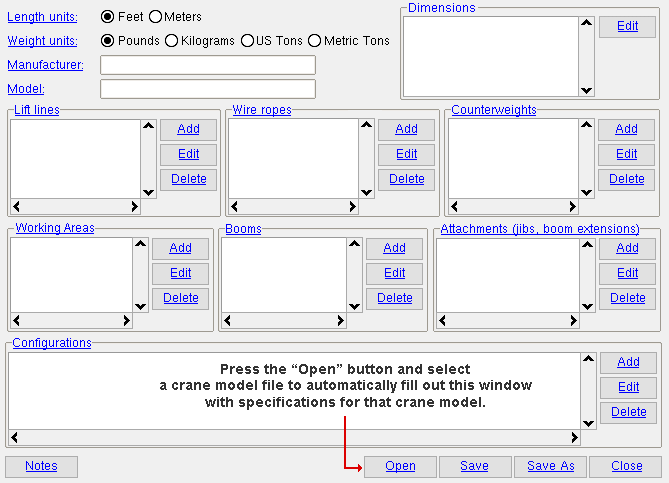
- When first opened in a new project, the Truck Crane Specification window is blank. To see the window filled out with crane specification information, press the " Open " button and choose a truck crane specification file.
- To open this window:
- Method 1 : Click the Add/Edit Truck Crane Specification icon, which is pictured above. The icon can be taken from the group named ' Model -- Cranes ' and placed on a toolbar (classic) or the ribbon (lightning).
- Method 2 : If " Modeling layout style " is ' Classic ', you can use the menu system to choose Model > Cranes > Add/Edit Truck Crane Specification .
- Method 3, 4 or 5 : Add/Edit Truck Specification can also be configured to be invoked using a keyboard shortcut , the context menu , or a mode . For the lightning interface, this configuration is done using Customize Interface .
- Here are some general steps for adding a new specification.
- Press the " Open " button and choose from the list the truck crane specifications that you wish to save under a new name then modify.
- Press " Save As " to save the specification you just opened under a new name.
- Make modifications to the specification you just gave a file name to, pressing " Save " periodically to write your changes to that new specification file.
- Press " Close " when you are done creating your new truck crane specification.
- Once a crane specification has been created, you can select that specification when you add a new truck crane. The specification quantifies the capabilities of the actual crane that will be used to perform lifts at the construction site.
- Cranes require a license. Without that license, crane modeling tools are not available in SDS2.
Also see :
- Truck Crane (window that opens when you Add/Edit Truck Crane )
- Add Truck Crane (involves the entry of entering a truck crane specification)
page 1 | model > cranes > | cranes | cranes (index) | top
Length units: Feet or Meters . This sets the units used to display length information that is presented on this window and on windows that are launched from this window. By default, the " Length units " are ' Feet '.
Example: The primary dimension " Units " are set to ' Metric ' in Drawing Presentation . When you " Open " a truck crane specification file, you notice that all lengths are in feet. You change the " Length units " to ' Meters ' to have those lengths displayed in meters.
Please note: If you " Open " a truck crane specification file, then change the " Length units " and then press " Save ," nothing will happen. The crane specification file will still be written in the units it was originally written in. This setting is for display only.
Weight units: Pounds or Kilograms or US Tons or Metric Tons . This sets the units used to display weight information that is presented on this window and on windows that are launched from this window. By default, the " Weight units " are ' Pounds '.
Example: The primary dimension " Units " are set to ' Metric ' in Drawing Presentation . When you " Open " a truck crane specification file, you notice that weights are in pounds. You change the " Weight units " to ' Kilograms ' to have those lengths displayed in kilograms.
Please note: If you " Open " a truck crane specification file, then change the " Weight units " and press " Save ," nothing will happen. The crane specification file will still be written in the units it was originally written in. This setting is for display only.
Manufacturer: The name of the manufacturer of the truck crane whose manufacturing specifications you are adding or editing.
Model: The model of the truck crane whose manufacturing specifications you are adding or editing.
page 1 | model > cranes > | cranes | cranes (index) | top
----- Dimensions -----
|
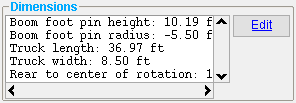
If truck crane dimensions have not yet been specified, notifications identifying which truck dimensions need to be specified will be printed here. |
(or double-click) opens an edit window for specifying the size of the truck crane that this specification is for.
Your changes become permanent when you " Save " or " Save As ."
page 1 | model > cranes > | cranes | cranes (index) | top
----- Lift lines -----
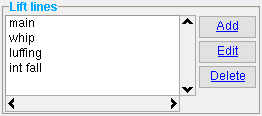
These lift lines may be used in any of the " Configurations " that are listed. If you want a configuration to use a lift line that is not listed here, you need to first add it here.
|
To add a " Lift Line " to the list, press the " Add " button. To edit a lift line, you need to first select the one (1) lift line that you want to edit or delete. |
lets you enter a new " Lift line " to the truck crane specification you are adding/editing. Once a new lift line has been added here, you can use it in " Configurations ."
(or double-click) opens an edit window for modifying the one (1) lift line that you have selected.
(or the Delete key) removes the one or more selected lift lines from the specification you are adding or editing. Any " Configurations " that specify the selected left line(s) will also deleted.
Your changes become permanent when you " Save " or " Save As ."
page 1 | model > cranes > | cranes | cranes (index) | top
----- Wire ropes -----
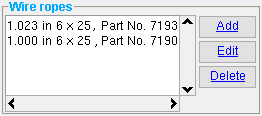
The wire ropes that are listed here may be used in one or more of the " Configurations " that are listed below.
|
To add a " Wire rope " to the list, press the " Add " button. |
lets you enter a new " Wire rope " to the truck crane specification you are adding/editing. After you have added a wire rope, you can use that same wire rope in " Configurations " " Booms " and " Attachments ."
(or double-click) opens an edit window for modifying the one (1) wire rope that you have selected.
(or the Delete key) removes from this specification the one or more wire ropes that you have selected. Any " Booms " " Attachments " or " Configurations " that specify the selected wire rope(s) will also be deleted.
Your changes become permanent when you " Save " or " Save As ."
page 1 | model > cranes > | cranes | cranes (index) | top
----- Counterweights -----
Counterweights that are listed here may be used in the " Configurations " that are listed below.
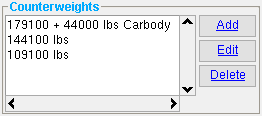
|
To add a " Counterweight " to the list, press the " Add " button. |
lets you enter a new " Counterweight " to the truck crane specification you are adding/editing. Once a new counterweight has been added, you can use it in one or more " Configurations ."
(or double-click) opens an edit window for changing the weight of the one (1) counterweight that you have selected.
(or the Delete key) removes from this specification the one or more counterweights that you have selected. Any " Configurations " that specify the selected counterweight(s) will also deleted.
Your changes become permanent when you " Save " or " Save As ."
Downstream implications: Each " Configuration " listed below can be assigned one " Counterweight ." The assigned counterweight affects the load chart for a configuration. When you are on the Truck Crane window, however, the " Configuration " that you select there does not include a counterweight. You define the counterweight you want to use for particular lifts by selecting a " Counterweight " on the Lift Configuration window.
page 1 | model > cranes > | cranes | cranes (index) | top
----- Working Areas -----
A working area is the configuration of the crane's lower works that determines the crane's quadrants of operation. Working areas must be defined here before they can be incorporated into any of the " Configurations " for this truck crane specification.
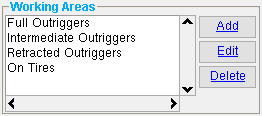
|
To define a new " Working Area " specifying the quadrants of operation for this crane specification, press the " Add " button. |
|
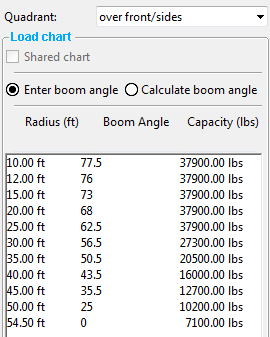
Shown here is a load chart for a quadrant named " over front/sides ." This screen shot was taken by editing the configuration. When you edit the " Configuration ," you can edit the load chart. For a configuration to incorporate a load chart for a particular quadrant of operation, the name of that quadrant needs to first be defined for a particular " Working Area ." That is to say, the quadrant must first be defined here, in this section, for a particular working area. |
lets you enter a new " Working Area " to the truck crane specification you are adding/editing. Adding a working area allows you to later incorporate that working area into " Configurations ."
(or double-click) opens an edit window for changing the working area specifications for the one (1) working area that you have selected.
(or the Delete key) removes from this specification the one or more working areas that you have selected. Any " Configurations " that specify the selected working area(s) will also deleted.
Your changes become permanent when you " Save " or " Save As ."
Also see: " Working Area " on the Lift Configuration window lets you define the quadrant of operation that is to be used for a particular lift.
page 1 | model > cranes > | cranes | cranes (index) | top
----- Booms -----
Any boom that is listed here may be used in one or more of the " Configurations " for this truck crane specification.
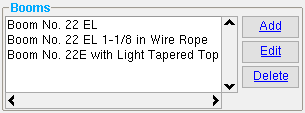
|
To add a " Boom " to the list, press the " Add " button. |
lets you enter a new " Boom " to the truck crane specification you are adding/editing. You need to add the boom here before you can use it in " Configurations ."
(or double-click) opens an edit window for modifying the one (1) boom definition that you have selected.
(or the Delete key) removes from this specification the one or more booms that you have selected. Any " Configurations " that specify the selected boom(s) will also deleted.
Your changes become permanent when you " Save " or " Save As ."
page 1 | model > cranes > | cranes | cranes (index) | top
----- Attachments (jibs, boom extensions) -----
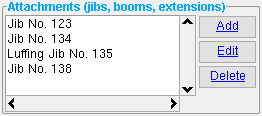
The attachments that are listed here may be used in the " Configurations " that are listed below. If you want to add a configuration that uses an attachment that is not listed here, you first have to add that attachment here.
|
To add a " Attachment " to the list, press the " Add " button. |
lets you enter a new " Attachment " to the truck crane specification you are adding/editing. Once you have added an attachment here, you can then use it in " Configurations ."
(or double-click) opens an edit window for modifying the one (1) attachment definition that you have selected.
(or the Delete key) removes from this specification the one or more attachments that you have selected. Any " Configurations " that specify the selected attachment(s) will also deleted.
Your changes become permanent when you " Save " or " Save As ."
page 1 | model > cranes > | cranes | cranes (index) | top
----- Configurations -----

|
|
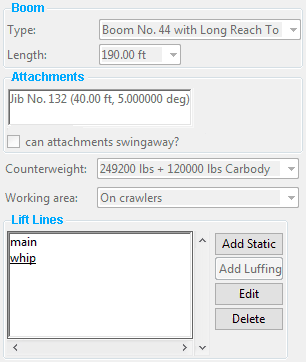
This is the sort of information that you will be shown if you double-click (" Edit ") a truck crane configuration. Please note that such a configuration is made up of items that are listed as " Booms " and " Attachments " and " Counterweights " and " Working areas " and " Lift lines " and " Wire ropes ." On this window, you could double-click "main" or "whip" to get additional configuration information. |
lets you enter a new " Configuration " to the truck crane specification you are adding/editing. A configuration is made up of items listed as " Lift lines " " Wire ropes " " Counterweights " " Working areas " " Booms " or " Attachments ."
(or double-click) opens an edit window for modifying the one (1) truck crane configuration that you have selected.
(or the Delete key) removes from this specification the one or more configurations that you have selected.
Your changes become permanent when you " Save " or " Save As ."
page 1 | model > cranes > | cranes | cranes (index) | top
The " Notes " button opens a window that lets you type in a note about the crane specification you are adding or editing.
![]()
You might use the " Notes " button, for example, to add a note citing the source manufacturer information for the specification you are defining. Or you might include contact information about the person who wrote the specification, or you could write special instructions or a disclaimer.
A person can review the " Notes " that have been entered for a specification by pressing the " Spec Notes " button on the Truck Crane window.
page 1 | model > cranes > | cranes | cranes (index) | top
![]()
![]()
![]()
![]()
"Open" opens the ![]() erector/crane/truck folder that is used by your current version of this program.
erector/crane/truck folder that is used by your current version of this program.
1 . In the erector/crane/truck folder are truck crane specification files that are provided by SDS2, or which have been added or edited by users. Double-click the file that you want to open.
2 . This window (the Truck Crane Specification window) will automatically be filled out with the settings that were stored in the file you selected in step 1.
"Save" lets you save changes you have made to the currently open crane specification file. A crane specification file is opened using " Open " or " Save As ."
Note: If you have not yet used " Open " or " Save As ," then " Save " does the same thing as " Save As " -- it lets you enter the name of the file that will store the entries made to this window.
"Save As" lets you save changes you have made on this window to a new file that you name. By default, your newly named file is placed in the erector/crane/truck folder.
" Save As " also opens the file that you name, so that it become your currently loaded crane specification file. This means that any changes that you subsequently make and " Save " on this window will be saved to that file.
"Close" closes this window. Any changes you have made to this window since you last did an " Open " or " Save " or " Save As " will be lost.
To apply the truck crane specification entered here to the creation of an actual crane in the 3D model, see step 2 of the step-by-step instructions for how to add a truck crane.
page 1 | model > cranes > | cranes | cranes (index) | top


