 Create Solids for Selected Members ( Modeling & Drawing Editor )
Tool summary :
Also see :
- Process and Create Solids (alternative)
- Process Selected Members (complements Create Solids for Selected Members )
- Create Solids (phases of Process and Create Solids )
- Status Display ( Detailing and processing > Needs solids created )
- When members are automatically marked for Process or marked for Create Solids (topic)
page 1 | contents | process > | process
 Step-by-step instructions :
Create Solids for Selected Members is for users who would like to divide Process and Create Solids into parts and select the member themselves. It automatically causes all members that have been marked for Create Solids to undergo Create Solids .
1 . Invoke using any one (1) of the following methods:
Method 1 : Click the Created Solids for Selected Members icon, which is pictured above. The icon can be taken from the group named ' Process ' ( Modeling ) or ' Process ' ( Drawing Editor ) and placed on a toolbar (classic) or the ribbon (lightning).
Method 2 : If " Modeling layout style " or " Drawing Editor layout style " is ' Classic ', you can use the menu system to choose Process > Create Solids for Selected Members .
Method 3, 4 or 5 : Create Solids for Selected Members can also be configured to be invoked using a keyboard shortcut , the context menu , or a mode . For the lightning interface, this configuration is done using Customize Interface .
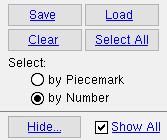
2 . A selection dialog opens. On it is a selection list of all members that have been created in your current Job . By default, all members that require Create Solids are selected automatically.
|
' |
Alternative 1 : If you want to create solids for only one member, double-click the number or piecemark of that member. Go to step 3.
Alternative 2 : Select multiple members, then press " OK " to continue to step 3.
Alternative 3 : Press the " Cancel " button to end the Create Solids for Selected Members Only operation. Do not continue.
3 . A progress bar appears on screen. The Create Solids phase of Process and Create Solids creates 3D material for members, matches holes in members, generates bolts in members, checks material marks for members, and assigns member piecemarks. The progress bar informs you when these events take place.
3a : When the progress bar reaches 100%, the progress bar window will close automatically if the box is checked (
) for " Close when done ." If the window does not close automatically, you can close it by checking that same box or by pressing the " OK " button.
4 . After Create Solids for Selected Members , you will be able to view members in solids form in the 3D model. Also, piecemarks will have been assigned.


