General Presentation (per-drawing setup overrides)
The setup overrides on this window are for your current drawing only. They apply when you detail with templates . If your current drawing is a member detail, then most of these overrides apply. If your current drawing is a submaterial, then the overrides " Default submaterial detail scale " and " Use curved pointers " apply.
Also see :
- Automatic detailing (affected by this window)
- Member details (most settings on this window apply to)
- Submaterial details (some settings on this window apply to)
page 1 | contents | settings > drawing settings | top
To open setup overrides for General Presentation :
Method 1 : In the Drawing Editor , with a ' Detail ' (system-generated) or ' Submaterial ' as your current drawing, choose Settings > Drawing Settings > General Presentation.
page 1 | contents | settings > drawing settings | top
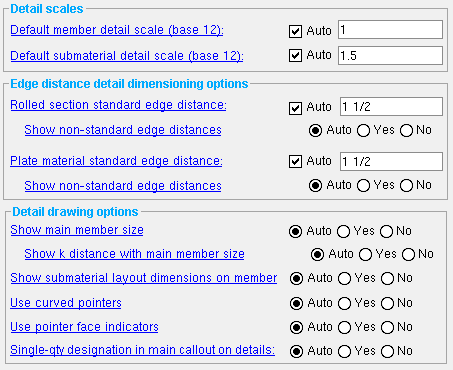
------ Detail scales ------
Default member detail scale ( base 12 or base 10 ): Auto or a Scale . The choice made here applies to your current drawing if that drawing is a member detail, and if you Detail Current Piecemark with templates. It also applies if, after exiting the drawing, you select that drawing for Detail Members with templates .
' Auto ' instructs member detailing with templates to apply the setup choice made to " Default member detail scale " when you next auto detail your current drawing.
The scale ( base 12 or base 10 ) that will be applied to your current member detail the next time that drawing is redetailed with templates. ( base 12 ) means ' Imperial... ' dimensioning is being used. You should enter the number of inches on that you want to represent 1 ft in the shop. ( base 10 ) means ' Metric ' dimensioning is being used. You should enter the number of millimeters that you want to represent 10 mm in the shop.
Note: Changing this scale does not affect the " Scale " of that drawing on a sheet that it has already been placed on.
Default submaterial detail scale ( base 12 or base 10 ): Auto or a Scale . The selection made here applies only to your current drawing if that drawing is a submaterial and if, after exiting the drawing, you select that drawing to detail submaterial and choose to " Detail using templates ."
' Auto ' instructs Detail Submaterial to apply the setup choice made to " Default submaterial detail scale " when you next auto detail your current drawing.
The scale ( base 12 or base 10 ) that your current submaterial detail will be drawn to the next time you Detail Submaterial (with templates) and select that drawing. ( base 12 ) means ' Imperial... ' dimensioning is being used. You should enter the number of inches on to-be-generated submaterial details that you want to represent 1 ft in the shop. ( base 10 ) means ' Metric ' dimensioning is being used. You should enter the number of millimeters that you want to represent 10 mm in the shop.
Note: Be aware that changing this scale and redetailing does not affect the " Scale " of that drawing on a sheet, if it has already been placed on the sheet.
page 1 | contents | settings > drawing settings | top
------ Edge distance detail dimensioning options ------
Rolled section standard edge distance: Auto or a Distance . The choice made here applies to your current drawing if that drawing is a member detail, and if you Detail Current Piecemark with templates. It also applies if, after exiting the drawing, you select that drawing for Detail Members with templates .
' Auto ' instructs member detailing with templates to apply the setup choice made to " Rolled section standard edge distance " when you next auto detail your current drawing.
The distance (in the appropriate " Units ") from the edge of the material to the center of the first hole. Rolled sections are channel , wide flange , HSS rectangular , angle or HSS round sections.
Show non-standard edge distances: Auto or Yes or No . The choice made here applies to your current drawing if that drawing is a member detail, and if you Detail Current Piecemark with templates. It also applies if, after exiting the drawing, you select that drawing for Detail Members with templates .
' Auto ' instructs member detailing with templates to apply the setup choice made to " Show non-standard edge distances " when you next auto detail your current drawing.
' Yes ' instructs your next invocation of member detailing with templates for your current member detail to dimension the edge distance when the actual edge distance is something other than that specified as the " Rolled section standard edge distance " (if ' Auto ' is not selected above) or the " Rolled section standard edge distance " (if ' Auto ' is selected above).
' No ' instructs member detailing to not dimension the edge distance.
Plate material standard edge distance: Auto or a Distance . The choice made here applies to your current drawing if that drawing is a member detail, and if you Detail Current Piecemark with templates. It also applies if, after exiting the drawing, you select that drawing for Detail Members with templates .
' Auto ' instructs member detailing with templates to apply the setup choice made to " Plate material standard edge distance " when you next auto detail your current drawing.
The distance (in the appropriate " Units ") from the edge of the plate to the center of the first hole.
Show non-standard edge distances: Auto or Yes or No . The choice made here applies to your current drawing if that drawing is a member detail, and if you Detail Current Piecemark with templates. It also applies if, after exiting the drawing, you select that drawing for Detail Members with templates .
' Auto ' instructs member detailing with templates to apply the setup choice made to " Show non-standard edge distances " when you next auto detail your current drawing.
' Yes ' instructs your next invocation of member detailing with templates for your current member detail to dimension the edge distance when the actual edge distance is something other than that specified as the " Plate material standard edge distance " (if ' Auto ' is not selected above) or the " Plate material standard edge distance " (if ' Auto ' is selected above).
' No ' instructs member detailing to not dimension the edge distance.
page 1 | contents | settings > drawing settings | top
------ Detail drawing options ------
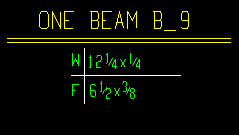
Show main member size: Auto or Yes or No . The choice made here applies to your current drawing if that drawing is a member detail, and if you Detail Current Piecemark with templates. It also applies if, after exiting the drawing, you select that drawing for Detail Members with templates .
|

' Auto ' instructs member detailing with templates to apply the setup choice made to " Show main member size " when you next auto detail your current drawing.
' Yes ' instructs your next invocation of member detailing with templates for your current member detail to show the member size beneath the callout on your current member detail.
' No ' instructs member detailing to not show the member size under the callout.
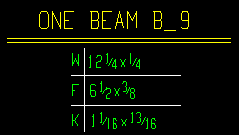
Show k distance with main member size: Auto or Yes or No . The choice made here applies to your current drawing if that drawing is a member detail, and if you Detail Current Piecemark with templates. It also applies if, after exiting the drawing, you select that drawing for Detail Members with templates .
|
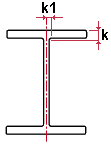
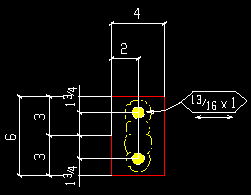
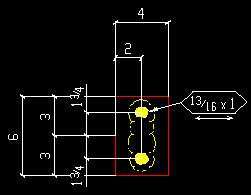
k distance x k1 distance : The values for " k distance (detail) " ( k ) and " Flange thickness " ( tf ) and " Web thickness " ( tw ) are stored in the local shape file .The " k1 distance " ( k1 ) used to be calculated (pre-v2020), but is now also stored in the local shape file. |
|
' Auto ' instructs member detailing with templates to apply the setup choice made to " Show k distance with main member size " when you next auto detail your current drawing.
If ' Yes ' is selected and " Show main member size " is set to ' Yes ' or possibly ' Auto ', the " k distance x k1 distance " will be reported under the main member size on your current member detail the next time it is redetailed.
' No ' instructs member detailing to not show the k distance and k1 distance under the main member size.
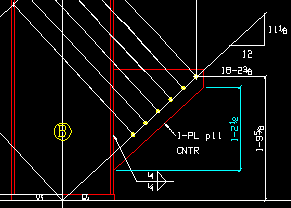
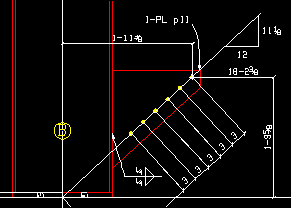
Show submaterial layout dimensions on member detail: Auto or Yes or No . The choice made here applies to your current drawing if that drawing is a member detail, and if you Detail Current Piecemark with templates. It also applies if, after exiting the drawing, you select that drawing for Detail Members with templates . This is a special-case option that applies when showing layout dimensions would cause the sloping hole dimensions to be drawn on the opposite side of the material. This rarely occurs. One special case where it may occur is a gusset plate to the base of a column with a base plate.
|
' Auto ' instructs member detailing with templates to apply the setup choice made to " Show submaterial layout dimensions on member detail " when you next auto detail your current drawing.
' Yes ' instructs your next invocation of member detailing with templates for your current member detail to show the layout dimensions for certain diagonal cuts on your current member detail.
' No ' instructs member dealing to draw complete submaterial layout dimensions on the member detail.
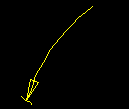
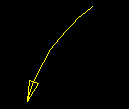
Use curved pointers: Auto or Yes or No. The choice made here applies only to your current drawing (if that drawing is a member detail or a submaterial detail). For a member detail, it applies if you Detail Current Piecemark with templates. It also applies if, after exiting the drawing, you select that drawing for Detail Members with templates . For a submaterial detail, it applies to your current drawing if, after exiting the drawing, you select that drawing for Detail Submaterial with templates .
|
' Auto ' instructs automatic detailing with templates to apply the setup choice made to " Use curved pointers " when you next auto detail your current drawing.
' Yes ' instructs your next invocation of automatic detailing with templates to draw curved pointers on your current drawing (member detail or submaterial detail).
' No ' instructs auto detailing to draw only straight pointers.
Use pointer face indicators: Auto or Yes or No . The choice made here applies to your current drawing if that drawing is a member detail, and if you Detail Current Piecemark with templates. It also applies if, after exiting the drawing, you select that drawing for Detail Members with templates .
|
' Auto ' instructs auto detailing with templates to apply the setup choice made to " Use pointer face indicators " when you next auto detail your current drawing.
' Yes ' instructs your next invocation of auto detailing with templates for your current member detail to add a face indicator to pointers drawn to the face of a material in order to call out the submaterial piecemark of that material.
' No ' instructs auto detailing with templates to not include a face indicator on pointers that it draws.
Also see: Regardless of the choice made here, you can add or remove a face indicator in the Drawing Editor using " Face indicator " on the Pointer Edit window.
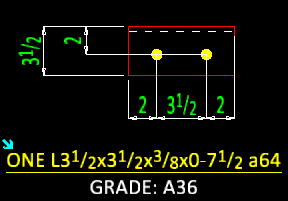
Single-quantity designation in main callout on details: ![]() ONE or
ONE or ![]() 1 . The choice made here applies only to your current drawing (if that drawing is a member detail or a submaterial detail). For a member detail, it applies if you Detail Current Piecemark with templates . It also applies if, after exiting the drawing, you select that drawing for Detail Members with templates. For a submaterial detail, it applies to your current drawing if, after exiting the drawing, you select that drawing for Detail Submaterial with templates when Show submaterial quantity on submaterial details " is checked..
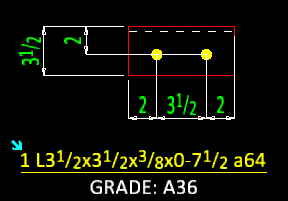
1 . The choice made here applies only to your current drawing (if that drawing is a member detail or a submaterial detail). For a member detail, it applies if you Detail Current Piecemark with templates . It also applies if, after exiting the drawing, you select that drawing for Detail Members with templates. For a submaterial detail, it applies to your current drawing if, after exiting the drawing, you select that drawing for Detail Submaterial with templates when Show submaterial quantity on submaterial details " is checked..
|
' Auto ' instructs auto detailing with templates to apply the setup choice made to " Single-quantity designation in main callout on details " when you next auto detail your current drawing.
' ONE ' instructs your next invocation of auto detailing with templates for your current member or submaterial detail to use ' ONE ' as the designation for quantity in the member or material main callout.
' 1 ' instructs your next invocation of auto detailing with templates for your current member or submaterial detail to use ' 1 ' as the designation for quantity in the member or material main callout.
page 1 | contents | settings > drawing settings | top
To close setup overrides for General Presentation :
"OK" (or the Enter key) closes the General Presentation window and saves the overrides on it with your current drawing, presumably so that the next time that drawing undergoes member detailing (or, for certain settings, submaterial detailing), those override settings are applied to the detail.
Submaterial settings: The setup overrides on this window that apply to submaterial are " Default submaterial detail scale " and " Use curved pointers ."
To permanently save your override changes, you need to save your current drawing. If you close your current drawing without saving changes made to it, any changes to override settings that you have applied to that drawing will be forgotten. On the other hand, a Drawing Overrides List will show active overrides (non-auto settings) that have been applied to your current drawing even if that drawing has not yet been saved.
"Cancel" (or the Esc key or the ![]() button) closes this window without saving any changes.
button) closes this window without saving any changes.
"Reset" undoes all changes made to this window since you first opened it. The window remains open.
page 1 | contents | settings > drawing settings | top

