 Change from System to User ( Modeling & Drawing Editor )
Tool summary :
Also see :
- Changing system piecemarks to user (topic on SDS2 Piecemarking page)
- Combine/Break Apart Piecemarks (lets you rename piecemarks)
- Remove Piecemarks (so that SDS2 piecemarking can reassign the members new piecemarks)
- Change User Piecemarks to System (system piecemarks are automatically named)
- Edit Member (a way to change system piecemarks to user)
- Change Marks (change piecemarks without changing to user)
- Detail Sheet Autoloading (change piecemarks without changing to user)
- Piecemarking in SDS2 (topic)
Step-by-step instructions :
1 . To invoke Change System Piecemarks to User :
▸ Click the Change System Piecemarks to User icon, which is pictured above. The icon can be taken from the group named ' Edit -- Edit Piecemarks ' ( Modeling ) or ' Edit -- Edit Piecemarks ' ( Drawing Editor ) and placed on the ribbon.
▸ Change System Piecemarks to User can also be configured to be invoked using a keyboard shortcut , the context menu , or a mode . For the lightning interface, this configuration is done using Customize Interface .
2 . A selection dialog opens. On it is a list of all system piecemarks which have been assigned to members in the 3D model. The dialog does not tell you how many members have been assigned a particular piecemark.
|
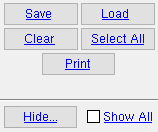
" Hide ... " and " Show All " can be used to adjust which classes of members are shown on the selection list. By default, members with frozen piecemarks are not shown. | ||||||
| Tip: The " Print " button outputs a list of all system piecemarks, including frozen piecemarks that are system piecemarks. | |||||||
2a : Select the piecemark(s) that you want to change from system to user piecemarks, then press the " OK " button.
3 . The piecemark(s) you selected in the previous step are now user piecemarks .
Note: When members next undergo the Assigning Piecemarks phase of Process and Create Solids , these piecemarks will not be broken apart or combined with other piecemarks.

