 Combine/Break Apart ( Modeling & Drawing Editor )
Tool summary :
Also see :
- Using Combine/Break Apart (topic on SDS2 Piecemarking page)
- Remove Piecemarks (so that SDS2 piecemarking can reassign the members new piecemarks)
- Change User Piecemarks to System (system piecemarks are SDS2-named)
- Change from System Piecemarks to User (user piecemarks are user-named piecemarks)
- Edit Member (a way to change system piecemarks to user)
- Change Marks (change piecemarks without changing to user)
- Detail Sheet Autoloading (change piecemarks without changing to user)
- Piecemarking in SDS2 (topic)
page 1 | contents | edit > edit piecemarks > | piecemarking
 Step-by-step instructions :
Combine/Break Apart Piecemarks can be used to change piecemarks or assign piecemarks to members that you select.
1 . To invoke Combine/Break Apart Piecemarks :
Method 1 : Click the Combine/Break Apart Piecemarks icon, which is pictured above. The icon can be taken from the group named ' Edit -- Edit Piecemarks ' ( Modeling ) or ' Edit -- Edit Piecemarks ' ( Drawing Editor ) and placed on a toolbar (classic) or the ribbon (lightning).
Method 2 : If " Modeling layout style " or " Drawing Editor layout style " is ' Classic ', you can use the menu system to choose Edit > Edit piecemarks > Combine/Break Apart Piecemarks .
Method 3, 4 or 5 : Combine/Break Apart Piecemarks can also be configured to be invoked using a keyboard shortcut , the context menu , or a mode . For the lightning interface, this configuration is done using Customize Interface .
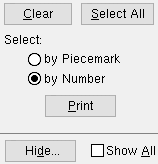
2 . A selection dialog opens. On it is a list of all piecemarks (both user and system ) that have been assigned to members in the 3D model. By default, each member is listed ' by Number ' -- that is, by its member number [in brackets] and piecemark .
|
" Hide ... " and " Show All " can be used to adjust which classes of members are shown on the selection list. By default, members with frozen piecemarks are not shown. | ||||||
| Tip 1: The " Print " button outputs the list that is shown on this selection dialog by default. This list is all members that can be changed. Members with a frozen piecemark cannot be changed. | |||||||
| Tip 2: Switch to ' |
|||||||
2a : Select the member(s) you want to assign a particular user piecemark , then press the " OK " button.
3 . A window opens. On it is the field, "New Member Piecemark _"
3a : Type the text string (up to 61 characters) that you want to be assigned as the user piecemark for the member(s) you selected in step 2. Spaces may be used to separate characters within the piecemark and are themselves considered a character.
Alternative 1 : Press the " OK " button to continue. Go to step 4.
Alternative 2 : Press " Cancel " to end this operation.
4 . The user piecemark you entered in step 3 is now assigned to the member(s) you selected in step 2.
Note: This piecemark will not be changed during the Assigning Piecemarks phase of Process and Create Solids , nor will SDS2 piecemarking assign this piecemark to any like members.
page 1 | contents | edit > edit piecmarks > | piecemarking | top


