Member Detailing Settings (setup overrides)
The setup overrides on this window are for your current drawing only. They apply when you auto detail with templates . Without exception, these overrides apply exclusively to member details.

Also see :
- Home > Project Settings > Fabricator > Member Detailing Settings (setup window whose settings this window can override)
page 1 | contents | settings > drawing settings | top
To open setup overrides for Member Detailing Settings :
Method 1 : In the Drawing Editor , with a '
Detail ' (system-generated) or '
Submaterial ' as your current drawing, choose Settings > Drawing Settings > Member Detailing Settings.
page 1 | contents | settings > drawing settings | top
| Beams | Columns | Vertical Braces | Horizontal Braces | Handrail |
------ Overrides for your current beam detail ------
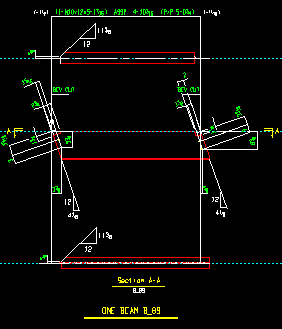
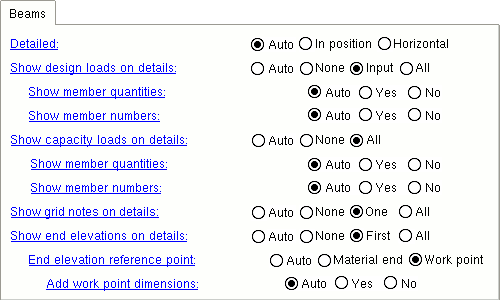
Detailed: Auto or In position or Horizontal . The choice made here applies only to your current drawing (if that drawing is a beam detail), and only if you select that drawing for Detail Members with templates or if you Detail Current Drawing with templates.
|
' Auto ' instructs member detailing with templates to apply the setup choice made to " Detailed " when you next detail your current drawing.
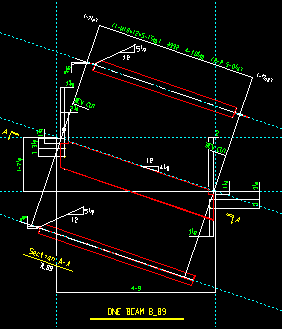
' In position ' instructs the next invocation of member detailing with templates for your current drawing to detail the beam so that it is depicted at the angle it appears in the model . The " Detail rotation " reported in the Drawing Data Panel reflects the slope of the beam.
' Horizontal ' instructs member detailing with templates to draw the beam horizontally.
Show design loads on details: Auto or None or Input or All . The choice made here applies only to your current drawing (if that drawing is a beam detail), and only if you select that drawing for Detail Members with templates or if you Detail Current Drawing with templates. If ' Input ' or ' All ' is selected, you can additionally choose to " Show member quantities " and/or " Show member numbers ."
| Loads on the left end, Beam Edit window : | |||

|
|||
| ' Input ' loads on the beam detail, left end : | |||
|
|||
| ' All ' loads on the beam detail, left end : | |||
|
' Auto ' instructs member detailing with templates to apply the setup choice made to " Show design loads on details " when you next detail your current drawing.
' None ' instructs the next invocation of member detailing with templates for your current beam detail to not print design loads.
' Input ' instructs member detailing with templates to print only those loads that have been entered by the user (on the Beam Edit window).
' All ' results all design loads -- except loads of ' 0 ' -- being noted the next time your current beam detail is redetailed.
Show member quantities: Auto or Yes or No . The choice made here applies only to your current drawing (if that drawing is a beam detail), and only if you select that drawing for Detail Members with templates or if you Detail Current Drawing with templates.
|
Example 1 : " Show design loads ... " is ' Input '. " Show member numbers " is ' Yes ' and " Show member quantities " is ' Yes '. | |
|
Example 2 : " Show design loads ... " is ' All '. Show member numbers " is ' Yes ' and " Show member quantities " is ' Yes '. | |
|
Example 3 : " Show design loads ... " is ' All '. " Show member numbers " is ' No ' and " Show member quantities " is ' No '. |
' Auto ' instructs member detailing with templates to apply the setup choice made to " Show member quantities " when you next detail your current drawing.
' Yes ' instructs the next invocation of member detailing with templates for your current beam detail to print the member quantity that a design load applies to.
' No ' instructs member detailing with templates to not print the member quantity.
Show member numbers: Auto or Yes or No . When " Show design loads on details " is set to ' Input ' or to ' All ' or possibly ' Auto ', the choice made here applies to your current drawing (if that drawing is a beam detail), and only if you select that drawing for Detail Members with templates or if you Detail Current Drawing with templates.
' Auto ' instructs member detailing with templates to apply the setup choice made to " Show member numbers " when you next detail your current drawing.
' Yes ' instructs the next invocation of member detailing with templates for your current beam detail to print the member numbers that a design load applies to. This can help you to identify which members have which design loads.
' No ' instructs member detailing with templates to not print the member numbers.
Show capacity loads on details: None or All . The choice made here applies only to your current drawing (if that drawing is a beam detail), and only if you select that drawing for Detail Members with templates or if you Detail Current Drawing with templates.
| Connection capacity loads ( Calcs ) : | |||

|
|||
| " Show capacity loads on details " = ' All ' : | |||
|
|||
| The capacity loads reported on the beam detail should match the Connection Design Calculations or Expanded Connection Design Calculations so long as everything -- the design calcs, the model, the detail -- is all up to date. |
' Auto ' instructs member detailing with templates to apply the setup choice made to " Show capacity loads on details " when you next detail your current drawing.
' None ' instructs the next invocation of member detailing with templates for your current beam detail to not print end connection capacities.
' All ' instructs member detailing with templates to print end connection capacities. You can additionally choose to " Show member quantities " and/or " Show member numbers ."
Show member quantities: Auto or Yes or No . The choice made here applies only to your current drawing (if that drawing is a beam detail), and only if you select that drawing for Detail Members with templates or if you Detail Current Drawing with templates.
' Auto ' instructs member detailing with templates to apply the setup choice made to " Show member quantities " when you next detail your current drawing.
' Yes ' instructs the next invocation of member detailing with templates for your current beam detail to print the quantity of members that an end connection capacity applies to.
' No ' instructs member detailing with templates to not print the quantity.
Show member numbers: Auto or Yes or No . The choice made here applies only to your current drawing (if that drawing is a beam detail), and only if you select that drawing for Detail Members with templates or if you Detail Current Drawing with templates.
' Auto ' instructs member detailing with templates to apply the setup choice made to " Show member numbers " when you next detail your current drawing.
' Yes ' instructs the next invocation of member detailing with templates for your current beam detail to print the member numbers that an end connection capacity applies to.
' No ' instructs member detailing with templates to not print the member numbers.
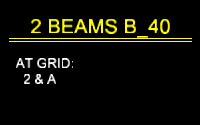
Show grid notes on details: Auto or None or One or All . The choice made here applies only to your current drawing (if that drawing is a beam detail), and only if you select that drawing for Detail Members with templates or if you Detail Current Drawing with templates.
|
' Auto ' instructs member detailing with templates to apply the setup choice made to " Show grid notes on details " when you next detail your current drawing.
' None ' instructs the next invocation of member detailing with templates for your current beam detail to not add grid-location notes.
' One ' instructs the next invocation of member detailing with templates for your current beam detail to add a grid location note stating the plan view grid intersection that is closest to the origin reference point (left-end workpoint) of the bottom, left beam that is under the particular piecemark being automatically detailed. The bottom beam in a plan view is the beam with the lowest Y global coordinate . The left beam in a plan view is the beam with the lowest X global coordinate.
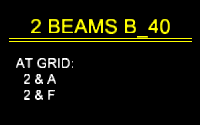
' All ' instructs the next invocation of member detailing with templates for your current beam detail to add to the detail the grid intersections for each beam with the same piecemark. The beam locations will be listed according to their bottom-to-top and left-to-right locations in a plan view. For beams that have the same X-Y global coordinates , the beam at the lower elevation will be listed first.
Show end elevations on details: None or First or All . The choice made here applies only to your current drawing (if that drawing is a beam detail), and only if you select that drawing for Detail Members with templates or if you Detail Current Drawing with templates.
|
' Auto ' instructs member detailing with templates to apply the setup choice made to " Show end elevations on details " when you next detail your current drawing.
' None ' instructs the next invocation of member detailing with templates for your current beam detail to not annotate the end elevations.
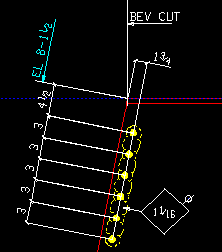
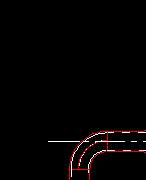
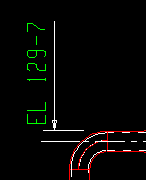
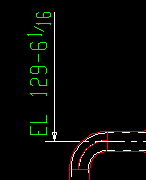
' First ' instructs member detailing with templates to annotate the detail with the end elevation of the beam with the lowest member number . The elevation is shown on the left end for a non-sloping beam; both end elevations are shown for a sloping beam.
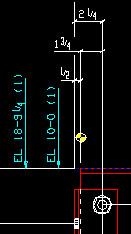
' All ' instructs member detailing with templates to annotate the quantity and elevation of beams with the same piecemark that are at different elevations.
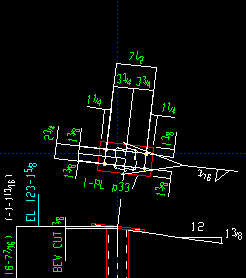
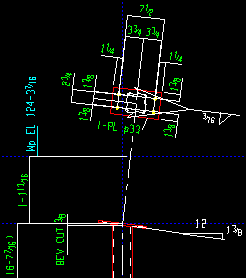
End elevation reference point: Material end or Work point . The choice made here applies only to your current drawing (if that drawing is a beam detail), and only if you select that drawing for Detail Members with templates or if you Detail Current Drawing with templates. On details of non-sloping beams, the same elevations are reported regardless of the choice made here.
|
' Auto ' instructs member detailing with templates to apply the setup choice made to " End elevation reference point " when you next detail your current drawing.
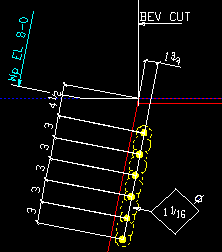
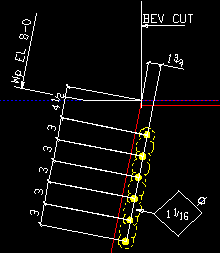
' Material end ' instructs the next invocation of member detailing with templates for your current beam detail to annotate the end elevations shown on the beam detail with the top flange elevation at the right/left edge of the beam's main material. " EL " will appear as part of the annotation.
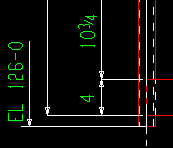
' Work point ' instructs member detailing with templates to annotate the end elevations shown on the beam detail with the " End elevations " of the right/left beam work points. " Wp EL " will appear as part of the annotation.
Add work point dimensions: Auto or Yes or No . The choice made here applies only to your current drawing (if that drawing is a beam detail), and only if you select that drawing for Detail Members with templates or if you Detail Current Drawing with templates. if ' Work Point ' is selected for " End elevation reference point ."
|
' Auto ' instructs member detailing with templates to apply the setup choice made to " Add work point dimensions " when you next detail your current drawing.
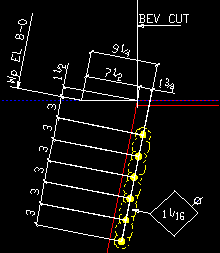
' Yes ' instructs the next invocation of member detailing with templates for your current beam detail to draw dimensions from the work point to, for example, the end of the material.
' No ' instructs member detailing with templates to not draw the work point dimensions.
page 1 | contents | settings > drawing settings | top
| Beams | Columns | Vertical Braces | Horizontal Braces | Handrail |
------ Overrides for your current column detail ------
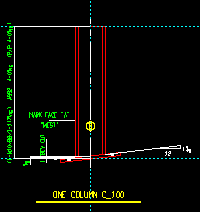
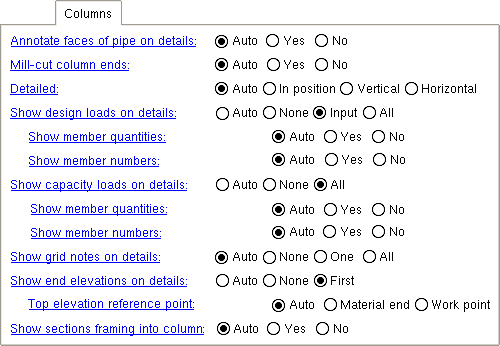
Annotate faces of pipe on details: Auto or Yes or No . The choice made here applies only to your current drawing (if that drawing is a column detail), and only if you select that drawing for Detail Members with templates or if you Detail Current Drawing with templates.
|
' Auto ' instructs member detailing with templates with templates to apply the setup choice made to " Annotate faces of pipe on details " when you next detail your current drawing.
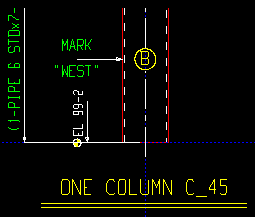
' Yes ' instructs the next invocation of member detailing with templates for your current column detail to annotate faces as (A) or (B) or (C) on pipe columns.
' No ' instructs member detailing with templates to not annotate the faces of columns.
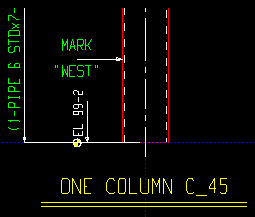
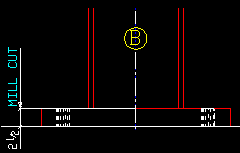
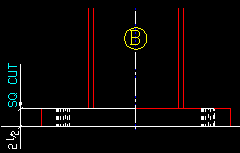
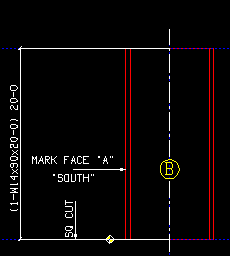
Mill cut column ends: Auto or Yes or No . This affects labeling only . The choice made here applies only to your current drawing (if that drawing is a column detail), and only if you select that drawing for Detail Members with templates or if you Detail Current Drawing with templates.
|
' Auto ' instructs member detailing with templates to apply the setup choice made to " Mill cut column ends " when you next detail your current drawing.
' Yes ' instructs the next invocation of member detailing with templates for your current column detail to label the ends of columns as " MILL CUT. "
' No ' instructs member detailing with templates to not label the ends of columns to be "SQ CUT."
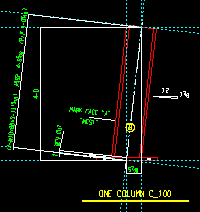
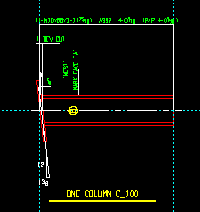
Detailed: Auto or In position or Vertical or Horizontal . The choice made here applies only to your current drawing (if that drawing is a column detail), and only if you select that drawing for Detail Members with templates or if you Detail Current Drawing with templates. For a perfectly vertical column, ' In position ' gives the same results as selecting ' Vertical '.
|
' Auto ' instructs member detailing to apply the setup choice made to " Detailed " when you next detail your current drawing.
' In position ' instructs the next invocation of member detailing with templates for your current drawing to depict the column at the angle it appears in the model . The " Detail rotation " reported in the Drawing Data Panel will reflect the slope of the column.
' Vertical ' instructs member detaling with templates to draw the column vertically.
' Horizontal ' instructs member detailing to draw the column horizontally.
Show design loads on details: Auto or None or Input or All . The choice made here applies only to your current drawing (if that drawing is a column detail), and only if you select that drawing for Detail Members with templates or if you Detail Current Drawing with templates. If ' Input ' or ' All ' is selected, you can additionally choose to " Show member quantities " and/or " Show member numbers ."
| Loads on the top end, Column Edit window : | |||

|
|||
| ' Input ' top end loads on the column detail : | |||
|
|||
| ' All ' top end loads on the column detail : | |||
|
' Auto ' instructs member detailing with templates to apply the setup choice made to " Show design loads on details " when you next detail your current drawing.
' None ' instructs the next invocation of member detailing with templates for your current column detail to not print design loads.
' Input ' instructs member detailing with templates to print only those loads that have been entered by the user (on the Column Edit window).
' All ' results all design loads -- except loads of ' 0 ' -- being noted on your column detail the next time that it is redetailed with templates.
Show member quantities: Auto or Yes or No . The choice made here applies only to your current drawing (if that drawing is a column detail), and only if you select that drawing for Detail Members with templates or if you Detail Current Drawing with templates.
|
Example 1 : " Show design loads ... " is ' Input '. " Show member numbers " is ' Yes ' and " Show member quantities " is ' Yes '. | |
|
Example 2 : " Show design loads ... " is ' All '. " Show member numbers " is ' No ' and " Show member quantities " is ' No '. |
' Auto ' instructs member detailing with templates to apply the setup choice made to " Show member quantities " when you next detail your current drawing.
' Yes ' instructs the next invocation of member detailing with templates for your current column detail to print the quantity of members that a design load applies to. This can help you to identify which members have which design loads.
' No ' instructs member detailing with templates to not print the member numbers.
Show member numbers: Auto or Yes or No . The choice made here applies only to your current drawing (if that drawing is a column detail), and only if you select that drawing for Detail Members with templates or if you Detail Current Drawing with templates. Since multiple columns with the same system piecemark can have different design loads, this option can help you to identify which members have which design loads.
' Auto ' instructs member detailing with templates to apply the setup choice made to " Show member numbers " when you next detail your current drawing.
' Yes ' instructs the next invocation of member detailing with templates for your current column detail to print the member numbers that a design load applies to. This can help you to identify which members have which design loads.
' No ' instructs member detailing with templates to not print the member numbers.
Show capacity loads on details: Auto or None or All . The choice made here applies only to your current drawing (if that drawing is a column detail), and only if you select that drawing for Detail Members with templates or if you Detail Current Drawing with templates.
| Connection capacity loads ( Calcs ) : | |||
|
|
|||
| " Show capacity loads on details " = ' All ' : | |||
|
|||
| The capacity loads reported on the column detail should match the Connection Design Calculations or Expanded Connection Design Calculations so long as everything -- the design calcs, the model and the detail -- is all up to date. |
' Auto ' instructs member detailing with templates to apply the setup choice made to " Show capacity loads on details " when you next detail your current drawing.
' None ' instructs the next invocation of member detailing with templates for your current column detail to not print connection capacities.
' All ' instructs member detailing with templates to print the connection capacities. You can additionally choose to " Show member quantities " and/or " Show member numbers ."
Show member quantities: Auto or Yes or No . This applies when " Show capacity loads on detail " is set to ' All '. It applies only to your current drawing (if that drawing is a column detail), and only if you select that drawing for Detail Members with templates or if you Detail Current Drawing with templates.
' Auto ' instructs member detailing with templates to apply the setup choice made to " Show member quantities " when you next detail your current drawing.
' Yes ' instructs the next invocation of member detailing with templates for your current column detail to print the quantity of members that an end connection capacity applies to.
' No ' instructs member detailing with templates to not print the quantity.
Show member numbers: Auto or Yes or No . This applies when " Show capacity loads on detail " is set to ' All ' or possibly ' Auto '. It applies only to your current drawing (if that drawing is a column detail), and only if you select that drawing for Detail Members with templates or if you Detail Current Drawing with templates.
' Auto ' instructs member detailing with templates to apply the setup choice made to " Show member numbers " when you next detail your current drawing.
' Yes ' instructs the next invocation of member detailing with templates for your current column detail to print the member numbers that an end load capacity applies to.
' No ' instructs member detailing with templates to not print the member numbers.
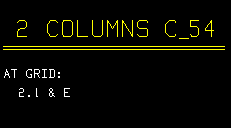
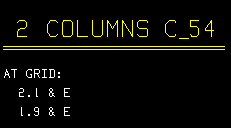
Show grid notes on details: Auto or None or One or All . The choice made here applies only to your current drawing (if that drawing is a column detail), and only if you select that drawing for Detail Members with templates or if you Detail Current Drawing with templates.
|
' Auto ' instructs member detailing with templates to apply the setup choice made to " Show grid notes on details " when you next detail your current drawing.
' None ' instructs the next invocation of member detailing with templates for your current column detail to not label the grid locations of the column.
' One ' instructs member detailing with templates to label only the grid intersection for the bottom, left column.
' All ' instructs member detailing with templates to label the grid intersections of each column that has the same piecemark. The column locations will be listed according to their left to right and bottom top locations in a plan view. For example: You have four columns with the same piecemark, two on one horizontal grid line, two on another horizontal grid line. The first grid location listed on the detail of these four columns is for the left column on the bottom grid line. The second grid location is for the right column on that same grid line. The third grid location is for the left column on the upper grid line. The fourth grid location is for the right column on the upper grid line.
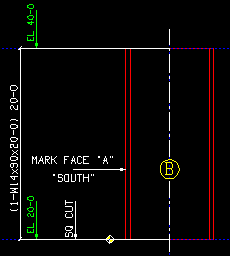
Show end elevations on details: Auto or None or First . The choice made here applies only to your current drawing (if that drawing is a column detail), and only if you select that drawing for Detail Members with templates or if you Detail Current Drawing with templates.
|
' Auto ' instructs member detailing with templates to apply the setup choice made to " Show end elevations on details " when you next detail your current drawing.
' None ' instructs the next invocation of member detailing with templates for your current column detail to label member end elevations.
' First ' instructs member detailing with templates to label the elevations for the column with the lowest member number . The end elevations of the column as well as members framing into the column will be shown.
Top elevation reference point: Material end or Work point . This applies when ' First ' is selected for " Show end elevations on details ." It applies only to your current drawing (if that drawing is a column detail), and only if you select that drawing for Detail Members with templates or if you Detail Current Drawing with templates.
|
||||
| The top end of a column's material may be different from its top-end work point when, for example, the column's work point is to the workline of a beam that is above the column. |
' Auto ' instructs member detailing with templates to apply the setup choice made to " Top elevation reference point " when you next detail your current drawing.
' Material end ' instructs the next invocation of member detailing with templates for your current column detail to label the column's top-end elevation as being at the top edge of the column's main material.
' Work point ' instructs member detailing with templates to label the column's top-end elevation as being at the top-end work point of the column.
Show sections framing into column: Auto or Yes or No . The choice made here applies only to your current drawing (if that drawing is a column detail), and only if you select that drawing for Detail Members with templates or if you Detail Current Drawing with templates.
|
' Auto ' instructs member detailing with templates to apply the setup choice made to " Show sections framing into column " when you next detail your current drawing.
' Yes ' instructs the next invocation of member detailing with templates for your current column detail to dimension the depth of members framing into the column and identify the section sizes of those members. This can help checkers to ensure that members will fit up correctly at the construction site.
' No ' instructs member detailing with templates to not dimension the depth of members framing into columns or identify the section sizes of those members.
page 1 | contents | settings > drawing settings | top
| Beams | Columns | Vertical Braces | Horizontal Braces | Handrail |
------ Overrides for your current vertical brace detail ------
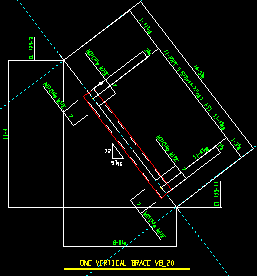
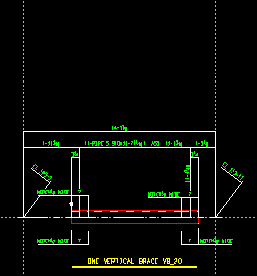
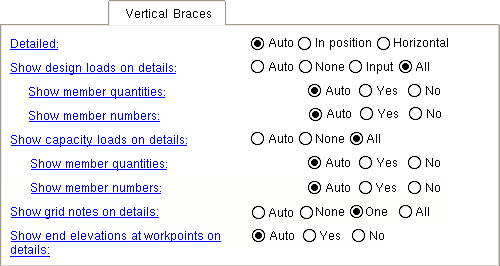
Detailed: Auto or In position or Horizontal . The choice made here applies only to your current drawing (if that drawing is a vertical brace detail), and only if you select that drawing for Detail Members with templates or if you Detail Current Drawing with templates.
|
' Auto ' instructs member detailing with templates to apply the setup choice made to " Detailed " when you next detail your current drawing.
' In position ' instructs the next invocation of member detailing with templates for your current detail to depict the vertical brace at the angle it appears in the model .
' Horizontal ' instructs member detailing with templates to draw the vertical brace horizontally.
Show design loads on details: Auto or None or Input or All . The choice made here applies only to your current drawing (if that drawing is a vertical brace detail), and only if you select that drawing for Detail Members with templates or if you Detail Current Drawing with templates.
| Loads on the right end, Vertical Brace Edit window : | |||

|
|||
| ' Input ' loads on the vertical brace detail, right end : | |||
|
|||
| ' All ' loads on the vertical brace detail, right end : | |||
|
' Auto ' instructs member detailing with templates to apply the setup choice made to " Show design loads on details " when you next detail your current drawing.
' None ' instructs the next invocation of member detailing with templates for your current vertical brace detail to not generate design load labels.
' Input ' instructs member detailing with templates to generate labels for those loads that have been entered by the user (on the Vertical Brace Edit window).
' All ' results all design loads -- except loads of ' 0 ' -- being labeled when your current vertical brace detail is redailed with templates.
Show member quantities. Auto or Yes or No . The choice made here applies only to your current drawing (if that drawing is a vertical brace detail), and only if you select that drawing for Detail Members with templates or if you Detail Current Drawing with templates." Show design loads on details " must set to ' Input ' or to ' All '.
|
Example 1 : " Show design loads ... " is ' Input '. " Show member numbers " is ' Yes ' and " Show member quantities " is ' Yes '. | |
|
Example 2 : " Show design loads ... " is ' Input '. " Show member numbers " is ' No ' and " Show member quantities " is ' Yes '. | |
|
Example 3 : " Show design loads ... " is ' Input . " Show member numbers " is ' No ' and " Show member quantities " is ' No '. |
' Auto ' instructs member detailing with templates to apply the setup choice made to " Show member quantities " when you next detail your current drawing.
' Yes ' instructs the next invocation of member detailing with templates for your current vertical brace detail to print the quantity of members that a design load applies to. Since multiple vertical braces with the same system piecemark can have different design loads, this option can help you to identify which members have which design loads.
' No ' instructs member detailing with templates to not print the quantity.
Show member numbers. Auto or Yes or No . The choice made here applies only to your current drawing (if that drawing is a vertical brace detail), and only if you select that drawing for Detail Members with templates or if you Detail Current Drawing with templates.
' Auto ' instructs member detailing with templates to apply the setup choice made to " Show member numbers " when you next detail your current drawing.
' Yes ' instructs the next invocation of member detailing with templates for your current vertical brace detail to print the member numbers that a design load applies to. This can help you to identify which members have which design loads.
' No ' instructs member detailing with templates to not print the member numbers.
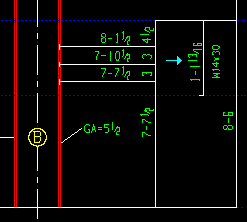
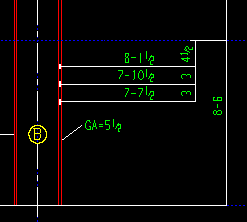
Show capacity loads on details: Auto or None or All . The choice made here applies only to your current drawing (if that drawing is a vertical brace detail), and only if you select that drawing for Detail Members with templates or if you Detail Current Drawing with templates.
| Connection capacity loads ( Calcs ): | |||

|
|||
| " Show capacity loads on details " = ' All ' : | |||
|
|||
| The capacity loads shown on the vertical brace detail should match the capacity shown in the Connection Design Calculations or Expanded Connection Design Calculations so long as everything -- the design calcs, the model, the detail -- is all up to date. |
' Auto ' instructs member detailing with templates to apply the setup choice made to " Show capacity loads on details " when you next detail your current drawing.
' None ' instructs the next invocation of member detailing with templates for your current vertical brace detail to not generate labels for connection capacities.
' All ' Instructs member detailing with templates to generate labels for all connection capacities. You can additionally choose to " Show member quantities " and/or " Show member numbers ."
Show member quantities : Auto or Yes or No . The choice made here applies only to your current drawing (if that drawing is a vertical brace detail), and only if you select that drawing for Detail Members with templates or if you Detail Current Drawing with templates.
' Auto ' instructs member detailing with templates to apply the setup choice made to " Show member quantities " when you next detail your current drawing.
' Yes ' instructs the next invocation of member detailing with templates for your current drawing to print the quantity of vertical braces that an end connection capacity applies to.
' No ' instructs member detailing with templates to not print the quantity.
Show member numbers: Auto or Yes or No . The choice made here applies only to your current drawing (if that drawing is a vertical brace detail), and only if you select that drawing for Detail Members with templates or if you Detail Current Drawing with templates.
' Auto ' instructs member detailing with templates to apply the setup choice made to " Show member numbers " when you next detail your current drawing.
' Yes ' instructs the next invocation of member detailing with templates for your current vertical brace detail to print the member numbers that an end connection capacity applies to. This can help you to identify which members have which design loads.
' No ' instructs member detailing with templates to not print the member numbers.
Show grid notes on details: Auto or None or One or All . The choice made here applies only to your current drawing (if that drawing is a vertical brace detail), and only if you select that drawing for Detail Members with templates or if you Detail Current Drawing with templates.
|
' Auto ' instructs member detailing with templates to apply the setup choice made to " Show grid notes on details " when you next detail your current drawing.
' None ' instructs the next invocation of member detailing with templates for your current vertical brace detail to not add grid-location notes.
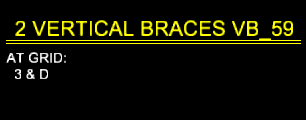
' One ' instructs the next invocation of member detailing with templates for your current vertical brace detail to add to the detail a grid location note stating the plan view grid intersection that is closest to the origin reference point (left-end workpoint) of the bottom, left vertical brace that is under the particular piecemark being automatically detailed. The bottom vertical brace in a plan view is the brace with the lowest Y global coordinate . The left vertical brace in a plan view is the brace with the lowest X global coordinate.
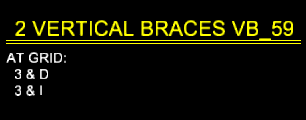
' All ' instructs the next invocation of member detailing with templates for your current vertical brace detail to add to the detail the grid intersections for each vertical brace with the same piecemark. The vertical brace locations will be listed according to their left-to-right and bottom-to-top locations in a plan view. For vertical braces that have the same X-Y global coordinates , the vertical brace at the lower elevation will be listed first.
Show end elevations at workpoints on details: Auto or Yes or No . The choice made here applies only to your current drawing (if that drawing is a vertical brace detail), and only if you select that drawing for Detail Members with templates or if you Detail Current Drawing with templates.
|
' Auto ' instructs member detailing with templates to apply the setup choice made to " Show end elevations at workpoints on details " when you next detail your current drawing.
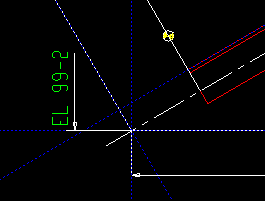
' Yes ' instructs the next invocation of member detailing with templates for your current vertical brace detail to depict member end elevations. If the vertical brace detail represents multiple vertical braces with the same piecemark , the end elevations that will be shown on the drawing will be those of the one vertical brace that has the lowest member number .
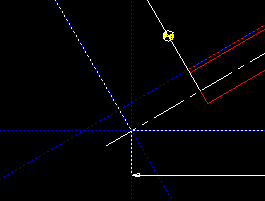
' No ' instructs member detailing with templates to not depict member end elevations.
page 1 | contents | settings > drawing settings | top
| Beams | Columns | Vertical Braces | Horizontal Braces | Handrail |
------ Overrides for your current horizontal brace detail ------
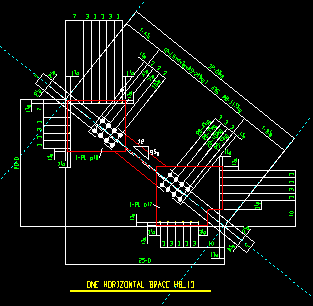
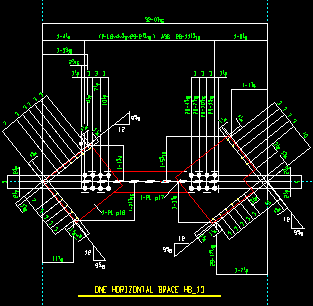
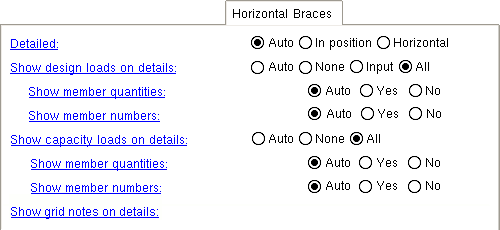
Detailed: Auto or In position or Horizontal . The choice made here applies only to your current drawing (if that drawing is a horizontal brace detail), and only if you select that drawing for Detail Members with templates or if you Detail Current Drawing with templates.
|
' Auto ' instructs member detailing with templates to apply the setup choice made to " Detailed " when you next detail your current drawing.
' In position ' instructs the next invocation of member detailing with templates for your current drawing to depict the horizontal brace at the angle it appears within the structural model .
' Horizontal ' instructs member detailing with templates to draw the horizontal brace oriented horizontally.
Show design loads on details: Auto or None or Input or All . The choice made here applies only to your current drawing (if that drawing is a horizontal brace detail), and only if you select that drawing for Detail Members with templates or if you Detail Current Drawing with templates.
| Loads on the left end, Horizontal Brace Edit window : | |||
|
|
|||
| ' Input ' loads on the horizontal brace detail, left end : | |||
|
|||
| ' All ' loads on the horizontal brace detail, left end : | |||
|
' Auto ' instructs member detailing with templates to apply the setup choice made to " Show design loads on details " when you next detail your current drawing.
' None ' instructs the next invocation of member detailing with templates for your current vertical brace detail to not generate labels showing design loads.
' Input ' instructs member detailing with templates to generate design load labels for only those loads that have been entered by the user (on the Horizontal Brace Edit window).
' All ' results all design loads -- except loads of ' 0 ' -- being noted on your current horizontal brace detail the next time that it is detailed with templates.
Show member quantities. Auto or Yes or No . The choice made here applies only to your current drawing (if that drawing is a horizontal brace detail), and only if you select that drawing for Detail Members with templates or if you Detail Current Drawing with templates.

Example 1 : " Show design loads ... " is ' Input '. " Show member numbers " is ' Yes ' and " Show member quantities " is ' No '.

Example 2 : " Show design loads ... " is ' Input '. " Show member numbers " is ' No ' and " Show member quantities " is ' Yes '.

Example 3 : " Show design loads ... " is ' Input '." Show member numbers " is ' No ' and " Show member quantities " is ' No '. ' Auto ' instructs member detailing with templates to apply the setup choice made to " Show member quantities " when you next detail your current drawing.
' Yes ' instructs the next invocation of member detailing with templates for your current drawing to print the quantity of horizontal braces that a design load applies to. This can help you to identify which members have which design loads.
' No ' instructs member detailing with templates to not print the quantity.
Show member numbers: Auto or Yes or No . The choice made here applies only to your current drawing (if that drawing is a horizontal brace detail), and only if you select that drawing for Detail Members with templates or if you Detail Current Drawing with templates.
' Auto ' instructs member detailing with templates to apply the setup choice made to " Show member numbers " when you next detail your current drawing.
' Yes ' instructs the next invocation of member detailing with templates for your current horizontal brace detail to print the member numbers that a design load applies to. This can help you to identify which members have which design loads.
' No ' instructs member detailing with templates to not print the member numbers.
Show capacity loads on details: Auto or None or All . The choice made here applies only to your current drawing (if that drawing is a horizontal brace detail), and only if you select that drawing for Detail Members with templates or if you Detail Current Drawing with templates.
| Connection capacity loads ( Calcs ): | |||

|
|||
| " Show capacity loads on details " = ' All ' : | |||
|
|||
| The capacity loads shown on the horizontal brace detail should match the capacity shown in the Connection Design Calculations or Expanded Connection Design Calculations so long as everything -- the design calcs, the model, the detail -- is all up to date. |
' Auto ' instructs member detailing with templates to apply the setup choice made to " Show capacity loads on details " when you next detail your current drawing.
' None ' instructs the next invocation of member detailing with templates for your current vertical brace detail to not generate connection capacity labels.
' All ' instructs member detailing with templates to generate connection capacity labels for all capacities. You can additionally choose to " Show member quantities " and/or " Show member numbers ."
Show member quantities : Auto or Yes or No . The choice made here applies only to your current drawing (if that drawing is a horizontal brace detail), and only if you select that drawing for Detail Members with templates or if you Detail Current Drawing with templates.
' Auto ' instructs member detailing with templates to apply the setup choice made to " Show member quantities " when you next detail your current drawing.
' Yes ' instructs the next invocation of member detailing with templates for your current drawing to print the quantity of horizontal braces that an end connection capacity applies to.
' No ' instructs member detailing with templates to not print the quantity.
Show member numbers: Auto or Yes or No . The choice made here applies only to your current drawing (if that drawing is a horizontal brace detail), and only if you select that drawing for Detail Members with templates or if you Detail Current Drawing with templates.
' Auto ' instructs member detailing with templates to apply the setup choice made to " Show member numbers " when you next detail your current drawing.
' Yes ' instructs the next invocation of member detailing with templates for your current horizontal brace detail to print the member numbers that an end connection capacity applies to.
' No ' instructs member detailing with templates to not print the member numbers.
Show grid notes on details: ![]() None or
None or ![]() One or
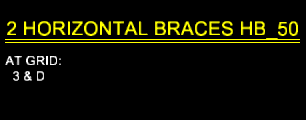
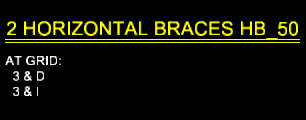
One or ![]() all . This " Horizontal Braces " section option applies to horizontal braces that you select when you Detail Members .
all . This " Horizontal Braces " section option applies to horizontal braces that you select when you Detail Members .
|
' Auto ' instructs member detailing with templates to apply the setup choice made to " Show grid notes on details " when you next detail your current drawing.
' None ' instructs the next invocation of member detailing with templates for your current horizontal brace detail to not add grid-location notes.
' One ' instructs the next invocation of member detailing with templates for your current vertical brace detail to add to the detail a grid location note stating the plan view grid intersection that is closest to the origin reference point (left-end workpoint) of the bottom, left horizontal brace that is under the particular piecemark being automatically detailed. The bottom horizontal brace in a plan view is the brace with the lowest Y global coordinate . The left horizontal brace in a plan view is the brace with the lowest X global coordinate.
' All ' instructs the next invocation of member detailing with templates for your current vertical brace detail to add to the detail the grid intersections for each horizontal brace with the same piecemark. The horizontal brace locations will be listed according to their left-to-right and bottom-to-top locations in a plan view. For horizontal braces that have the same X-Y global coordinates , the brace at the lower elevation will be listed first.
page 1 | contents | settings > drawing settings | top
| Beams | Columns | Vertical Braces | Horizontal Braces | Handrail |
------ Overrides for your current handrail detail ------
Noted at top rail from: Auto or Not noted or Top of top rail or Center of top rail . The choice made here applies only to your current drawing (if that drawing is a handrail detail), and only if you select that drawing for Detail Members with templates or if you Detail Current Drawing with templates.
|
' Auto ' instructs member detailing with templates to apply the setup choice made to " Noted at top rail from " when you next detail your current drawing.
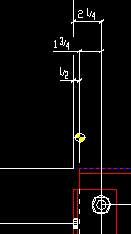
' Not noted ' instructs the next invocation of member detailing with templates for your current handrail detail to not generate a pointer and label that identifies the elevation of the top rail on subsequently generated handrail member details.
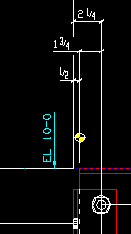
' Top of top rail ' instructs member detailing with templates to generate a pointer and label that identifies the elevation of the top of the top rail.
' Center of top rail ' instructs member detailing with templates to generate a pointer and label that identifies the elevation of the center of the top rail.
Noted at bottom of post: Auto or Yes or No . The choice made here applies only to your current drawing (if that drawing is a handrail detail), and only if you select that drawing for Detail Members with templates or if you Detail Current Drawing with templates.
|
' Auto ' instructs member detailing with templates to apply the setup choice made to " Noted at bottom of post " when you next detail your current drawing.
' Yes ' instructs the next invocation of member detailing with templates for your current handrail detail to draw a pointer and label that identifies the elevation of the bottom post of the handrail.
' No ' instructs member detailing with templates to not identify the bottom post elevation.
page 1 | contents | settings > drawing settings | top
To close setup overrides for Member Detailing & Fabrication
"OK" (or the Enter key) closes the Member Detailing Settings window and saves the overrides on it with your current drawing, presumably so that the next time that drawing undergoes member detailing, those override settings are applied to the detail.
To permanently save your override changes, you need to save your current drawing. If you close your current drawing without saving changes made to it, any changes to override settings that you have applied to that drawing will be forgotten. On the other hand, a Drawing Overrides List will show active overrides (non-auto settings) that have been applied to your current drawing even if that drawing has not yet been saved.
"Cancel" (or the Esc key or the ![]() button) closes this window without saving any changes made to it.
button) closes this window without saving any changes made to it.
"Reset" undoes all changes made to this window. The window remains open.
page 1 | contents | settings > drawing settings | top
