 Image Add ( Drawing Editor )
Tool summary :
Also see :
- Images (topic)
- Importing items (index)
- Layer Panel (selects layer to add the image to)
- Edit Image (double-click the image to open this window)
- To move an image (drag its center in Select Items mode)
- To re-size an image (drag its edge in Select Items mode)
page 1 | contents | objects > images > | objects -- images | xxx add | images
 Step-by-step instructions :
|
1 . Invoke Image Add . | |||

|
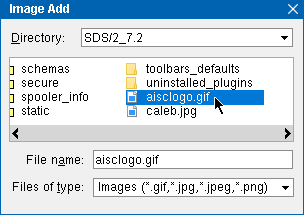
2 . Double-click the image that you want to place. | |||
|
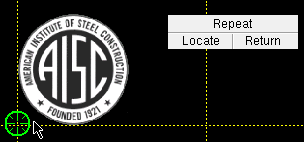
3 . Place the mouse pointer ( |
|||
|
4 . The image is placed. Either repeat step 3 to add the same image at another location. Or, if you are done adding images, right-click ( Return ). |
Method 1 : Click the Image Add icon. The icon can be taken from the group named ' Objects -- Images ' and placed on a toolbar (classic) or the ribbon (lightning).
Method 2 : If " Drawing Editor layout style " is ' Classic ', you can use the menu system to choose Objects > Images > Add .
Method 3, 4 or 5 : Image Add can also be invoked using a keyboard shortcut , the context menu , or a mode . For the ' Lightning ' layout style, configuration of the interface is done using Customize Interface .
Note 2: Right-click ( Return ) in steps 3 or 4 ends this operation.


bindings , steps 3, 4
Note 3: Any images added using this procedure can be instantly removed (one at a time, in reverse-order of their addition) by using Undo .
Note 4: Images added using the above procedure are copies of the original image and are embedded in the Drawing Editor drawing. If you delete or alter the original image file, the copied image in the Drawing Editor drawing will remain unaltered.
Note 5: GIF and PNG are similar, compressed formats that are excellent for line drawings, logos and icons. TIFF files may appear similar to GIFs and PNGs, but take up more disk space. The JPEG format should be limited to photographs. Click here for more information.
Tip: To rotate or re-size the image, simply double-click it -- see Edit Image . You can also move an image by dragging its center or re-size an image by dragging its border in Select Items mode.
page 1 | contents | objects > images > | objects -- images | xxx add | images | top


