 Export Report Writer Report ( Home & Modeling & Drawing Editor )
Tool summary :
- Exports to a file. The data in that file is generated by the Report Writer report that you select.
- Export Report Writer Report in Modeling or Drawing Editor is equivalent to Home > Reports > Generate Report .
- The format of the file is based on the choice made to Report Writer > the " Destination " tab > " Export report type ."
- If " Export report type " in Report Writer is set to ' None ', the program looks to User and Site Options to set the output format.
- The exported file is named (by you) at the time of export and, by default, is placed in the
 output folder in your software program's data directory .
- As described here , it is your responsibility to give the file an appropriate extension.
- See the step-by-step instructions .
Also see :
- Report Writer (to create a report, which you can run)
- Export report type ( Report Writer -- see step 1c)
- Report writer report export type (per user) ( User and Site Options > Output > -- see step 1d)
- Report writer export report type ( User and Site Options > Site > -- see step 1e)
- Run Report Writer Report (a related tool)
![]() Step-by-step instructions :
Step-by-step instructions :
1 . Before exporting a Report Writer report file:
1a : A report must have been created in the Report Writer before you can use that report to export a file with information about your current Job .
1b : To ensure that the report data generated by this export is up to date, you may want to Process and Create Solids and/or Update the ABM and/or auto detail members and submaterials. Exactly what you need to do depends on whether that data comes from the model or from the ABM or from Drawing Editor drawings.
1c : If Report Writer > the " Destination " tab > " Export report type " is set to a choice other than ' None ', the export format will be the selected choice (' HTML ', ' SYLK ', ' Delimited ' or ' Excel '). If the Report Writer option is set to ' None ', go to step 1d.
1d (when ' None ' is selected in step 1c) : If User and Site Options > Output > " Report writer export type (per user) " is set a choice other than ' None ', the export format will be the selected choice (' HTML ', ' SYLK ', ' Delimited ' or ' Excel '). If the Output option is set to ' None ', go to step 1e.
1e (when ' None ' is selected in steps 1c & 1d) : If User and Site Options > Site > " Report writer export report type " is set a choice other than ' None ', the export format will be the selected choice (' HTML ', ' SYLK ', ' Delimited ' or ' Excel '). If the Site option is set to ' None ', the export format will be CSV.
2 . Use any one (1) of the following methods to begin output of this report:
Method 1: Home > Reports > Generate Report .
▸ Click the Export Report Writer Report icon. The icon can be taken from the group named ' Reports ' and placed on the ribbon.
▸ Export Report Writer Report can also be configured to be invoked using a keyboard shortcut , the context menu , or a mode . For the lightning interface, this configuration is done using Customize Interface .
3 . A report-selection dialog opens. If this is the first time you exported or run a report in your current session, a dialog lists files in the ![]() reports folder that is in the data directory used by your current version of this program. If you navigate to a different location to select Report Writer reports from, the next time you Export ... or Run ... a Report Writer report during the same session, the program will go to that other location.
reports folder that is in the data directory used by your current version of this program. If you navigate to a different location to select Report Writer reports from, the next time you Export ... or Run ... a Report Writer report during the same session, the program will go to that other location.
Alternative 1 : Double-click the report file (
) that you want to export. Go to step 4.
Alternative 2 : Press the " Cancel " button if you don't want to export the report. Do not continue.
4 . What happens at this point depends on the selection made to " Select " in the Report Writer .
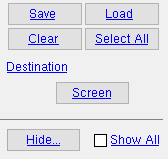
|
A selection dialog like this one opens when " Select " is set to ' Piecemarks ' for this report. See possibility 2. |
Possibility 1 : If ' None ' is selected for " Select " in the Report Writer , the report will automatically include, for example, all members in your current Job. Go to step 5.
Possibility 2 : If ' Member numbers ' or ' Piecemarks ' or etc. is the choice made to the " Select " in the Report Writer , then a selection dialog opens. On it is a listing from your current Job of that category of items. Select from this listing the items you want included in the report.
5 . The program opens the ![]() output folder in your software program's data directory .
output folder in your software program's data directory .
|
5a (optional) : Navigate to a different location on your network where you want to place the report you are exporting.
5b : Give the export file a " File name " then press the " Save " button.
When naming the file, it is your responsibility to give it an extension that is compatible with the program that will eventually open the file. A delimited file should have a .csv or .txt extension. An HTML file should be given an .htm or .html extension. A SYLK file normally has a .slk extension. A Microsoft Excel v2.1 file should have an .xls extension. If you forget to add the extension during export, it is permissible add it later. An appropriate extension may be required to enable the importing software to read and properly interpret the file. It is also permissible to change the file extension after the file has been exported.
6 . The file is exported to the location you navigated to in step 5a. Its name is the " File name " you entered in step 5b. The format of the file is determined by the choices made in steps 1c, 1d and 1e. If you specified the proper format for the file in steps 1c, 1d and 1e, and if you gave it a proper extension in step 5b, a spreadsheet program or other program should be able to properly read the file.

