[Legacy] Miscellaneous Member Edit
To open the member's material window, hover the material in the model > right-click (Menu) > choose "Edit Other" on the context menu.
[Custom] Miscellaneous members provide superior functionality and ease-of-use characteristics compared to [Legacy] Miscellaneous members.
- General Overview
- Tips and Tricks
- Related Tools
![]() Copy, Paste, Save, Load buttons:
Copy, Paste, Save, Load buttons:
- The position of these "form" buttons on the window tells you what settings they apply to. Click here for more information.
- You can
 Copy the settings on this window, then
  Paste those settings to a different edit window of the same type.
- You can
 Save the settings on this window to a file stored in a global folder that is used by your current version of SDS2. Give the file a name that will help other users identify its purpose. You can
  Load a saved file to replace the settings on this window (except Piecemark) with the settings that are stored in the file you select.
- When editing multiple windows at the same time, Paste and Load replace mixed entries to a single field with a single entry. Copy and Save ignore fields with mixed entries, treating them as if they have no entry or do not exist.
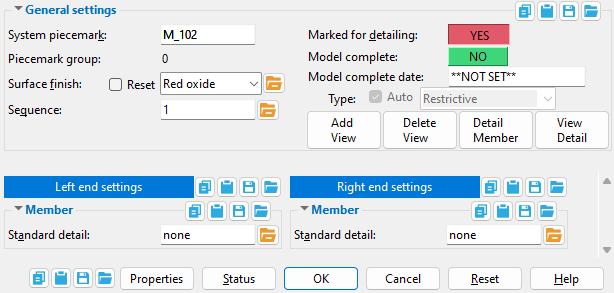
General settings
Piecemark or System piecemark or User piecemark or Frozen piecemark
Setup: Piecemarking uses the " Piecemark Prefix " for " Miscellaneous " when assigning a system piecemark to a legacy miscellaneous member.
Left/Right end standard detail: None or a standard detail name. To apply a standard detail, you can type in the file name of the drawing (if you know it), or press the "file cabinet" browse button ( ![]() ) and double-click any job standard detail or global standard detail that is on the list.
) and double-click any job standard detail or global standard detail that is on the list.
If ' none ' is entered here, then no standard detail will be applied on this end of the legacy miscellaneous member when it is automatically detailed.
If a ' standard detail name ' is entered here, the next time you auto detail this legacy miscellaneous member, the reference point of the standard detail will align with the input work point on this end of the member, and the standard detail's bill of material will be combined with the member's bill of material. The detail is placed on a layer that is named after the standard detail plus a " _L " or " _R " suffix.
Report Writer: Member.LeftEnd.MoreEnd.StandardDetailFileType
Report Writer: Member.LeftEnd.MoreEnd.StandardDetailFileNumber
Report Writer: Member.LeftEnd.MoreEnd.StandardDetailFileNameAdvanced Selection: m.Ends[0].StandardDetailFileNumber
Advanced Selection: m.Ends[0].StandardDetailFileTypeParametric module: m.Ends[0].StandardDetailFileNumber
Parametric module: m.Ends[0].StandardDetailFileType
| Special Buttons for Detailing this Legacy Miscellaneous Member | |||
|
|
|
|
|
| Press this button to open a window with a list of preset views that you can select. When you Detail this member, any preset view you select will be drawn on the detail. | Press this button to open a list of views you can delete. If this member has only a main view, you will get a warning instead of a list of views since you cannot delete the main view. | This button opens the Annotations... window. Press " OK " on that window to detail this column. Newly added views will be drawn on the detail. Deleted views will not be drawn. | Press this button to start up the Drawing Editor . You will automatically be shown the detail of this member if the member has been detailed and if the file is not currently open. |
| Tip: When the setup option " Detailed " is set to ' In position ', isolation's main view is the view shown on the detail, and the preset views are based off of that main view. If " Detailed " is set to ' Horizontal ' or ' Vertical ', the main view is always shown flat, and the preset views that are selected are based off of that flat view. |
Properties opens the Edit Properties window, on which you can make entries to custom properties. If your current Job was set to use a legacy flavor when it was created, the window that opens is named Custom Properties , not Edit Properties.
Tip: The Edit Properties window can also be used to read
Log entries or review or type
Tip: The Member Properties command is an alternative to this button. It opens the Edit Properties window directly, without your first having to open a member edit window.
Status opens the Member Status Review window, which can give you additional information about the member, and which you can use to enter status information or designate a member as an existing member.
Note: This button shows
if one or more Repeat check boxes on the Member Status Review window do not match the checked-unchecked state of same-named fields in User and Site Options > Site > Member status items to copy/repeat. On the Status Review window, the fields that do not match User and Site Options are plotted in red .
OK (or the Enter key) closes the edit window and saves any changes you have made on the window to the member file.
Solids on OK: If the appropriate choice is made to User and Site Options > Modeling > Automatically process after modeling operation, then this member will automatically be regenerated (Create Solids will take place) after your press OK. Otherwise, you will have to manually Process and Create Solids in order for changes you made on this window to be fully updated in the 3D model.
Change all: If you Edit Member (one member only) and make a change that potentially triggers the Do you want to change all ... dialog and the 3D model contains more than one member of the same type that has the same piecemark as the member you changed, a yes-no dialog opens. On it is the question, Do you want to change all (members with this piecemark). Press the Yes button to change all the members; press the No button to change only this member.
Cancel (or the Esc key or the ![]() button) closes the edit window without saving any changes that you have made. Cancel does not undo a Detail Member operation.
button) closes the edit window without saving any changes that you have made. Cancel does not undo a Detail Member operation.
Note: If you opened this window while adding a member, Cancel brings you back to the work point location step of adding a member.
Tip: Any time you use Edit Member just to review a member (and you do not want to set the defaults for to-be-added members), the best way to close this window is to Cancel.
Reset undoes any changes made since you opened this window.
Exception: Reset does not undo changes made using the Add View, Delete View, Detail Member, and View detail buttons.
- If you are editing one legacy miscellaneous member, its member number (" Member xx ") is shown in the title bar. [Legacy] Miscellaneous Member Edit - Multiple Members is this window's title if you are editing multiple miscellaneous members.
- This window is mostly read-only (titled Legacy Miscellaneous Member Review ) if the " Model complete date " is set and ' Restrictive ' is selected for any legacy miscellaneous member that is being edited.
- Legacy miscellaneous members are members of various material types which are added to the 3D model by designating two or more points.
- The orientation of these points with respect to the view in which the legacy miscellaneous member was added sets the default orientation for the main view of the member on its member detail.
- You can change this default orientation by changing the main view in member isolation .
- The origin point for a legacy miscellaneous member is the member's left end. However, the origin of a legacy miscellaneous member's main material is not necessarily the member's left end. The material origin is the 1st point that was located when the legacy miscellaneous member was added. This means that a legacy miscellaneous member, which will always have its origin at its left end, may have its main material origin at its right end. The best way to ensure that the two origins are the same is to locate points for legacy miscellaneous members so that the 1st point located is the left end as defined using the global coordinate system.
- Home > Project Settings > Fabricator > Piecemarking > Member Descriptions > the " Default Descriptions " tab > " Miscellaneous Members " provides a list of descriptions that can be applied to legacy miscellaneous members. These same descriptions can also be applied to miscellaneous members.
- To add certain legacy miscellaneous members in Modeling , you can press F2 > check the box for "
 Miscellaneous steel " > select the member's material type only if User and Site Options > Site > " Show legacy miscellaneous member in member add screen " is checked on. If the user option is turned off, mostly miscellaneous members -- not certain legacy miscellaneous members -- will be listed under the " Miscellaneous steel " category.
- Some legacy miscellaneous members do not have miscellaneous member counterparts. On the Member Type Selection window (opened with F2), these legacy miscellaneous members are as follows: " Miscellaneous -- Existing Material " " Miscellaneous -- Assembly (
 )" " Miscellaneous -- Turned Element " " Miscellaneous -- Reference Member " " Miscellaneous -- Reference Profile Layout " " Miscellaneous -- Bolt " " Miscellaneous -- Library Part ( )" " Miscellaneous -- Extruded Profile " " Miscellaneous -- Part Library Fastener ." These legacy miscellaneous members are selectable on the Member Type Selection window regardless of the choice choice ( or
  ) made to Site Options > Site > " Show legacy miscellaneous member in member add screen."
- Miscellaneous members (alternative to legacy miscellaneous members)
- Add Miscellaneous Member (not a legacy miscellaneous member)
- Edit Material (to get material settings)
- Update Attributes (alternative for sequence/status changes)
- To edit multiple members
- Grayed out fields (indicate mixed entries or that the field is disabled)

